Published Date : December 21, 2017
Power BI provides multiple ways of sharing the content with users. Each sharing method has pros and cons and can be used for specific scenarios. Some of the sharing methods can be used together to build a framework for sharing. In this post, I will talk about the most basic way of sharing Power BI content. This method is called Dashboard Sharing. Dashboard sharing is the easiest way of sharing; however, it is always the best way of sharing. In this post, you’ll learn how this method works, you will learn about pros and cons of this method, and scenarios of using it.
Before going through the dashboard sharing, you need to understand the content security in Power BI. When you publish a *.pbix report into Power BI website, especially when you publish it under “My workspace”, no one else will see or have access to your report. It would be only you who has access to it. Then you can decide whom you want to share this report.
Every Power BI content (report, dashboard, or dataset) has an owner; content owner is the person who created and published that content into Power BI. The owner has full access to the content of Power BI. One of the accesses that owner has is to share the content with others.
What dashboard sharing as the name of it explains is based on a dashboard. You can only share a dashboard with this method, not a report. Consider that you have a dashboard like below screenshot, and you want to share it. There is a share link at the top right corner of the dashboard.

Dashboard sharing have very few options to set and is very simple to configure. You just need to add the email address of people whom you want to share this report. You can also write a message for them to know that this report is shared with them. There are two options to set;
You can decide if people that you shared this dashboard with are also allowed to share it with others or not? And you can also choose if you want them to receive an email notification when you shared the dashboard with them or not.
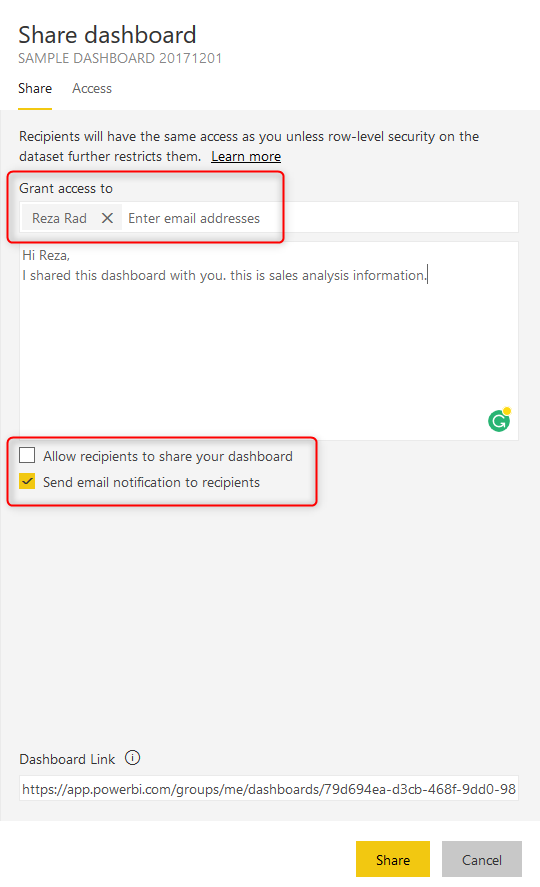
After configuration, then you can click on Share button. The recipient will immediately have access to the report. If you selected “Send email notification to recipients”, they will receive an email. Otherwise, they get a notification in Power BI itself. When they login to the service (http://powerbi.microsoft.com), they can find this dashboard under “Shared with me” section.
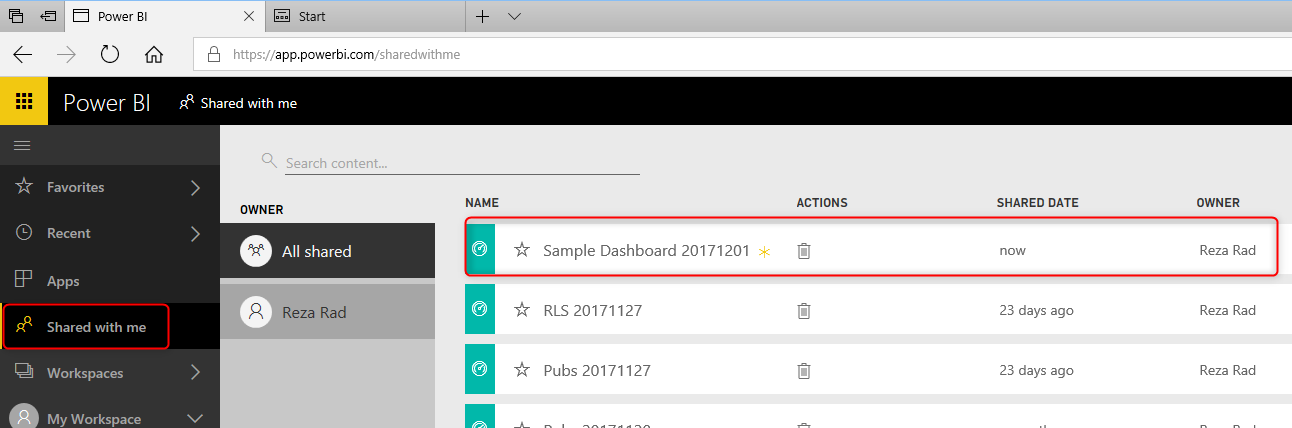
The recipient can click on the dashboard to view it.
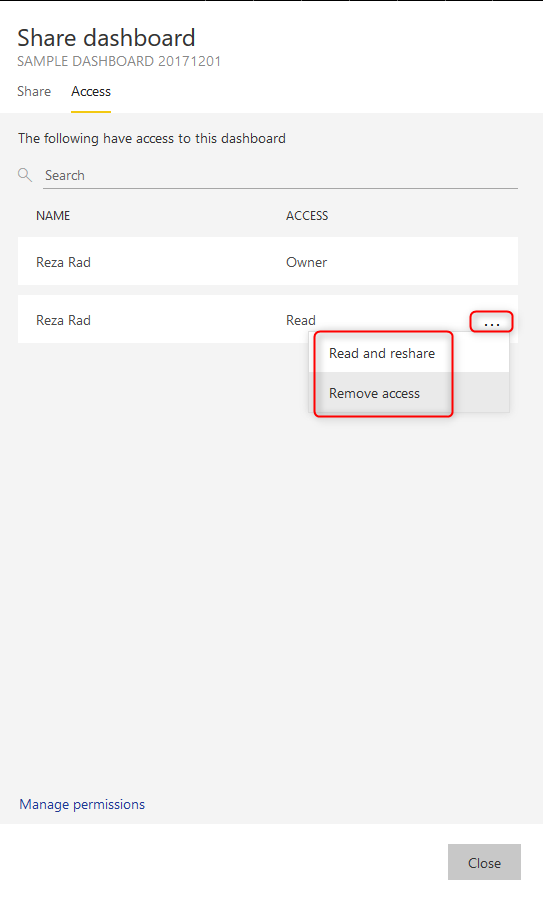
With dashboard sharing, users will have two levels of access; Read, or Read and reshare. If you give them access, without selecting the option “Allow recipients to share your dashboard”, then this access is Read. If you choose the option mentioned above, then the access is Read and reshare.
You can also remove this access anytime you want, by going to the Share option in the same dashboard, and click on the Access tab. You will see a list of all users who have access to this dashboard, and their access level (Owner, Read, Read and reshare), and then you can click on more option (…) and change it.
Another way of setting access is through manage permission in the dashboard, report, or dataset. If you share a dashboard, by default the report and the dataset will also be shared as read-only for users. Users can click on dashboard and go to the report; they can interact with the report quickly. However, they cannot Edit the report. The access to edit report cannot be provided through this method.

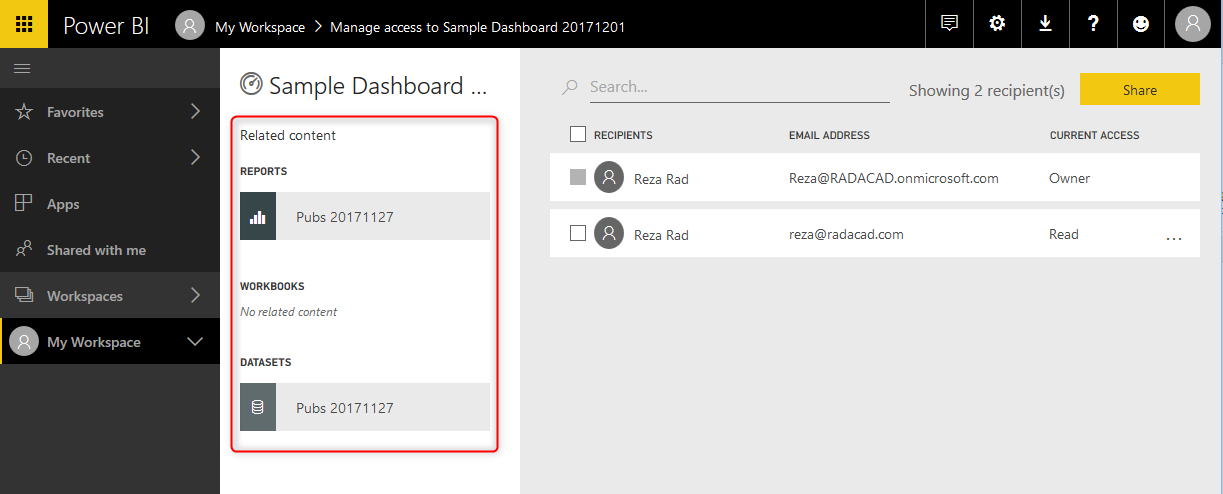
To manage permission on every item (dashboard, report, or dataset) individually, you can go to Manage Permission in the Access tab of Share window for the dashboard.

Manage permissions will show you a detailed list of access to the dashboard, reports, and datasets. In the left-hand-side of the Manage Permissions section, you will see related reports, and datasets. You can click on the report.
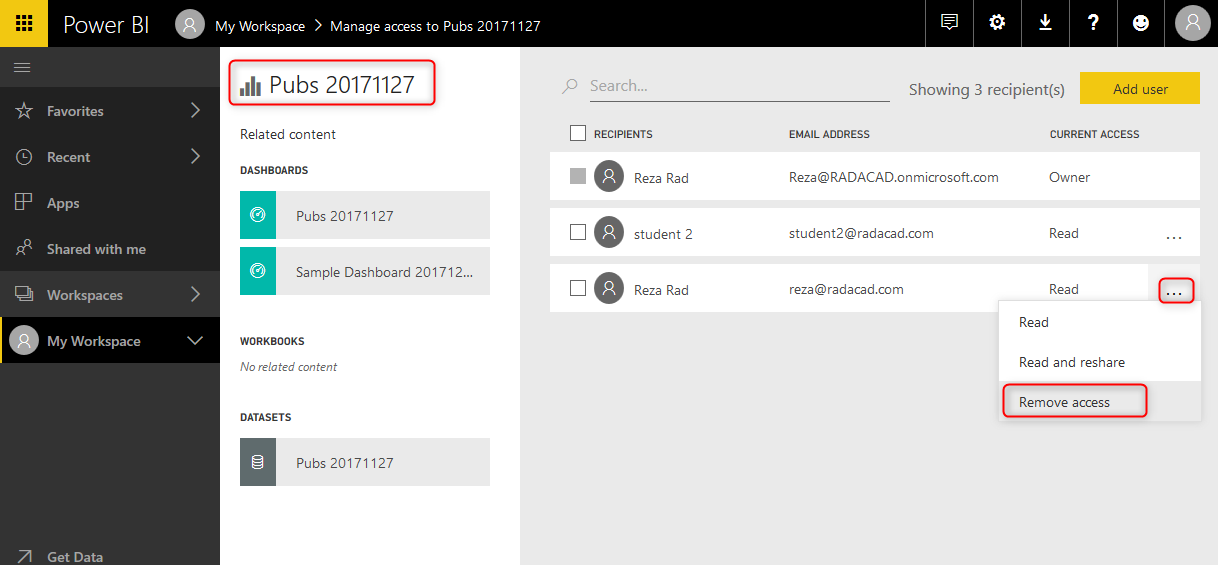
By clicking on a report or dataset, you will see the permission specified for that object. And you can change it. For example, user reza@radacad.com has access as Read to the report in below screenshot (because we shared this dashboard with him, so the report sharing happened automatically after that). You can remove that access by clicking on more options.
You will see the Remove access window, which asks do you also want to remove the access to some of the related content as well or not. Let’s just remove access to this report now.
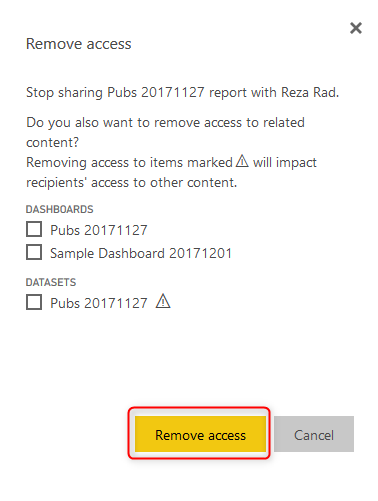
If you are removing access to some of the other items, you should be careful, because that item might be used in multiple other objects. For example, if you remove the access to the dataset, that dataset might be used in multiple reports.
If you shared a dashboard with a user but removed the access to the report or dataset, the user when logged in and accessing the dashboard will see the error message for tiles that are coming from that report. Users cannot drill into the report, because they don’t have access to it.

Dashboard sharing like many other methods of sharing in Power BI is a paid feature. The account which is sharing the content should be Power BI pro account, and people who are using the shared content, should be part of a paid account (Power BI Pro accounts, of Power BI free accounts under a Power BI premium capacity). I’ll talk about licensing more in future posts. Free users with no connection to Power BI premium cannot leverage content shared with this method of sharing.
Dashboard sharing is the most basic way of sharing content in Power BI. This method is quick and easy to set up. You don’t need to have a lot of steps to set up sharing of the dashboard. The ability to share it very quickly makes this method the most common method of sharing for testing.
If you have created a Power BI content and want to share it with others easily just for Testing, one of your first options in Dashboard sharing.
Dashboard sharing is simple; however, it has many drawbacks, which makes it hard to be used in production. I do not recommend using this method to share Power BI content with users in production environment because of reasons mentioned below;
With Dashboard sharing, you cannot specify edit access. For end users, you never want to give edit access, however, if you are working with a team of developers, and you want to provide them with access to edit the content, you cannot do that with dashboard sharing. You have to use other methods of sharing, which will come in next few posts.
You can only share one dashboard at a time. What if you wanted to share hundreds of dashboards? You must go to each dashboard, and share items individually. Sharing every single dashboard would add a lot of maintenance overhead to your work. Best would be having all contents under a group and sharing it with others at once.
Dashboard sharing is straightforward; it has two levels of access, Read, or Read and reshare. You can use this method efficiently for test scenarios. When you want to share a dashboard with a user for testing, Dashboard sharing can be one of the best options to choose.
Dashboard sharing, however, has some disadvantages. There is no Edit access to this way of sharing, and on the other hand, if you want to share multiple items, you have to go to each dashboard and share individually from there. Because of these two significant limitations, dashboard sharing is never used in development or production environment of Power BI implementation. Other methods which I’ll write about them in next few posts, can cover these limitations.