
One of the recent features in Power BI Desktop is the ability to create your own custom connector and use it when connecting to the data source. This feature looks just one feature, but it opens doors to many possibilities. With this feature you can write your own custom connector to any types of data source that is not already available. Many of you want to connect to some data sources already and waiting for the connector for it. with Customer Connector, you can write your own component for it, and use it as many times you want. Custom Connectors should be created in Visual Studio with M script. This post is the first post of blog series about creating custom connectors. In this first post I’ll explain what Custom Connector is and how to create a very basic custom connector. If you want to learn more about Power BI; read Power BI online book from Rookie to Rock Star.
What is Custom Connector?
Power BI has a set of existing connectors which you can find them in Get Data section of Power BI (or Power Query).

Connectors in this list are connections to the major types of data sources, such as SQL Server, Oracle, some software as a services such as SalesForce, CRM Online and etc. However, this list is not including all types of data sources. There are always data sources that you want to connect, and is not available in this list. Power BI recently introduced a feature called Custom Data Connector, or simpler Custom Connector. With Custom Connector you can code your own connection provider and re-use it multiple times. Your custom connector will appear in the list of Get Data in Power BI, similar to other connectors. Let’s have a look at how this custom connector can be built.
Prerequisites
For running examples of this post you need to have Visual Studio installed. You can download the community edition of that for free.
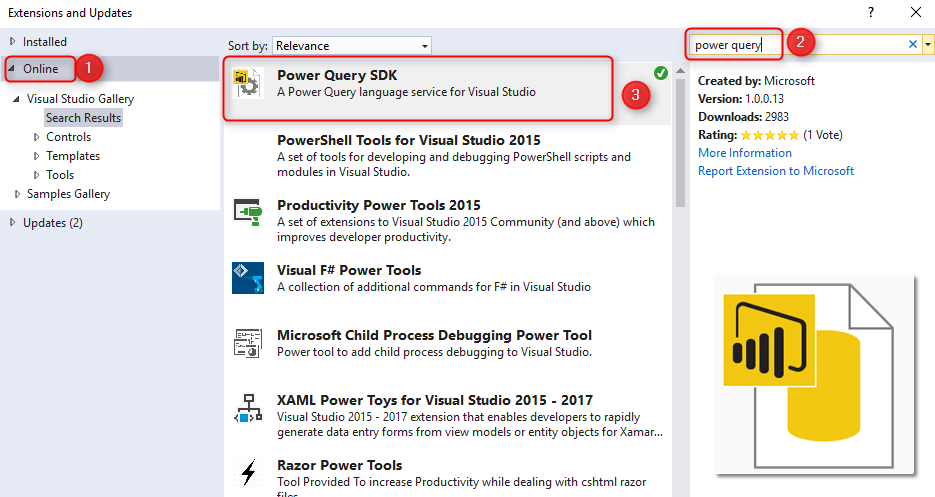
Install Power Query SDK
You need to install Power Query SDK on Visual Studio as the very first action. This SDK easily can be found in the Visual Studio Tools menu -> Extensions and Updates

In the list of Online search for Power Query and you will easily find Power Query SDK. simply download and install it.
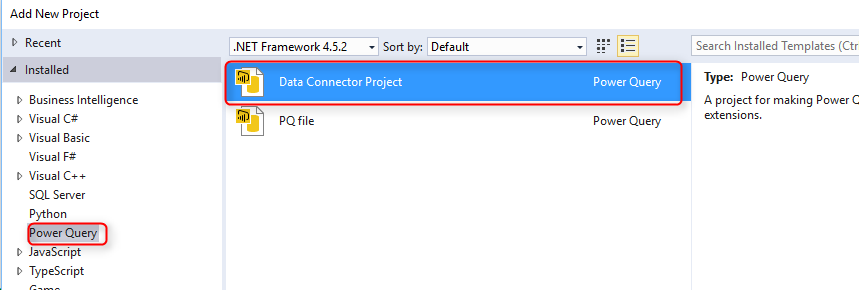
Create the First Project
After installing the SDK, then you should be able to create a project of type Data Connector. From List of Installed templates choose Power Query, and then select Data Connector Project.
I just left the name as default PQExtension1. you can call it anything.
Project Structure
Data Connector project has a simple structure. It has some files as below;
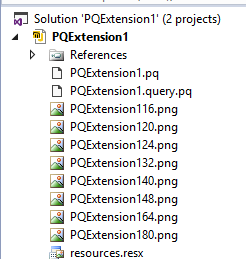
- <connector name>.pq file: The code and metadata of the script and connection to the data source. Majority of development is in this file.
- <connector name>.query.pq: calling the function in the <connector name>.pq file. combination of these two files generates the custom connector’s script. This is test file.
- *.png: Icon files.
- resources.resx: Resource file.
Coding Language: M
Coding language for custom connector is M: Power Query Formula Language. If you like to learn about the basics of M, read my post here. Good news is that M has an intelisense here in Visual Studio.

For a M script geek like me, this is one of the best news I could get!
Structure of Query Files
The main query file is <connector name>.pq. This file includes all the code and M script to connect to the data source and fetch the data out in the desire format. the first time you create the project, this file will come with some default sections.
// This file contains your Data Connector logic
section PQExtension2;

[DataSource.Kind="PQExtension2", Publish="PQExtension2.Publish"]
shared PQExtension2.Contents = (optional message as text) =>
    let
        _message = if (message <> null) then message else "(no message)",
        a = "Hello from PQExtension2: " & _message
    in
        a;

// Data Source Kind description
PQExtension2 = [
    Authentication = [
        // Key = [],
        // UsernamePassword = [],
        // Windows = [],
        Implicit = []
    ],
    Label = Extension.LoadString("DataSourceLabel")
];

// Data Source UI publishing description
PQExtension2.Publish = [
    Beta = true,
    Category = "Other",
    ButtonText = { Extension.LoadString("ButtonTitle"), Extension.LoadString("ButtonHelp") },
    LearnMoreUrl = "https://powerbi.microsoft.com/",
    SourceImage = PQExtension2.Icons,
    SourceTypeImage = PQExtension2.Icons
];

PQExtension2.Icons = [
    Icon16 = { Extension.Contents("PQExtension216.png"), Extension.Contents("PQExtension220.png"), Extension.Contents("PQExtension224.png"), Extension.Contents("PQExtension232.png") },
    Icon32 = { Extension.Contents("PQExtension232.png"), Extension.Contents("PQExtension240.png"), Extension.Contents("PQExtension248.png"), Extension.Contents("PQExtension264.png") }
];
Explaining all functions and code above might be a bit out of scope for this introduction post. I will explain these in details in future posts. for now just a very brief explanation;
- Code above contains a function called <connector name>.Contents. This function will return the result set that will be the input for Power BI when connecting to this connector.
- The credentials configuration for this data source will be configured in an Authentication section.
- <connector name>.Publish is for configuring the location and configuration of showing this connector in Get Data section of Power BI.
- <connector name>.Icons is list of Icons for the connector.
In the <connector name>.query.pq, then you will see only a function call to the same function which is defined above.
let
    result = PQExtension2.Contents()
in
    result
This file is mainly to perform testing here in Visual Studio.
If you run this project, you would be able to see the result (after setting the authentication of course)
Write a Sample Function
To make the first connector; I’m not going to explain how to use OData and pass authentication to get data from a web service. that will make things complicated. The very first example I want to show is a simple function that you just pass the number to it and it will give you a table with one single column with values starting from 1, adding one at a time and finishing at that number. It is just a list of numbers. I found it is the easiest way to understand how things work.
in PQExtension1.pq file, change the Contents function as below;
[DataSource.Kind="PQExtension1", Publish="PQExtension1.Publish"]
shared PQExtension1.Contents = (value as number) =>
    let
        mylist = List.Numbers(1,value),
        out= Table.FromList(mylist, Splitter.SplitByNothing(), null, null, ExtraValues.Error)
    in
        out;
In this function I have used List.Numbers to generate a list of numbers from 1. Adding one number at time to the specified number.
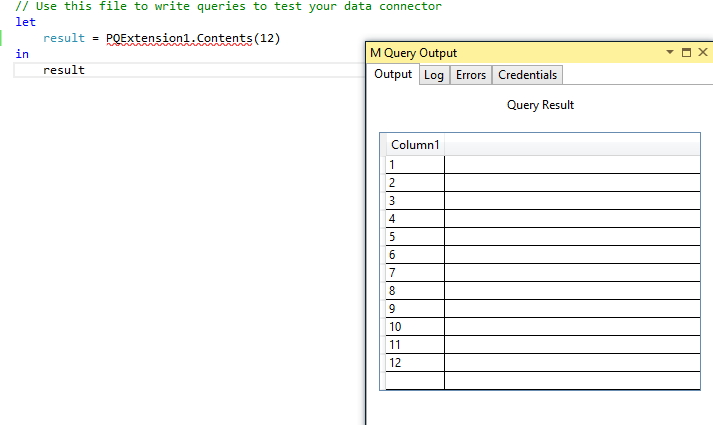
After writing the code above, you can call it from query.pq file with this test line;
let
    result = PQExtension1.Contents(12)
in
    result
Testing the Result
You can test the query in Visual Studio. just run the project, and you will see the result for 12 rows
Publishing Custom Connector
To publish the custom connector, you have to build it first. This will create a *.mez file in the debug folder of the project. to find that folder, right click on the project in visual studio and click on Open Folder in File Explorer.
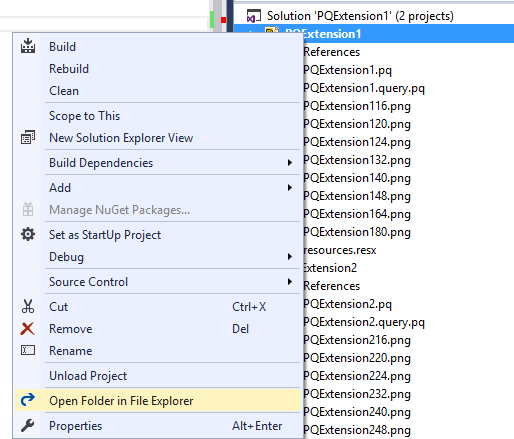
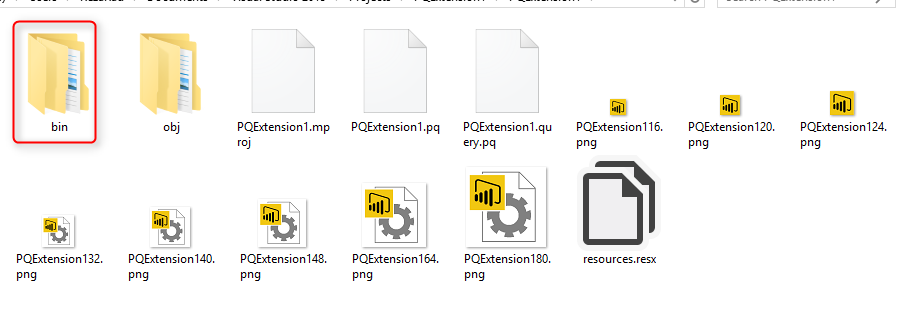
In the project folder go to Bin Folder, and then Debug, find PQExtension1.mez there.
Copy the *.mez file from here into a folder in My Documents. folder name should be exactly this:
Microsoft Power BI Desktop\Custom Connectors
Create the folder above if doesn’t exists.
Using the Connector
After copying the *.mez file in the documents’ custom connectors folder, then open Power BI Desktop.
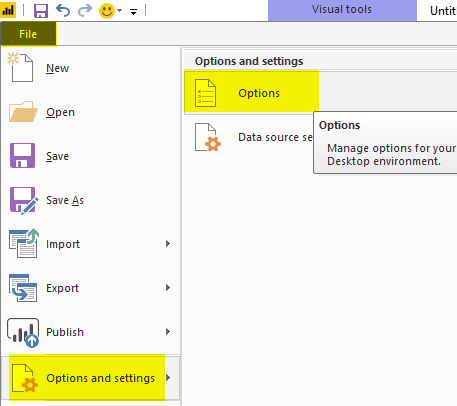
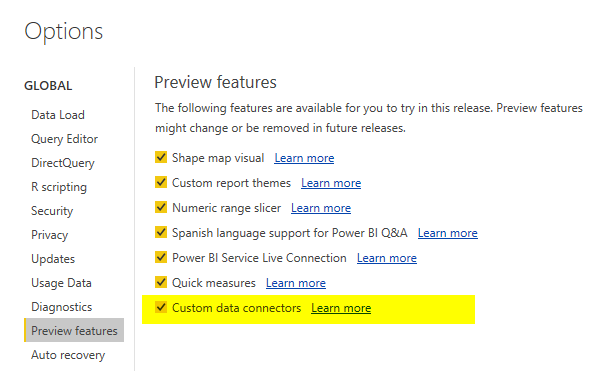
At the time of writing this post, custom connectors is still a preview feature. To enable this feature; Go to File, Options
select custom connector preview options. You will need to close Power BI Desktop after this action and re-open it.
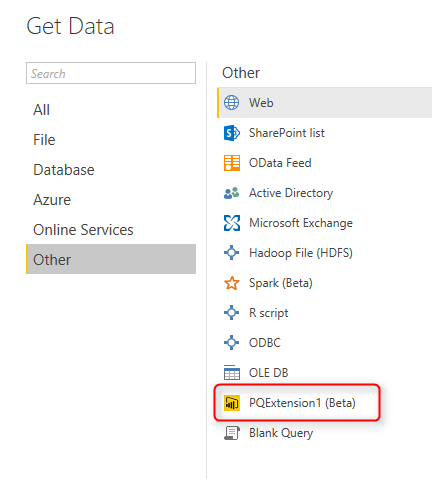
After re-opening Power BI Desktop you should see your new connector under Other section (or by searching it);
With selecting this connector you will be asked for an input value (remember, this is the number value input for the function that generates the list);
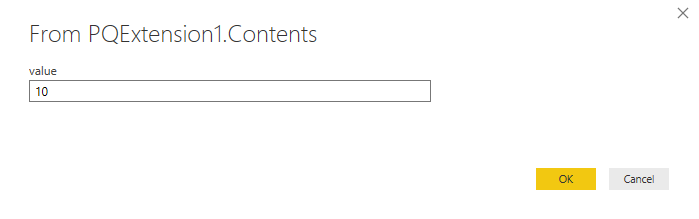
Don’t worry about “From PQExtension1.Contents” now. In future posts I’ll explain how we can customize all of these stuff. after entering a value you will see the result immediately;

Summary
The custom connector that we have created in this post, doesn’t connect to OData and authenticate through a process to bring some interesting data for you. However, this example was very basic one just to show you main components of a Custom Connector. In next blog posts in this series I will write about how to custom each part and we will have much more complex examples of that. If you are interested to learn more about this the documentation of Power BI team in GitHub is already great resource for it. In my opinion after the custom visuals which was great milestone for Power BI visualization; Custom Connector is a big milestone for Power Query. You can now write your own connector and connect to the world of data, anywhere, anything. Are you excited about this feature; please let me know your opinion in comments section below.


Reza is author of more than 14 books on Microsoft Business Intelligence, most of these books are published under Power BI category. Among these are books such as Power BI DAX Simplified, Pro Power BI Architecture, Power BI from Rookie to Rock Star, Power Query books series, Row-Level Security in Power BI and etc.
He is an International Speaker in Microsoft Ignite, Microsoft Business Applications Summit, Data Insight Summit, PASS Summit, SQL Saturday and SQL user groups. And He is a Microsoft Certified Trainer.
Reza’s passion is to help you find the best data solution, he is Data enthusiast.
His articles on different aspects of technologies, especially on MS BI, can be found on his blog: https://radacad.com/blog.