
There are many scenarios that you might want to implement a conditional expression. When the conditional expression’s logic is on a row-by-row basis, the best is doing it in Power Query rather than DAX (there are exceptions always), The Add Conditional Column in Power Query is a very helpful option, but often many people find it a bit limited to use. In this article, I’ll explain how that works, and how it can be used for any complex scenarios as well. To learn more about Power BI, read Power BI book from Rookie to Rock Star.
Sample Dataset
The sample dataset used here is the AdventureWorksDW Excel file which can be downloaded from here. The only table I used for this example is DimCustomer.
Adding Conditional Column in Power Query
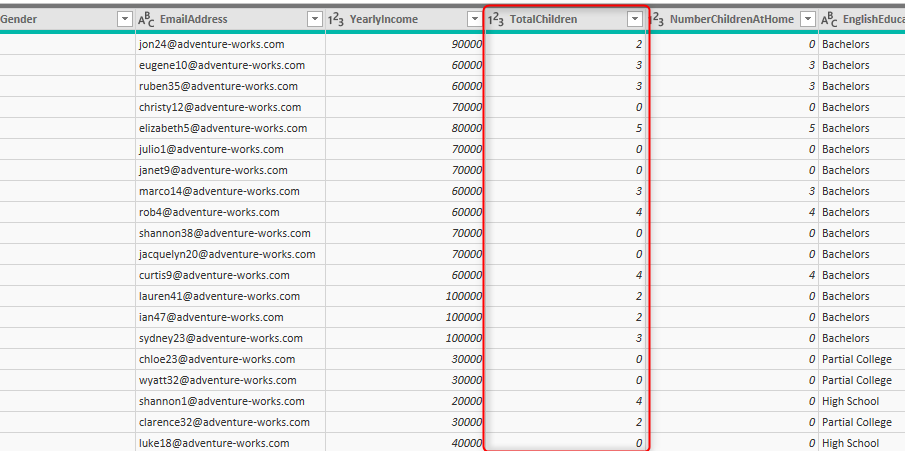
Let’s say we want to do a conditional column for banding the customers, but the number of children that they have. If they have one or fewer children, we call it a small family, 2 to 3, medium-size family, and anything more than 4 children, a large family. The DimCustomer table has a column named Total Children as below;
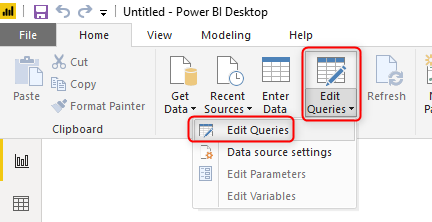
To add the conditional columns, the first thing is to go to Edit Queries if you are not in the Power Query Editor;
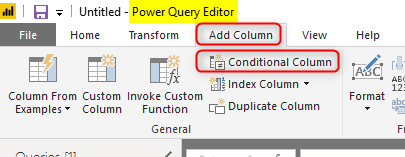
Then under Add Columns in the Power Query Editor, you’ll find the Conditional Column
The Conditional Column for such logic would be like this:
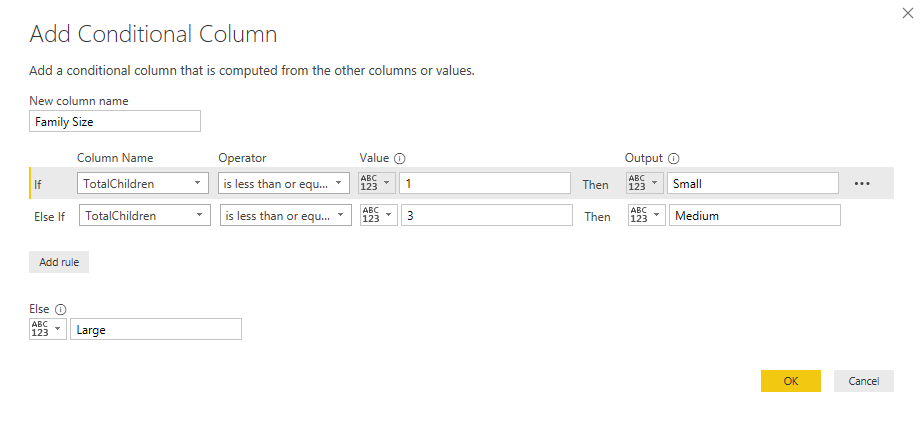
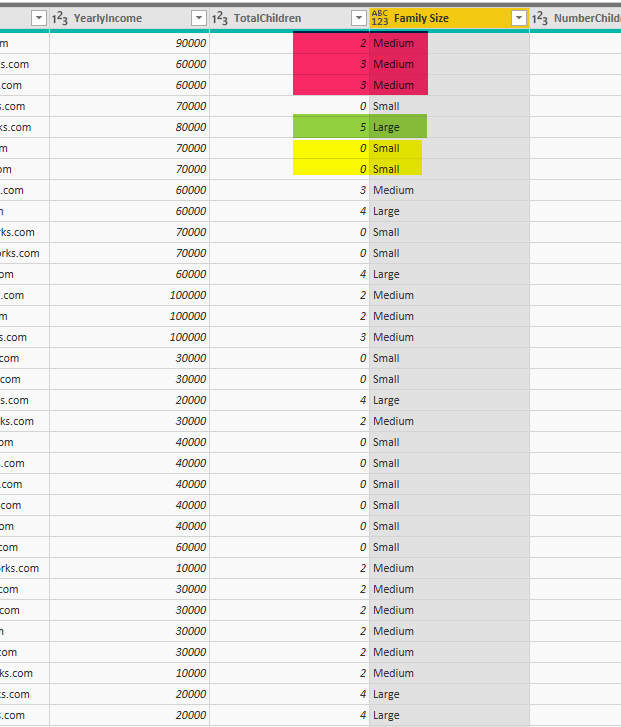
Building the logic above is simple, you choose the Column Name, then the Operator, and then the Value. After that, you can set the Output. As you see I just put two logics for Small and Medium. and Else means everything which is not in those two conditions. After adding the column with condition above, here is what the result looks like:
Adding Rules
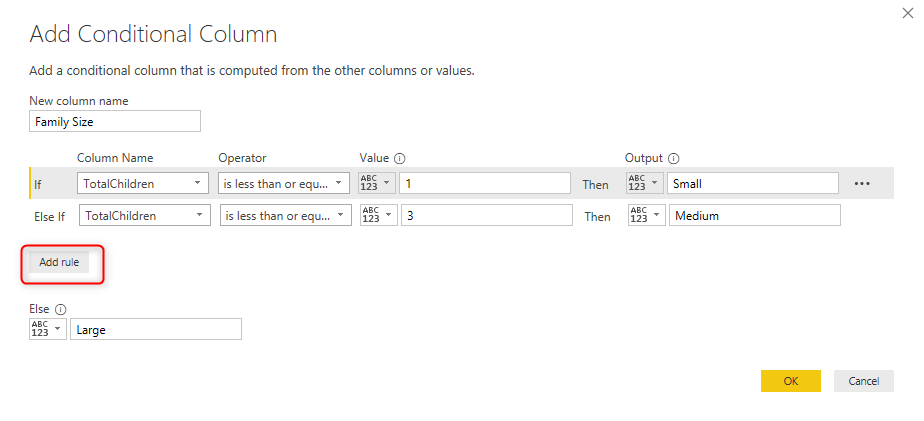
Adding more rules is just simply possible by clicking on Add rule button
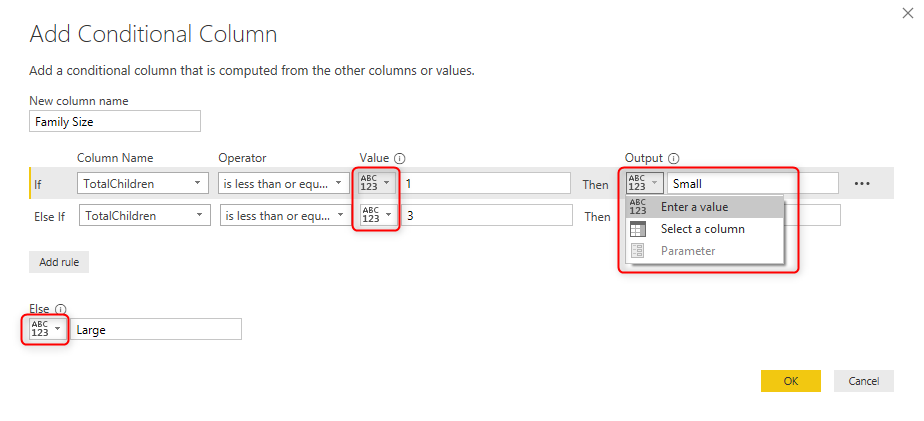
Choosing between Static Value, Value from a Column, or Parameter
You can choose the value as the Output or Value to come from another column if you want to, or even use a Parameter for that
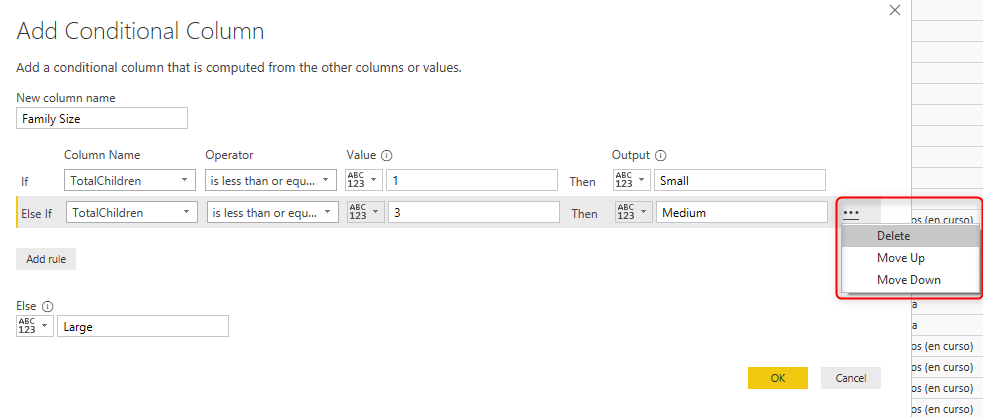
Delete or change the order of Conditions
To delete or change the order of conditions, simply click on more options (…) on that line of condition
What about AND/OR?
Conditional Column is simple to do in Power Query, much simpler than doing it with DAX. However, when I explain it, one of the first questions I always get is: How we can do AND or OR logics in the conditions? You might have the same question too. Let’s see that through an example.
We want to create a conditional column logic that produces the Title, based on Gender and Marital Status of DimCustomer. There is already a Title column in the DimCustomer, but not populated correctly. so let’s see what logic we need to implement. This is what it should look like logically:
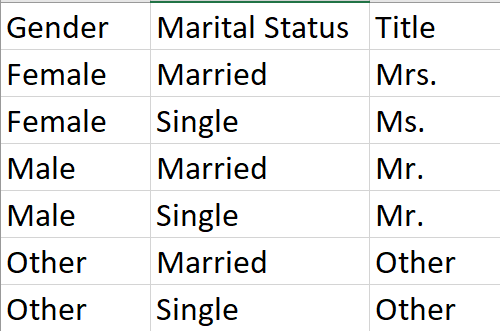
In this dataset, we don’t have any “Other” values, however, let’s build the logic based on that.
The problem of creating a conditional column with the logic above is that for this scenario you need to have two columns in your conditional logic. you need something like AND or OR. There are two ways (in fact three) that you can achieve this. Let’s go through it one by one.
Order of conditions matters!
The very first thing that you need to know is that order of conditions matters. That is why we have the option to move a condition up or down in the list. And in a conditional operation, there are always three parts:
If (Logic) is true, then (Do something)
else (Do something else)
It is important to think about it that way because then it means the execution goes to the next logic ONLY IF the first logic is not true.
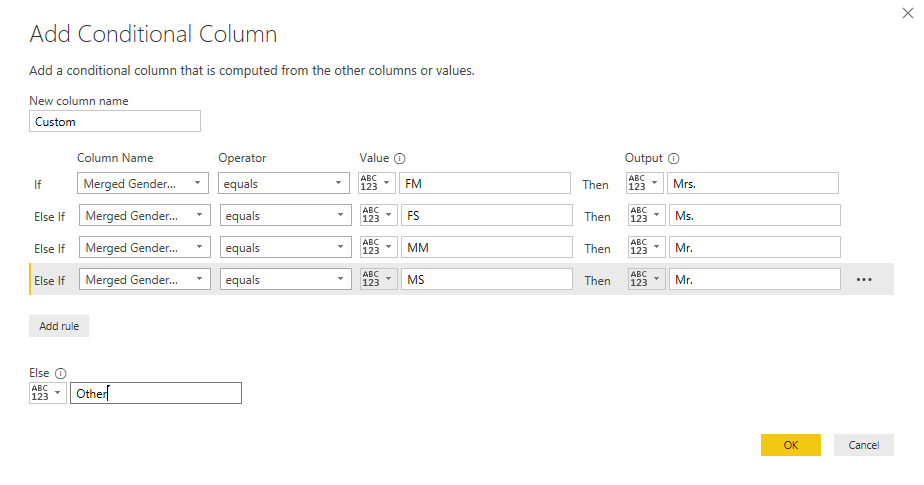
Here is how I would do the above logic in Conditional Column:
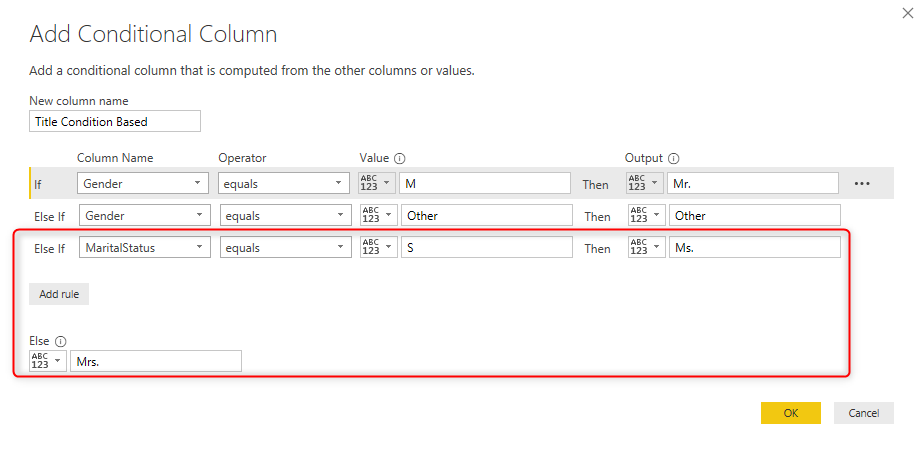
The first and second logic seems to be simple and easy enough to understand. the trick is the third condition.
For Male, or for Other as Gender, the title is going to be Male or Other respectively. so we don’t really need to check the value of Marital Status column.
However, for Female gender, you need to check both Gender and Marital Status. Now, if you remember the logic of IF THEN ELSE, you should see that the execution comes to the third condition ONLY IF it is not valid in the first two (means Gender is not Male and is not Other), so Gender is definitely going to be Female, you don’t need to check that again. Then it is only one field to check, which is Marital Status.
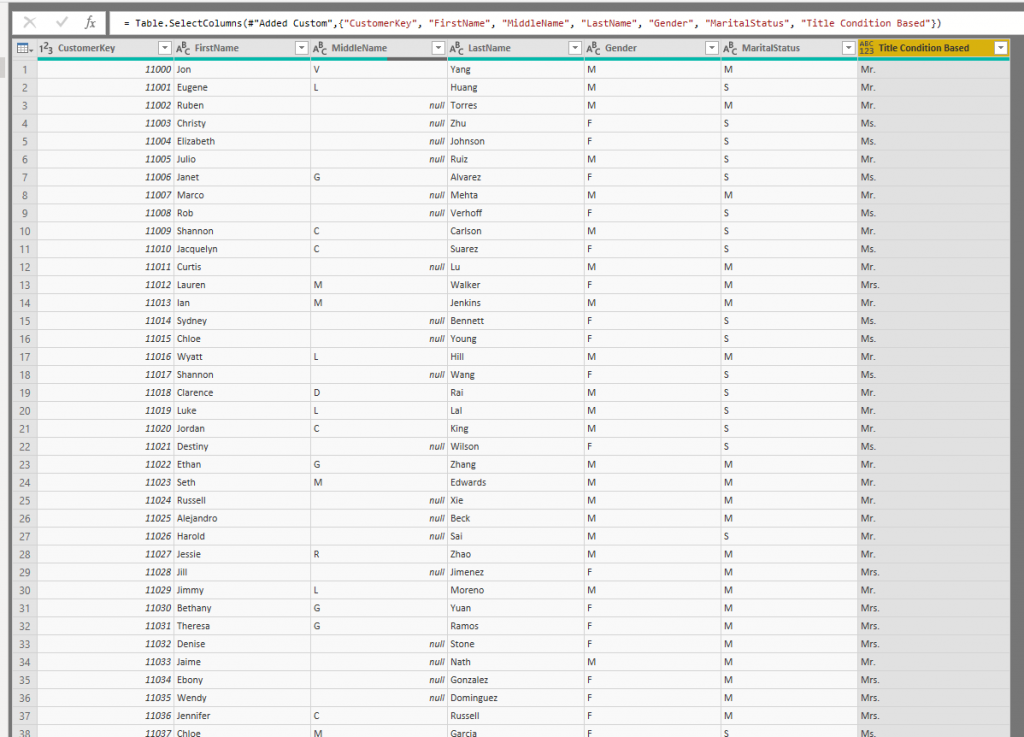
Here is the output:
When you know how IF THEN ELSE works and leverage the order of conditions correctly, you can apply any rules and any logics. However, for some logics, this might looks a bit more complicated to apply. If you ask me, I can tell you that everything is possible with this method, you just need to change their way of thinking in your mind to think programmatically on IF THEN ELSE basis. However, if you still find it complicated, here are a few other methods to try.
Other methods: Concatenate
Another method, which I have seen many are using it because it is simpler, is this: Using a combination of transformations to put the combination of columns into one column. this can be done using concatenating columns or some other ways. In Power Query, you can concatenate columns using Merge Columns for example;
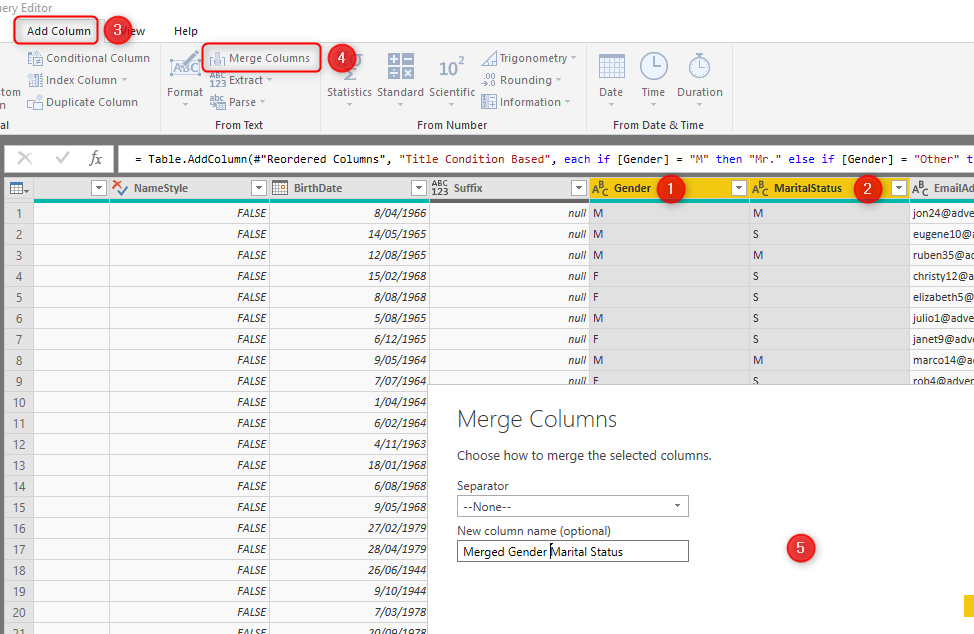
Then you can use that new column to do simple conditional column:
This is not my personal preferred way of doing things, I generally prefer the first method. However, because it is easy to understand and implement, you might want to use it.
Techie Way: M
If you worked with Power Query for a while, you know that Power Query works on a formula language behind the scene. The formula language is more powerful than anything you can do in the GUI. I have explained about the structure of Power Query language called M in this article. If you want to implement an AND or OR in M script, you can use Add Custom Column under Add Column tab, and then write the expression like this:
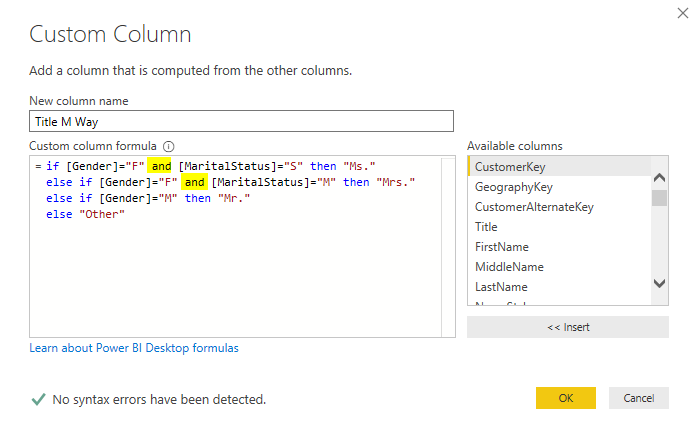
As you can see, you have the option to use “and” or “or” (lowercase), and also any combination of if then else, and changing the order based on what you like.
This method requires writing a few lines of scripts, and that is why I called it a techie way of doing it.
Summary
Conditional Column in Power Query is a great way to implement a logic that is a row-by-row basis. You can use the graphical interface, and implement any logic you want. For some logics, you might need to change the way of thinking and change the order of conditions. Alternatively, you can use other methods, which one of those is writing the M script. Is there a condition that you think is hard to implement? let me know what it is in the comments below. and feel free to share your experience of using Conditional Column and how it helped in your Power BI solution.
Video


Reza is author of more than 14 books on Microsoft Business Intelligence, most of these books are published under Power BI category. Among these are books such as Power BI DAX Simplified, Pro Power BI Architecture, Power BI from Rookie to Rock Star, Power Query books series, Row-Level Security in Power BI and etc.
He is an International Speaker in Microsoft Ignite, Microsoft Business Applications Summit, Data Insight Summit, PASS Summit, SQL Saturday and SQL user groups. And He is a Microsoft Certified Trainer.
Reza’s passion is to help you find the best data solution, he is Data enthusiast.
His articles on different aspects of technologies, especially on MS BI, can be found on his blog: https://radacad.com/blog.
hi and thanks for all your posts, i track them daily. Each morning yours and sqlbi are my tech-breakfast. Greedyyy….
I often switch to M in those cases where i have more than 10 rules to set up.
Say you have 50 rules to create.
You start with the first couple one to get the M logic. Then you past the M code in excel where you build the 48 others with a plain formula. And eventualy copy/paste them back to the advanced editor. Check the comma etc… then clic ok and tadaaaa your 50 steps appears like magic. 🙂
I’m new to Power BI and I’m figuring a lot out. I’ve used conditional columns similar to the above examples but I’m getting errors because our data has null values in it. How can I account for null vales?
Hi Robin
You can right-click on the column, choose Replace Values, then replace null (note that it should be written all lowercase) with blank. do this step first, and then do your conditional column.
Cheers
Reza
Hi Reza,
Trying to add a new column conditional colum (Period) that is based on a date ranges. Example
7/1/2019 thru 8/10/2019 = Period 2 (in the new PERIOD column)
I want to add a new column- PERIOD to populate with input PERIOD 2 in above example, for any transaction that falls within the DATE range. From what I can see, conditional formatting in a query does not allow DATE ranges?
I have 12 Period definitions.
Appreciate any feedback.
Hi Denise
the GUI might not have the date range, but you can always right the condition yourself, after creating a conditional column, you can look at the formula bar (enable it from the view tab), and then you will see a simple “if then else” statement, you can write your date condition there simply.
Cheers
Reza
Hi Reza,
I would like use to add an conditional column based on several conditions. Basically if the column contains an letter I would like the information to be sperated to a new column. Is there any why to write this in M-code without having to add the full Alphabet?
I have started to write the codes as below (used the M-code that was created for the GUI as basis), though there must be some more efficient way to write this:
= Table.AddColumn(#”Ändrad typ”, “Raw Material”, each if not Text.Contains([#”Basis Weight Spec – kopiera.1″], “A”) then [#”Basis Weight Spec – kopiera.1″] else if not Text.Contains([#”Basis Weight Spec – kopiera.1″], “B”) then [#”Basis Weight Spec – kopiera.1″] else null)
Kind Regards,
Henrik
You can use lists for that. the code below simply gives you a list of alphabet:
{"a".."z"}this then can be used in a List.Contains expression such as:
List.Contains({"a".."z"})which can be part of a condition.
Another option can be using R transformation, where you can write a regular expression for this.
Cheers
Reza
You are awesome !