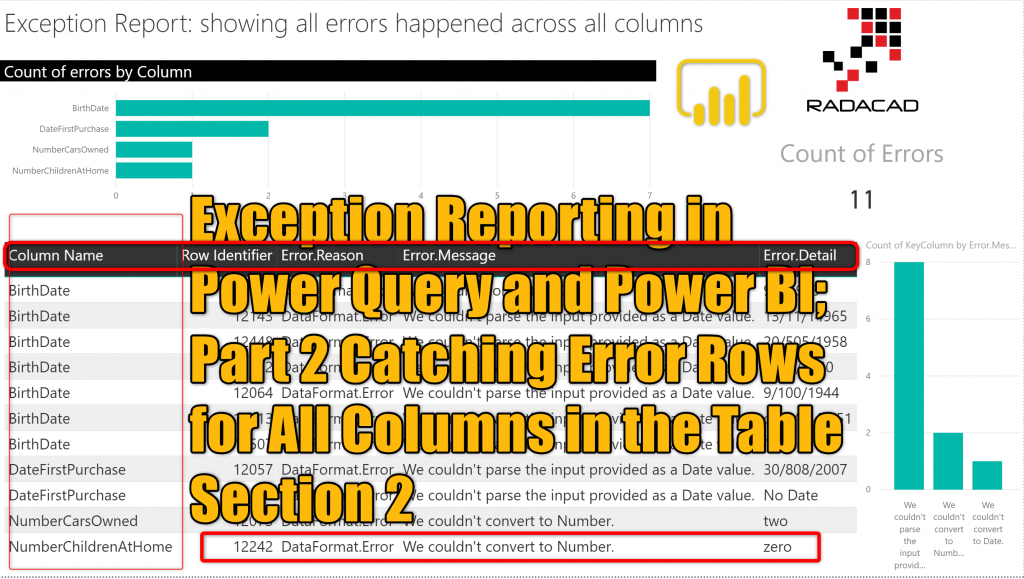
In the first part of this series, you learned how to create an exception reporting for a column in a table using Power Query in Power BI. In the second part, you learned how to initiate that process for all columns in a table. This article continues the section one of creating exception reporting for all columns in a table using Power Query and Power BI. If you want to learn more about Power BI, read Power BI book from Rookie to Rock Star.
Prerequisite
It would be beneficial to read the first part of Exception Reporting in this article here.
You can download the dataset used for this example here.
Continue from the Last Step
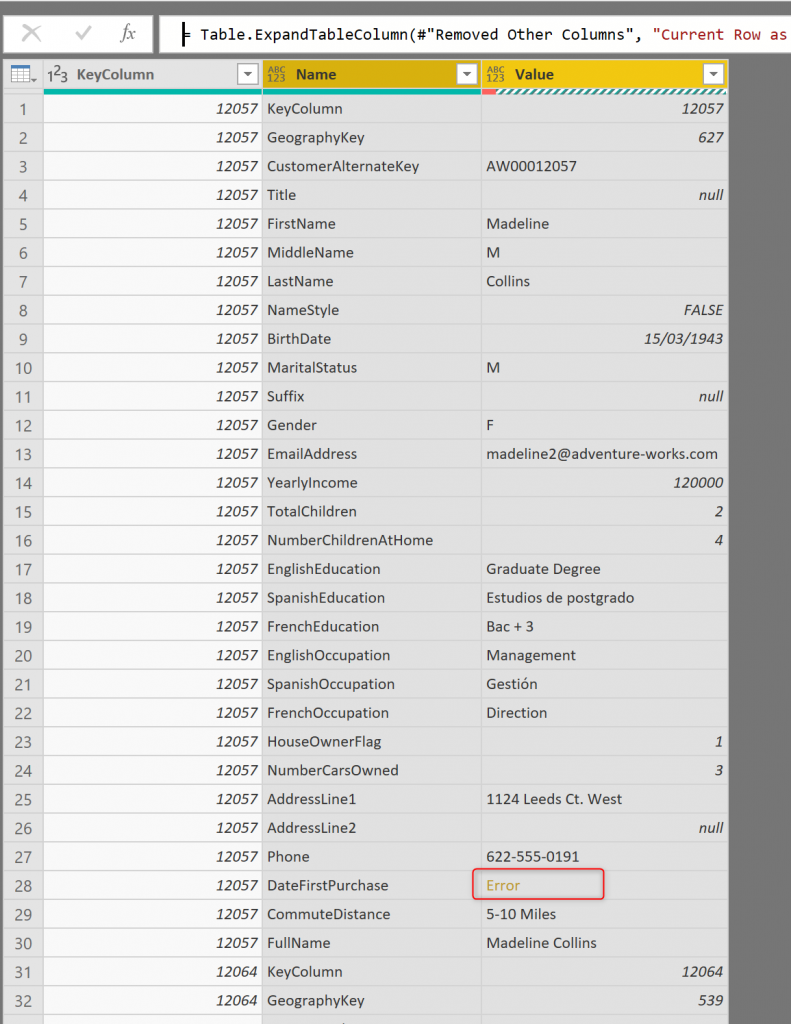
At the end of the previous part, we ended up with a table as below which contains all rows in the table which caused an error in one or more columns in an unpivoted structure;
Keep Errors
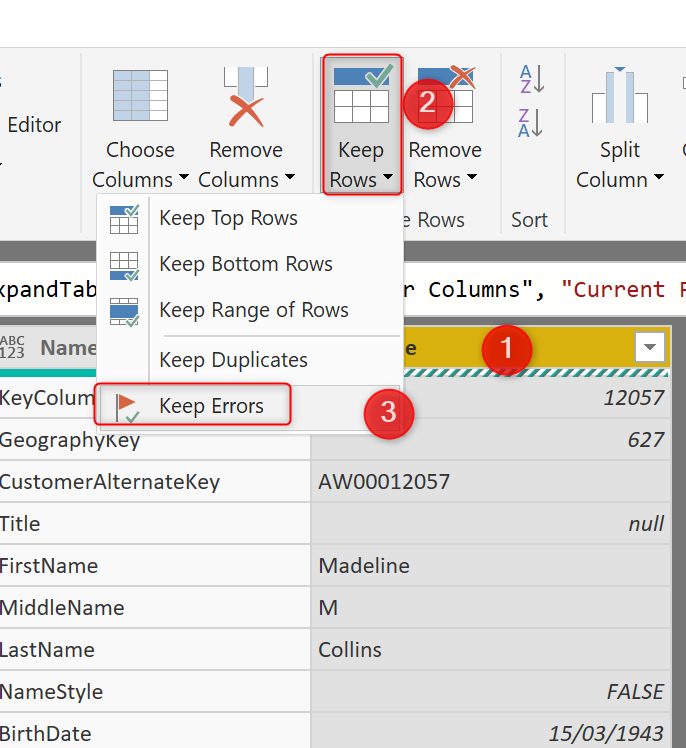
Remember that we want to only keep those columns that caused an error. Now our columns are rows, so we need to keep only those rows that caused an error. And the error only can occur in the Value column because that is where the cell value exists. Select the Value column and then Keep Rows -> Keep Errors.
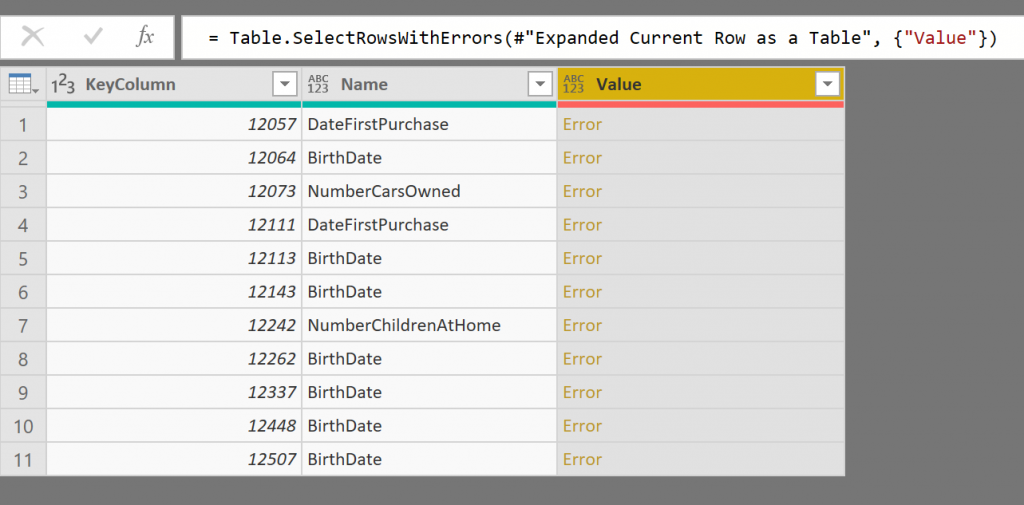
The output table is the table with a list of all rows with their only columns that caused an error!
Get the error details: try
Congratulations! You have done the hard part. Now the rest is as it was in part 1. You need to get the error details, and adding a custom column with the try as the expression will give you that:
try [Value]
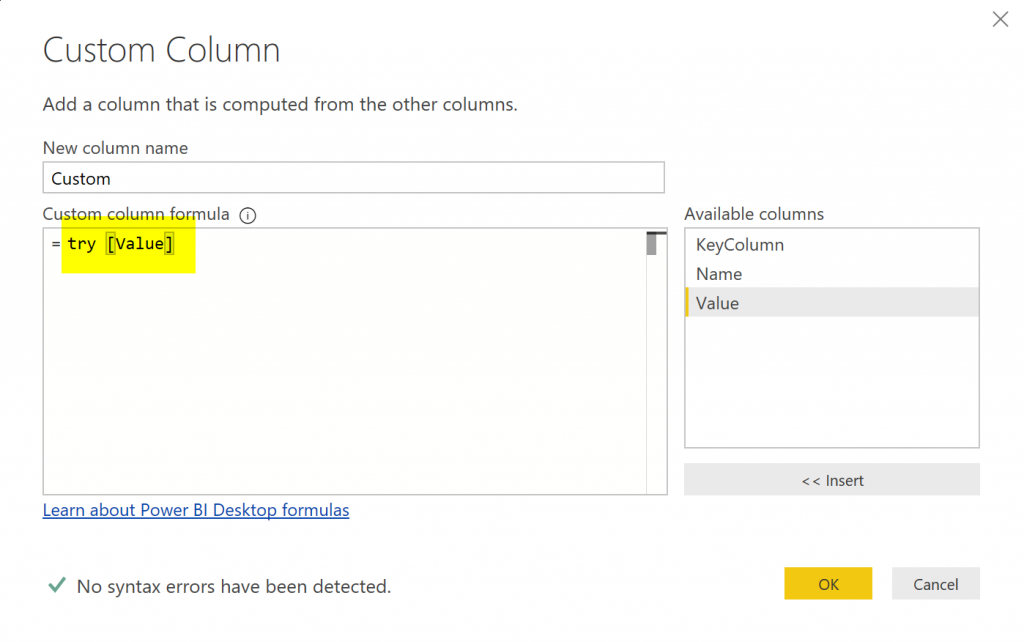
The new column will have a Record with error details in each row;
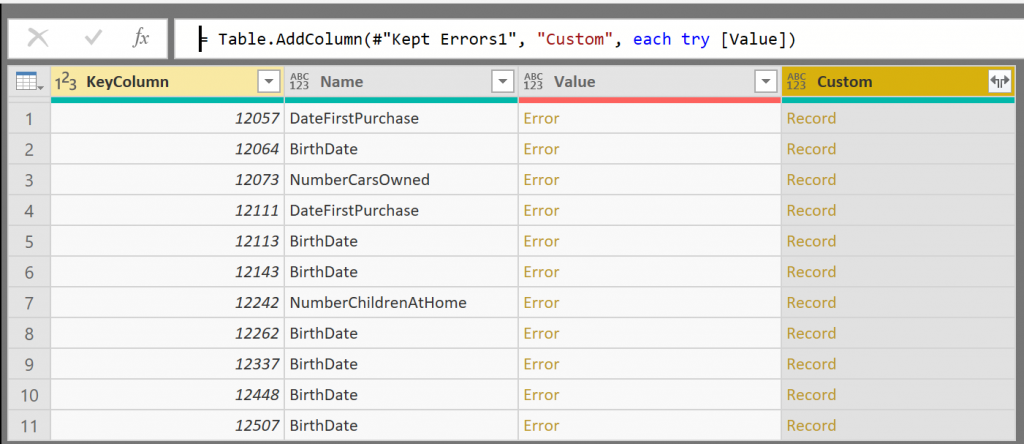
The new column after expanding have two columns inside, which we are only interested in the Error column;
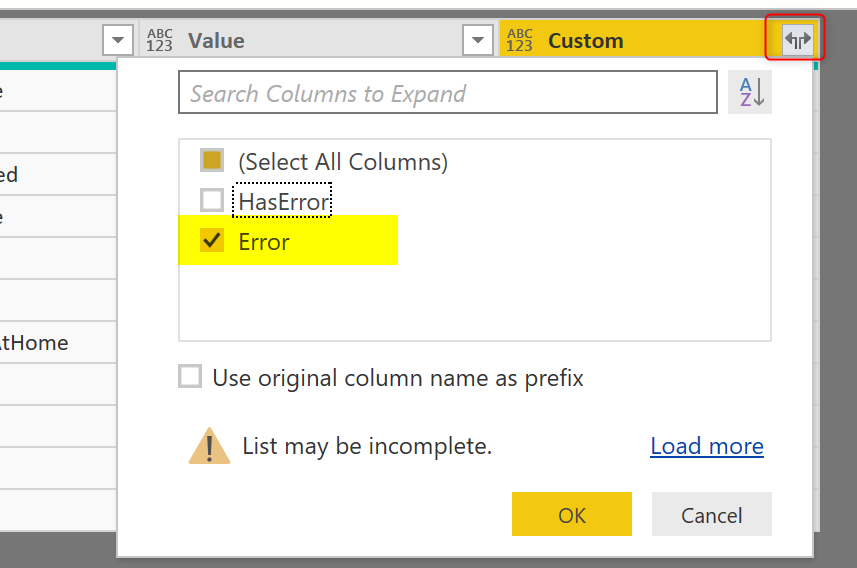
As the next step, expand the Error column to get the three column output of the error details:
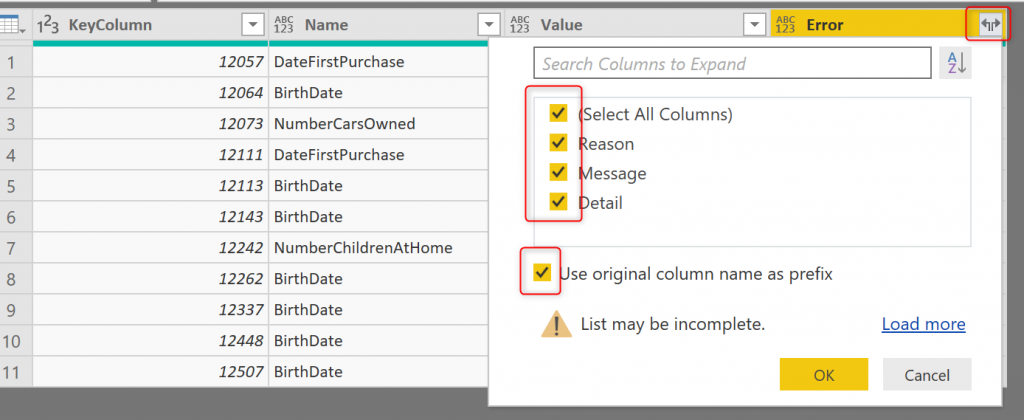
And here is the output:
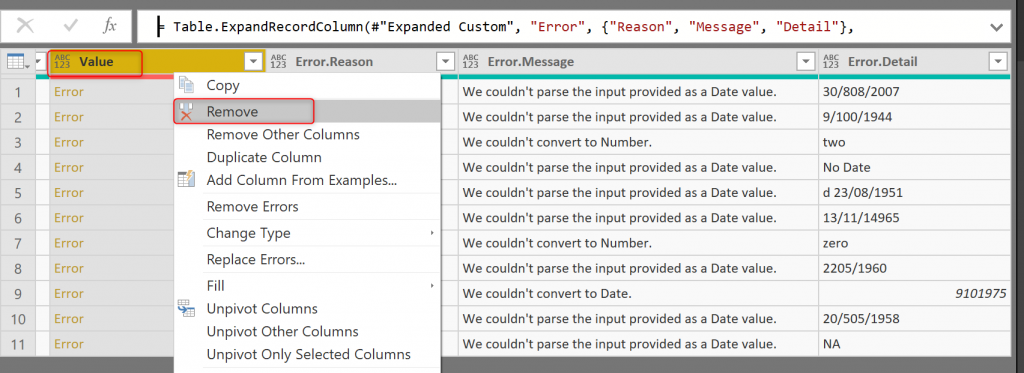
And as the final step, remove the column that has errors in it, which is the Value column. (If you don’t do that step, you will get an error when you load data into Power BI).
I have not explained the process of using “try” and getting the error details, because I explained it in details in the previous part(link). To learn more about the process of getting error details, read part 1 of Exception Reports here.
A Custom Function: Re-use your code
To get the best output, I want to create a function from this process. A function that gets the table as the input, and also the KeyColumn name, and gives me all error rows happening across all columns as a table output.
To create a function like that you would need a parameter of type table. However, using the graphical interface of Power Query, at the time of writing this article, it is not possible to create a parameter of type table. I show you another easy way to do it;
Create a function with no parameters!
The first step is to create a function from what you did in DimCustomer – Error Rows. Right-click on that table and then create a function;

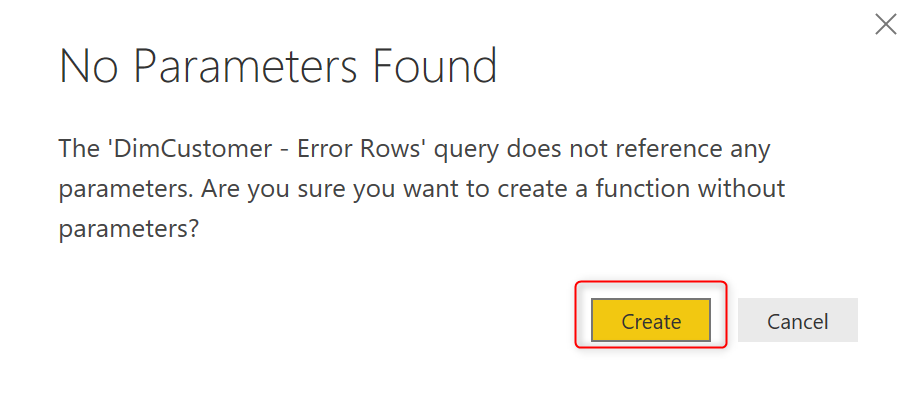
You will get a warning that this function you are about to create, doesn’t have any input parameters, are you find with that? Confirm it by clicking on Create.
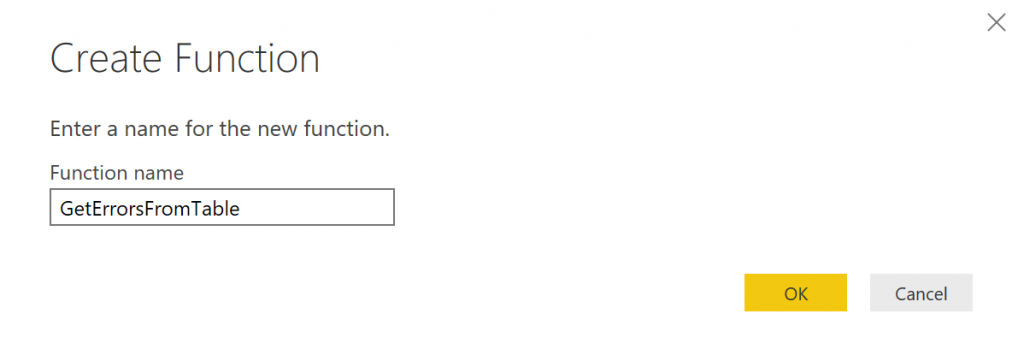
Let’s call the function as GetErrorsFromTable (function name can have space too, but it would make our code much cleaner if we avoid it);
To learn more about custom functions in Power Query and how to use them, read this article.
Add parameters to the function
Now that the function is created, click on the function in the left-hand-side, and expand the formula bar;
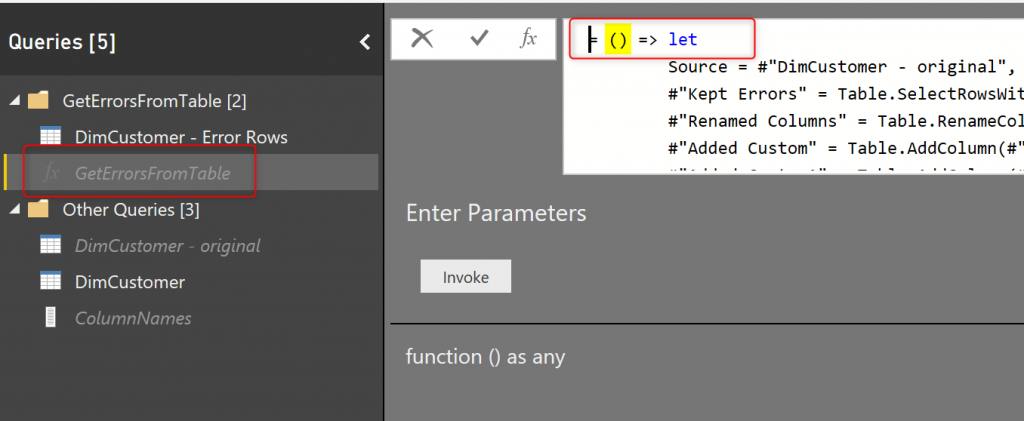
The very first line of the code in the formula bar and more specifically the section inside the parenthesis is where we should change. That is the place that parameters of a function are set. To learn more about functions and their code definitions in M, read this article(link).
To add parameters to the existing function, add them in this syntax:
(<parameter> as <data type>, <parameter> as <data type, …)
So the change in the first line would be:
= (InputTable as table, KeyColumn as text) => let
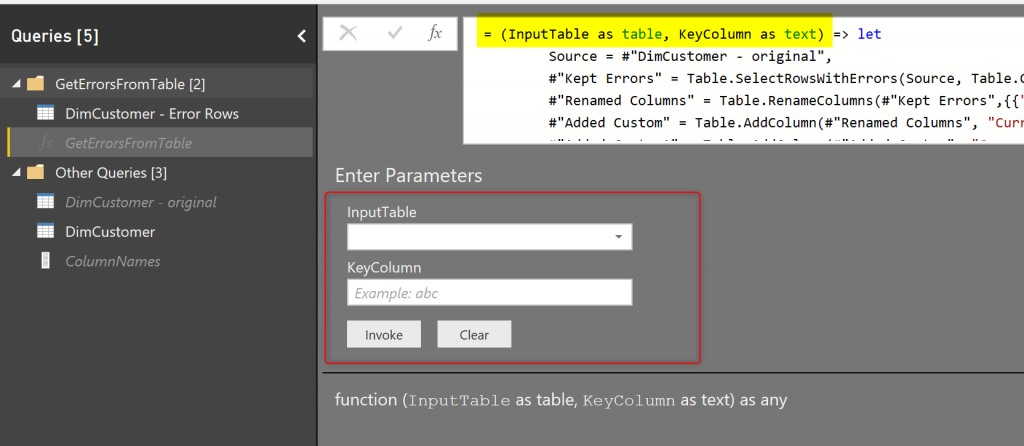
After making that change, click on the checkbox beside the formula bar, and you get the function UI changing now with accepting two parameters.
Using the parameters in the code
Now you need to use both parameters in the code because otherwise there is no point of having parameters. Screenshot below shows where in the code should change with their respective parameters names;

Here is the entire code of the function now:
= (InputTable as table, KeyColumn as text) => let
Source = InputTable,
#"Kept Errors" = Table.SelectRowsWithErrors(Source, Table.ColumnNames(Source)),
#"Renamed Columns" = Table.RenameColumns(#"Kept Errors",{{KeyColumn, "KeyColumn"}}),
#"Added Custom" = Table.AddColumn(#"Renamed Columns", "Current Row", each _),
#"Added Custom1" = Table.AddColumn(#"Added Custom", "Current Row as a Table", each Record.ToTable([Current Row])),
#"Removed Other Columns" = Table.SelectColumns(#"Added Custom1",{"KeyColumn", "Current Row as a Table"}),
#"Expanded Current Row as a Table" = Table.ExpandTableColumn(#"Removed Other Columns", "Current Row as a Table", {"Name", "Value"}, {"Name", "Value"}),
#"Kept Errors1" = Table.SelectRowsWithErrors(#"Expanded Current Row as a Table", {"Value"}),
#"Added Custom2" = Table.AddColumn(#"Kept Errors1", "Custom", each try [Value]),
#"Expanded Custom" = Table.ExpandRecordColumn(#"Added Custom2", "Custom", {"Error"}, {"Error"}),
#"Expanded Error" = Table.ExpandRecordColumn(#"Expanded Custom", "Error", {"Reason", "Message", "Detail"}, {"Error.Reason", "Error.Message", "Error.Detail"}),
#"Removed Columns" = Table.RemoveColumns(#"Expanded Error",{"Value"})
in
#"Removed Columns"
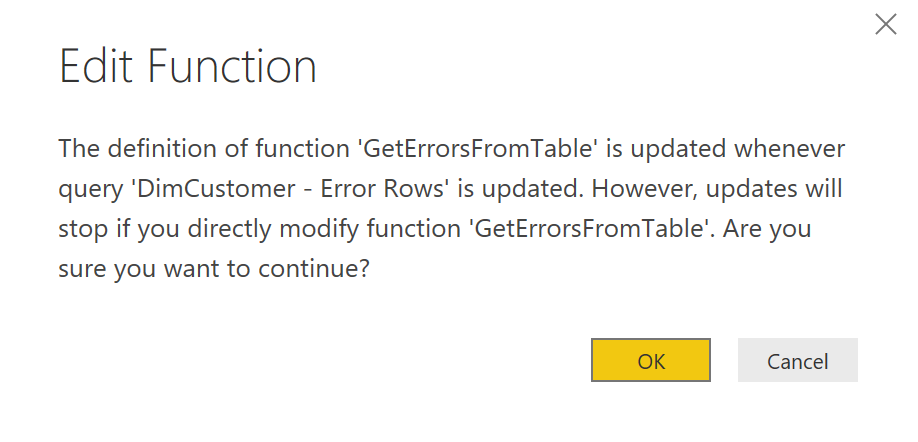
After making this change, you will see a message like below, confirm it with clicking on OK.
Calling the custom function
Now that you have created the function, you can easily call it, and get the error output. We won’t need the DimCustomer – Error Rows anymore to be calculated separately. Having that in the solution, means we will have two instances of the same code for detecting the error rows, which cause higher maintenance. Let’s remove DimCustomer – Error Rows;
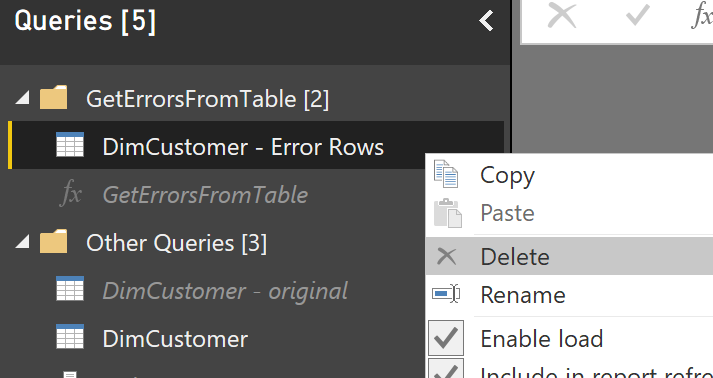
And we can create it this time by calling the GetErrorsFromTable function. Click on the function and set the parameters as below;
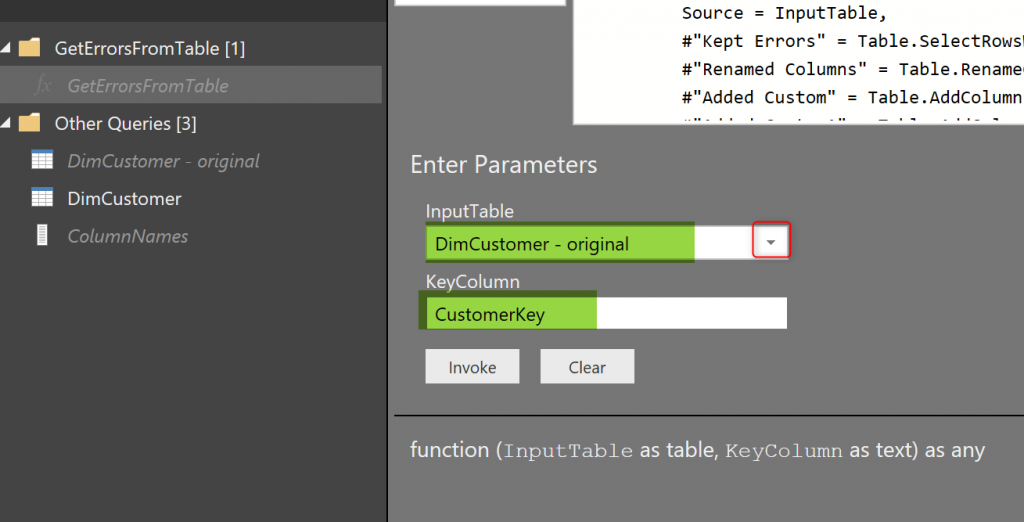
Note that you have to select the table in the InputTable drop-down list, and the KeyColumn is a case sensitive name. the output would be as below:
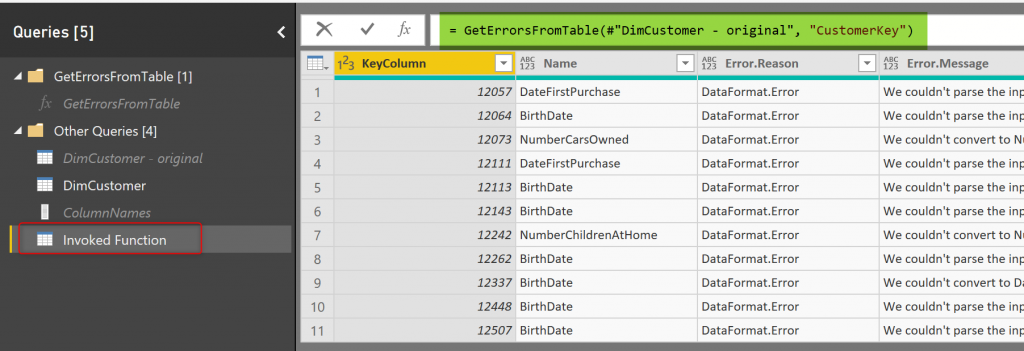
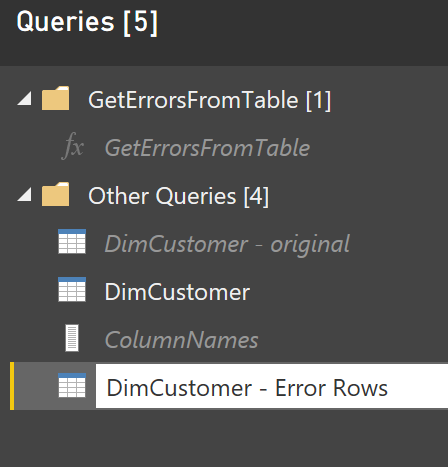
By just calling this function we get all error rows and error columns in the table. This Invoked Function name can now be renamed to DimCustomer – Error Rows.
Exception Report
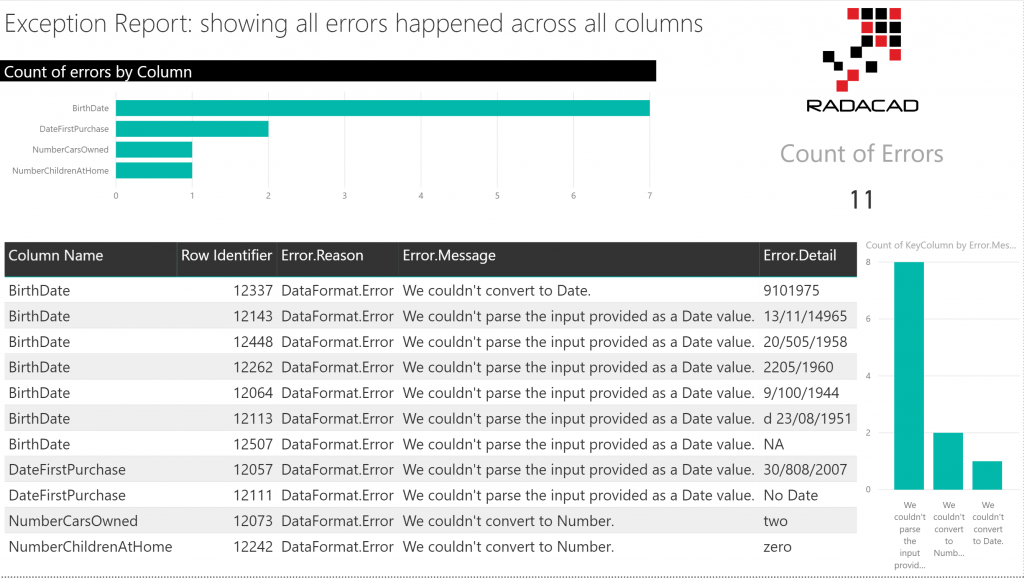
After doing all the back-end work, you can now build a report page with some visualizations that serve as an exception report.
Note that in the table output below the KeyColumn as actually a row identifier, and the Name is Column Name that caused an error.

I created a report with some visualizations that show the number of error rows by Columns and by some other factors;
Summary
In part 1 of exception reporting(link), you learned about how to do exception reports for one column in your dataset table. In part 2, you learned how you can achieve an exception report even if you don’t know which column causes the error. This new method will search through all rows and all columns that cause the error. The method implemented in this article ended up with a function that you can use for any table to get the error rows output.
Read more
It would be beneficial to read the first part of Exception Reporting in this article here.
The second part of Exception Reporting, which is the first section of Exception Reporting for all columns in a table here.


Nifty.
Amazing article with a lot of good info shared with the Data Community! Thanks!
Remarkable. Thanks!!!