
In the last post, I have shown how to create a simple Bot.
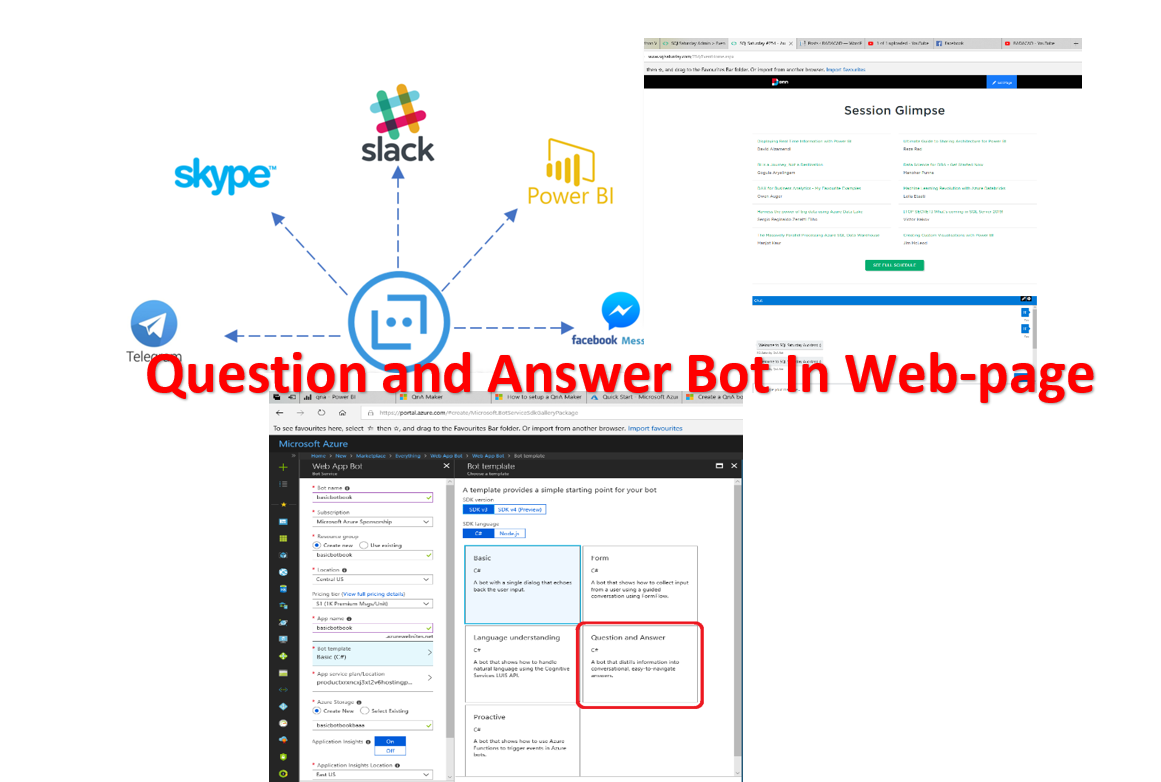
In this post, I am going to show how to create a Question and Answer Bot and embed it in a website.
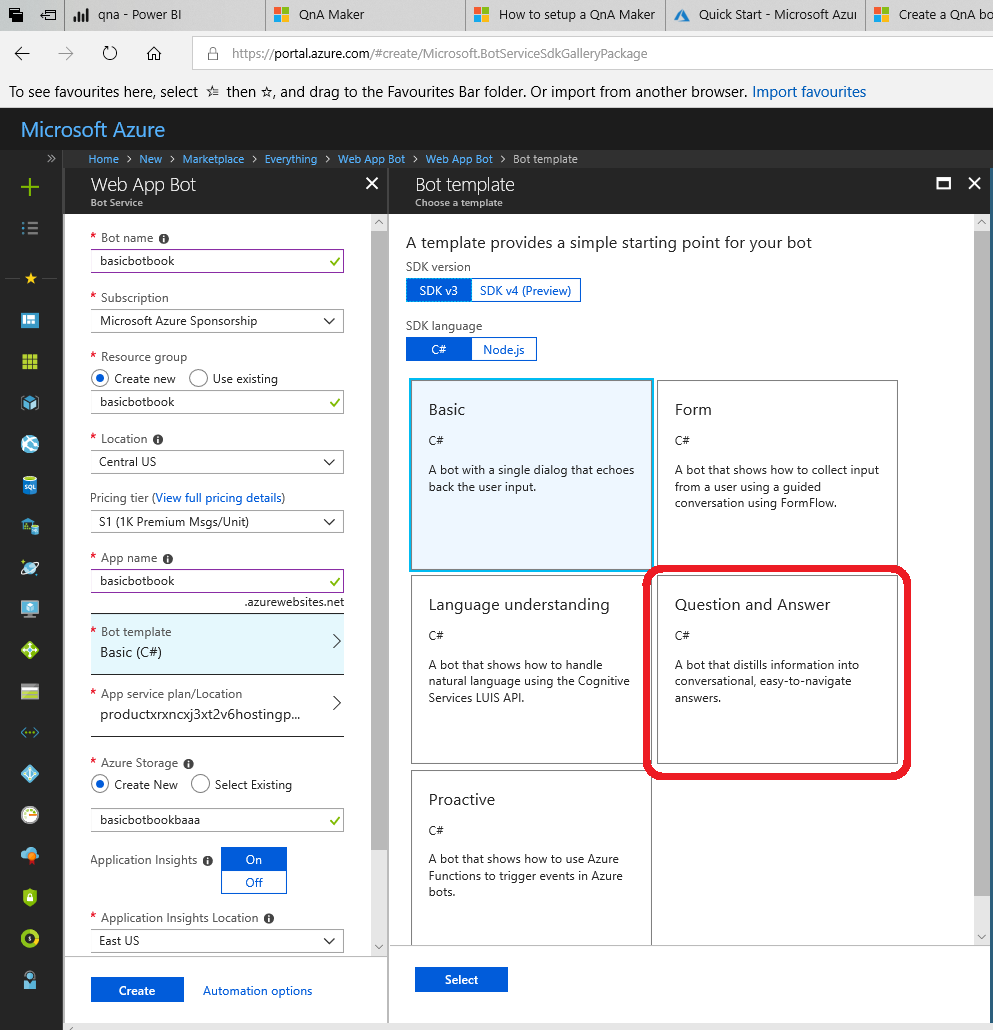
To start you need to create a Web App Bot in Microsoft Azure with Bot Template as Question and Answer.
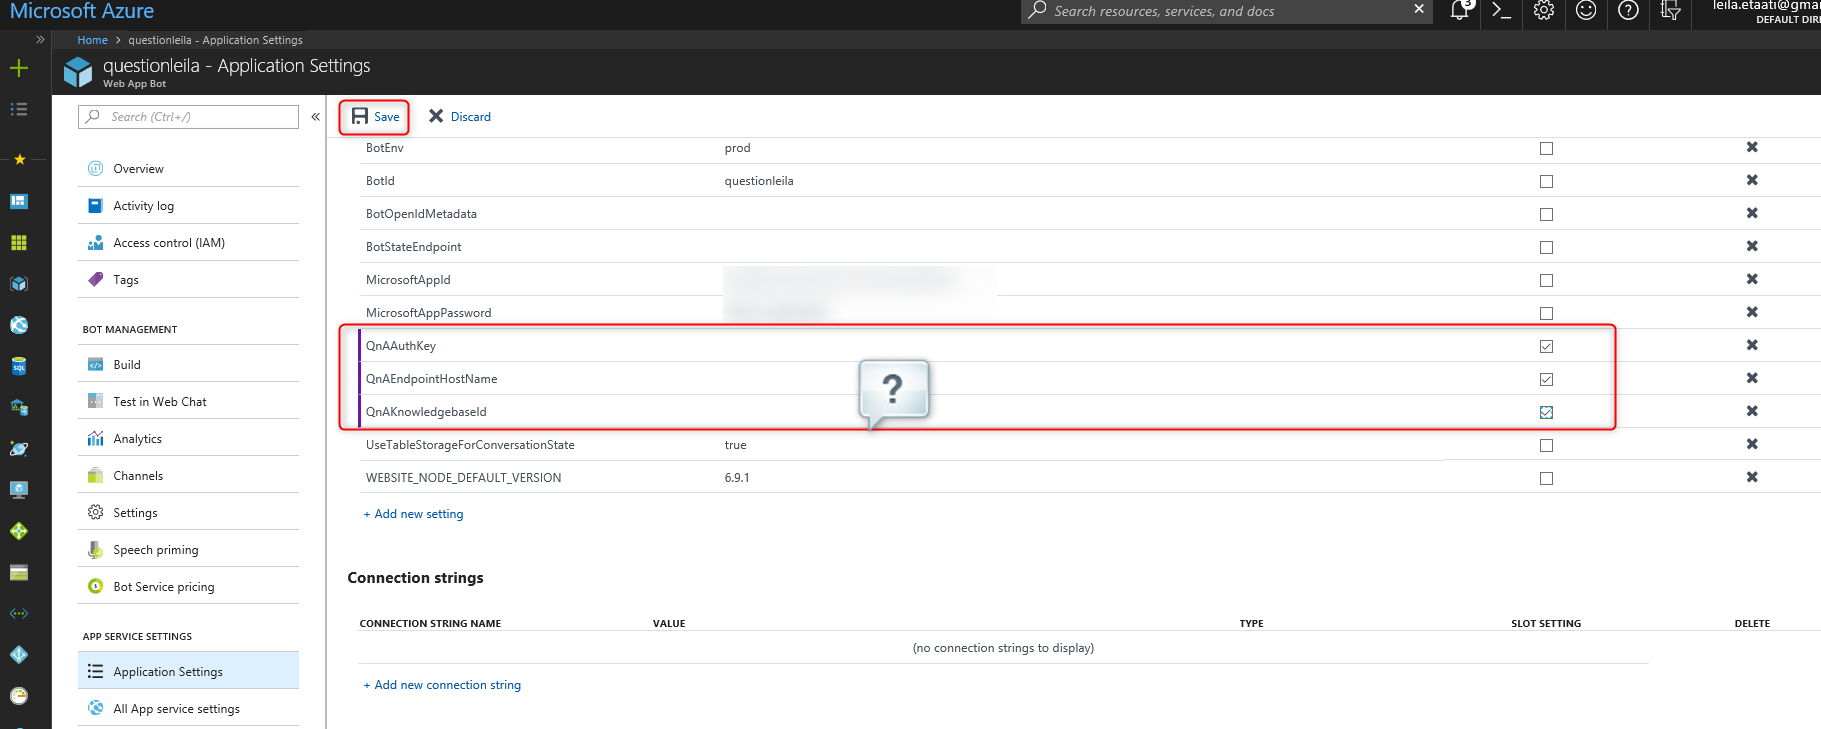
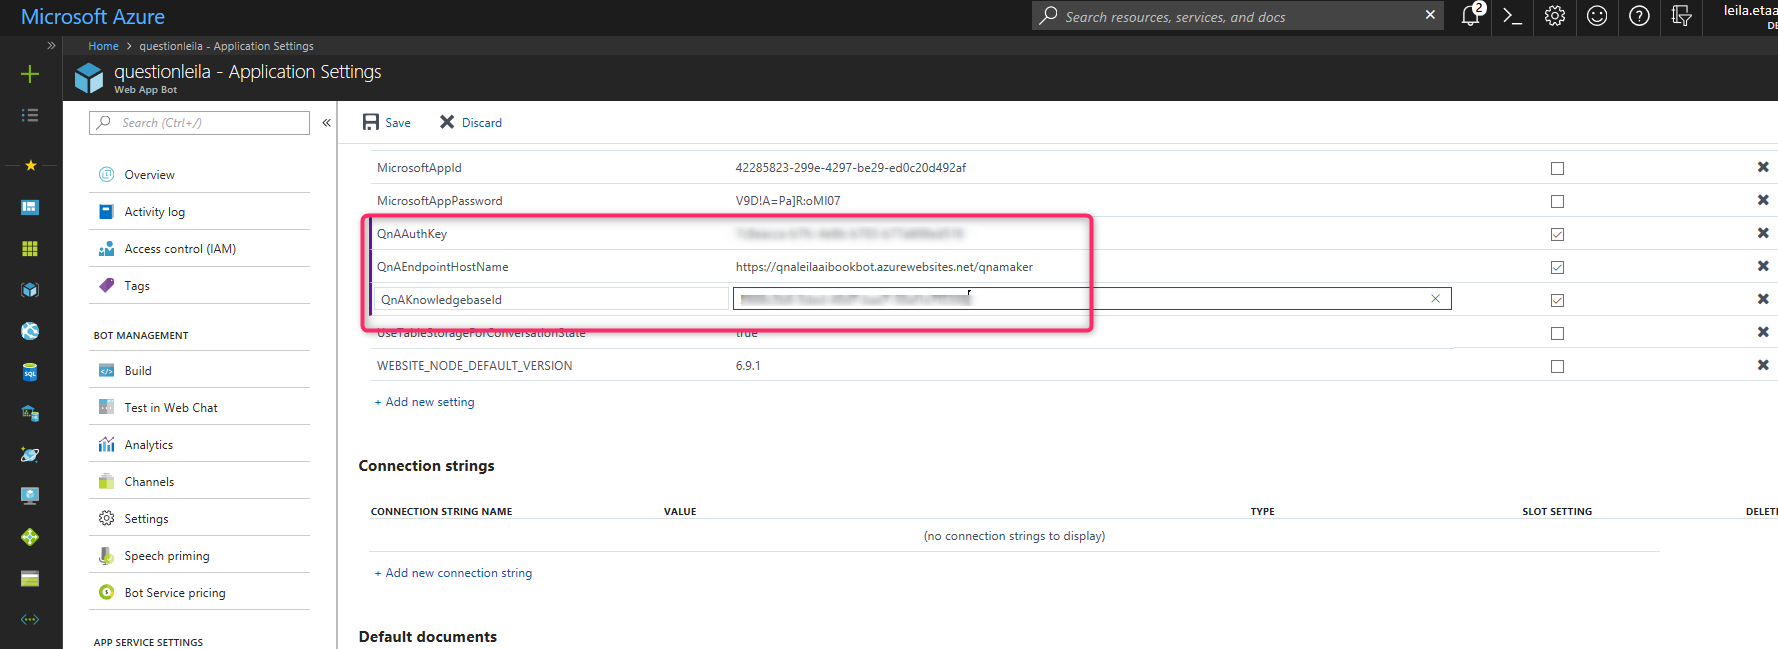
After creating the Web App Bot, you need to set up App Service Setting.
Click on the Application Setting, there are four different parameters under the Application Settings: The QnAAuthKey, QnAEndpointHostName, and QnAKowledgebaseid.
To set these parameters, we need to create a Question and Answer Knowledgebase.
to create Knowledgebase navigate to the website: https://www.qnamaker.ai/
in the website click on the Create a Knowledge Base.
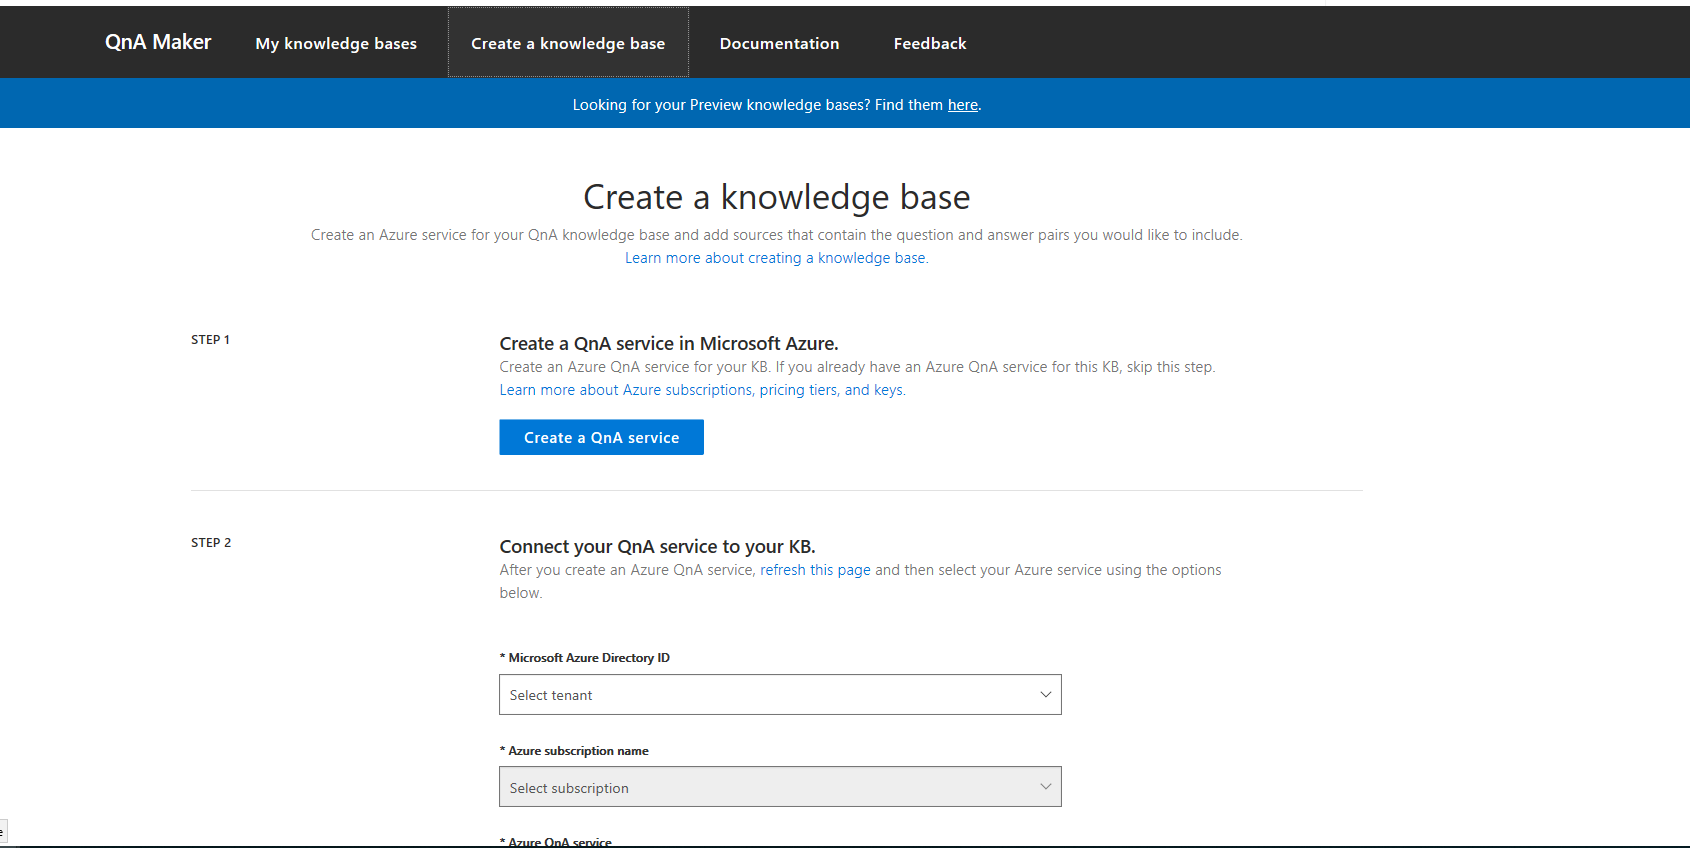
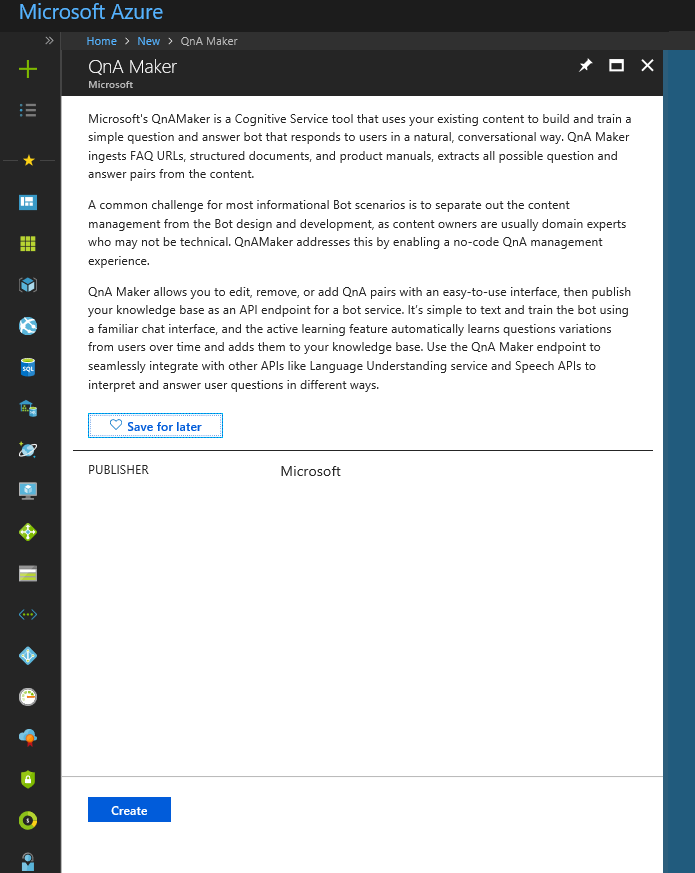
You need to create a Cognitive Service, for QnA in Azure First.
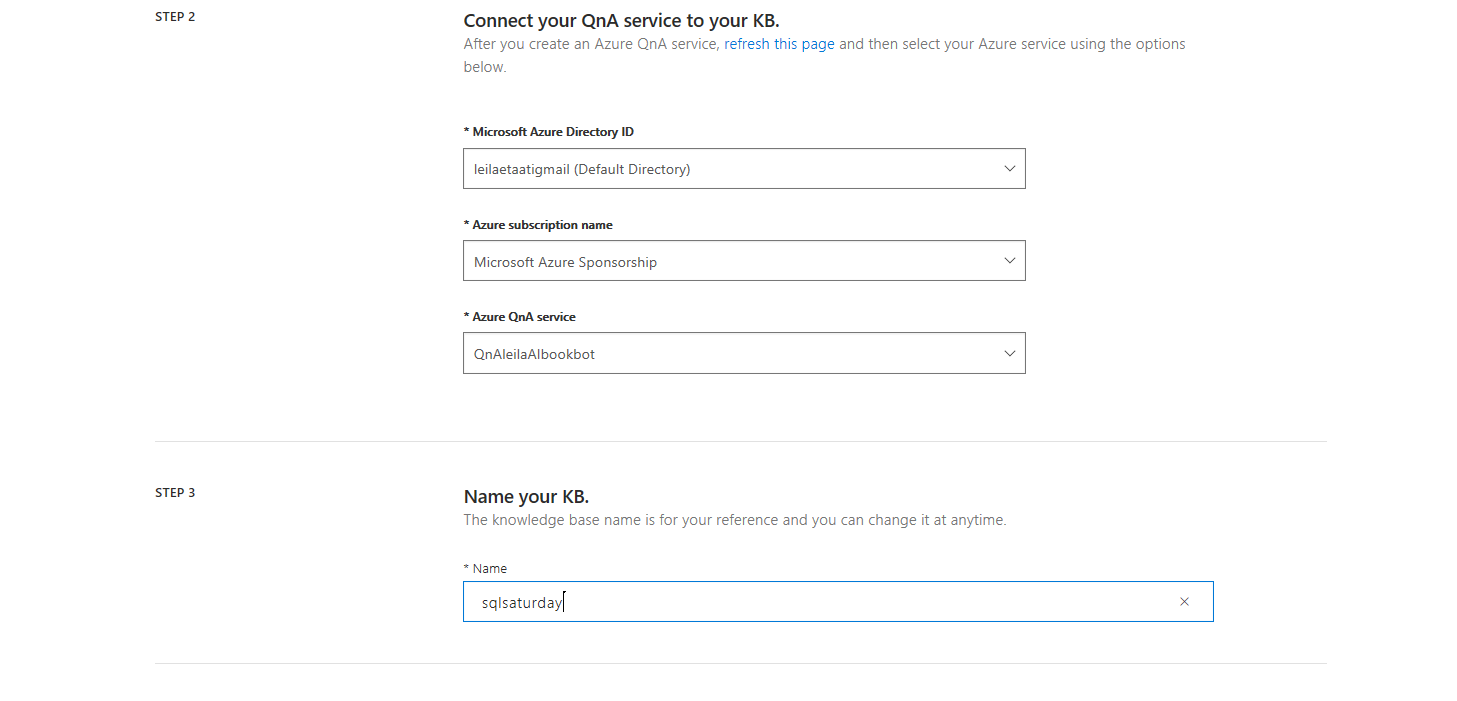
Now, you need to set the knowledge base, putting the proper name and assign the Azure specification. Now you need to back to the https://www.qnamaker.ai/
In the Populate your KB, there are two option: Url and File input. you able to pass the frequent questions to the website in the format of TSV, PDF, Doc, Xlxs. The form can be uploaded to the web or it can be accessible via uploading the file.
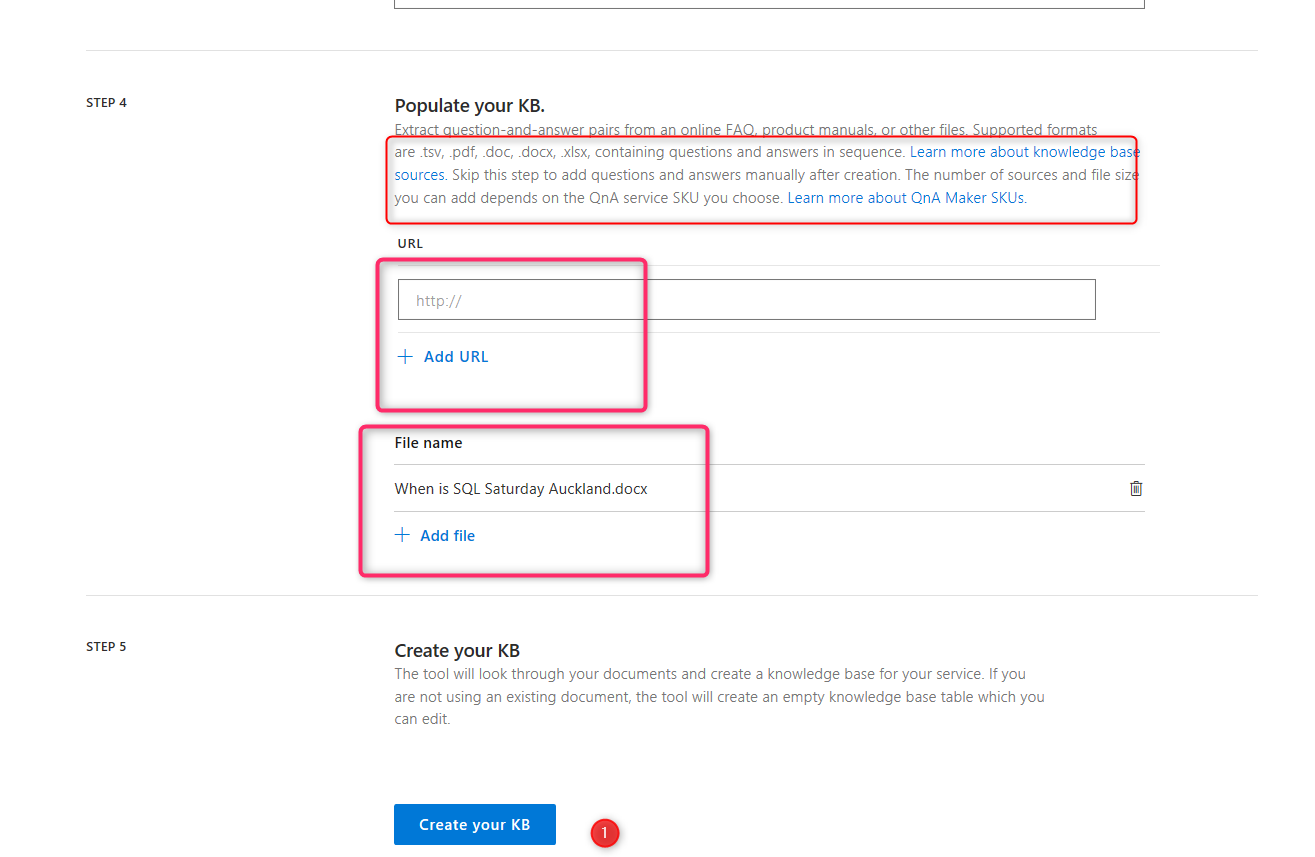
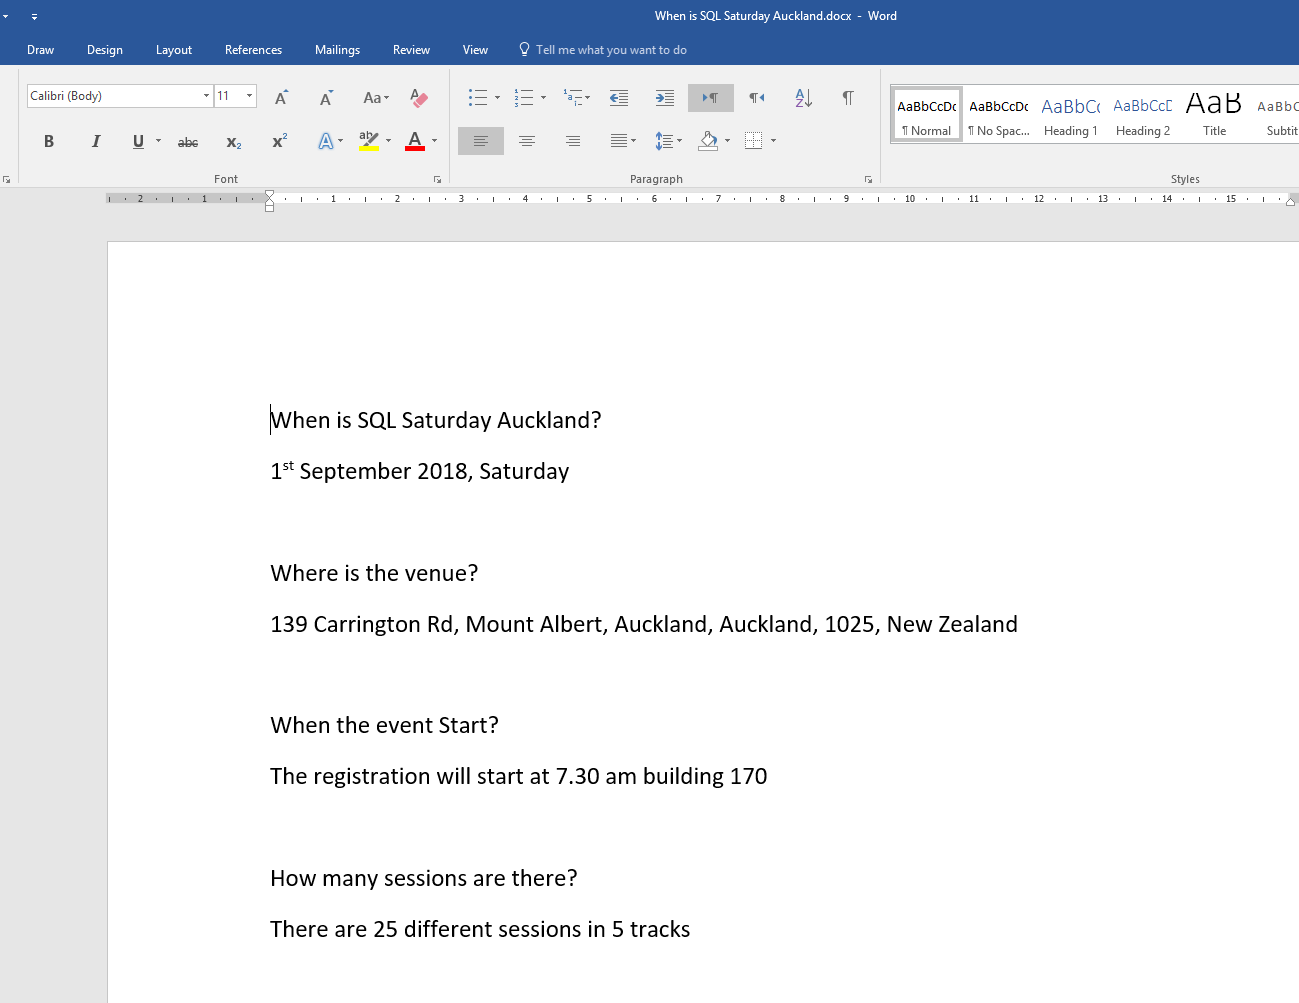
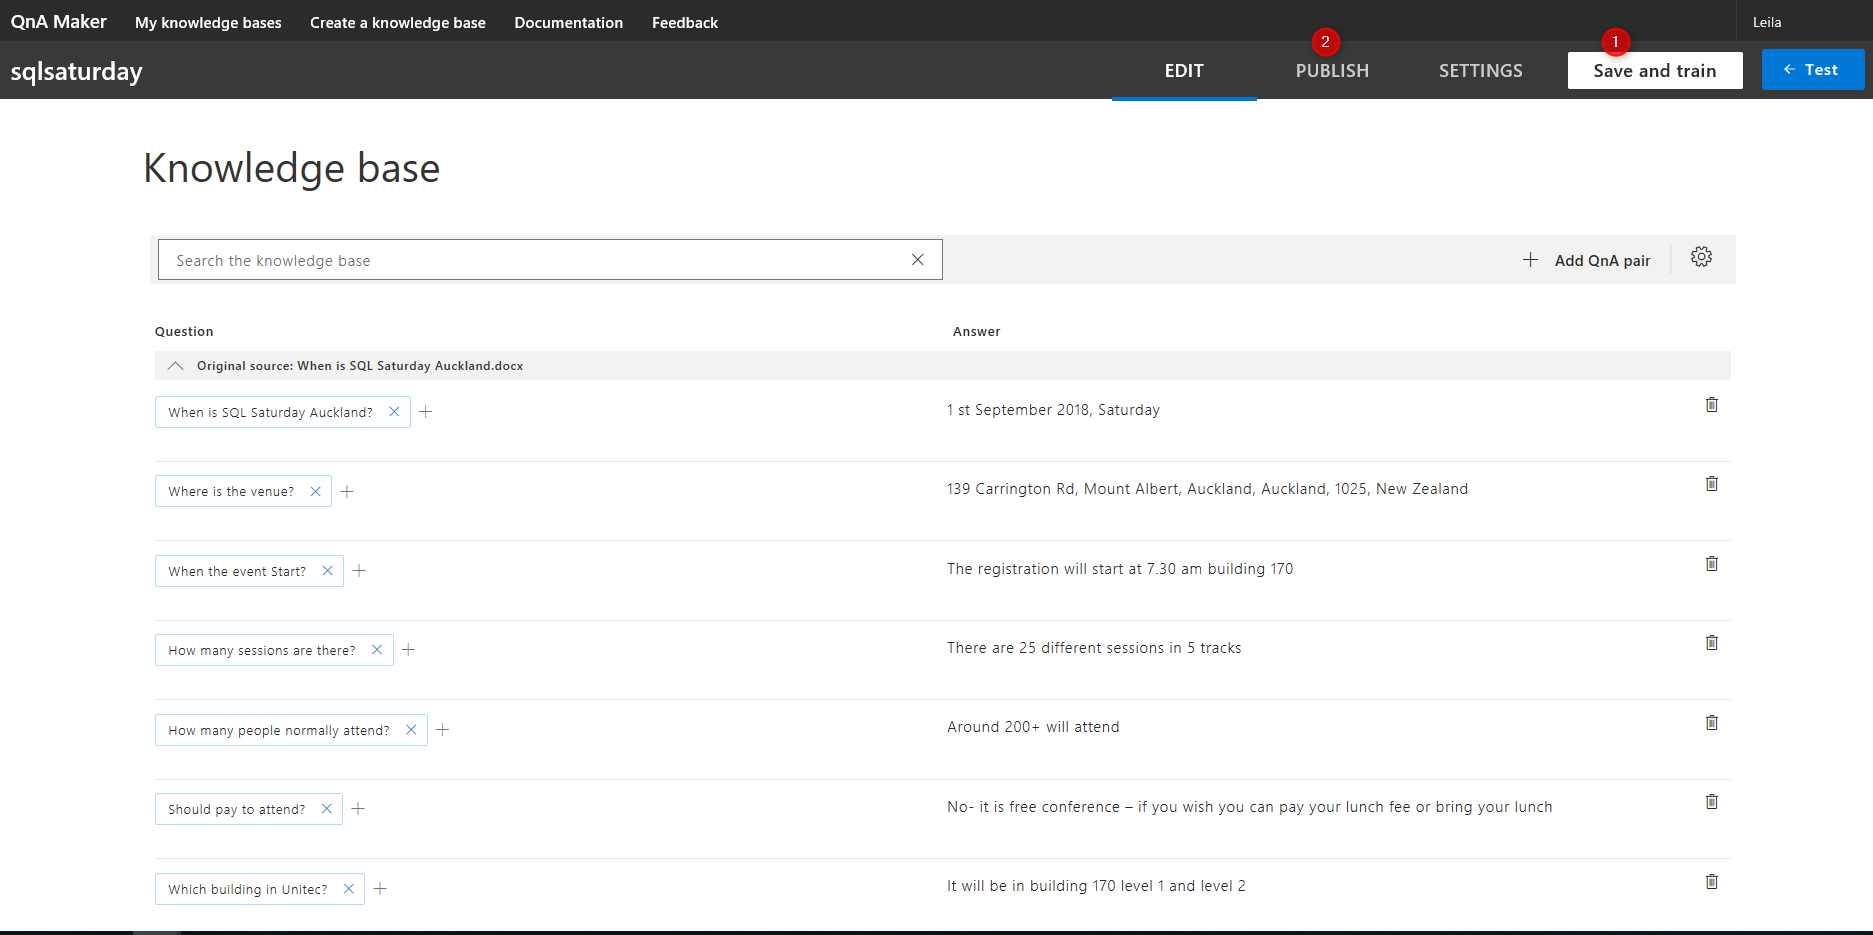
I am going to create a knowledge base for a conference, so everybody able to search for some frequent questions such as: Location, what time start, where to park, what accommodation and so forth. For this aim, I created a word documents to write these frequent question there.
After creating this document, I need to upload it to the qnamaker website.
After uploading the frequent question word document into the website, the preview of the questions and answer will be shown. There is a possibility to add more question and answer.
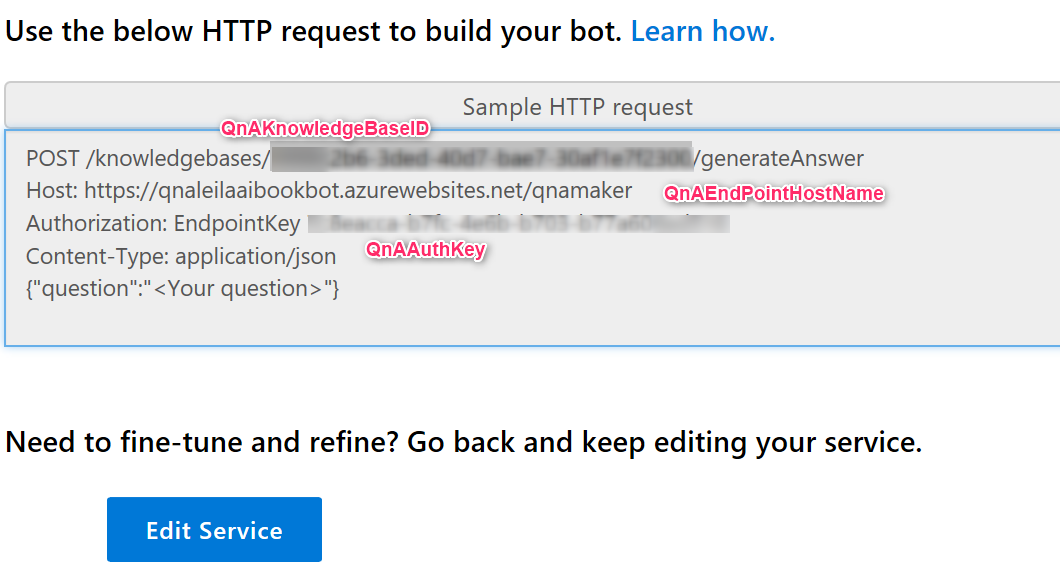
Now you need to save and train, and finally publish it. After publishing the QnA, the required fields will be shown up. As you can in see in the below picture, the knowledge base ID, endpoint hostname, and authentication key.
Now, you need to put the below keys in the Web App Bot.
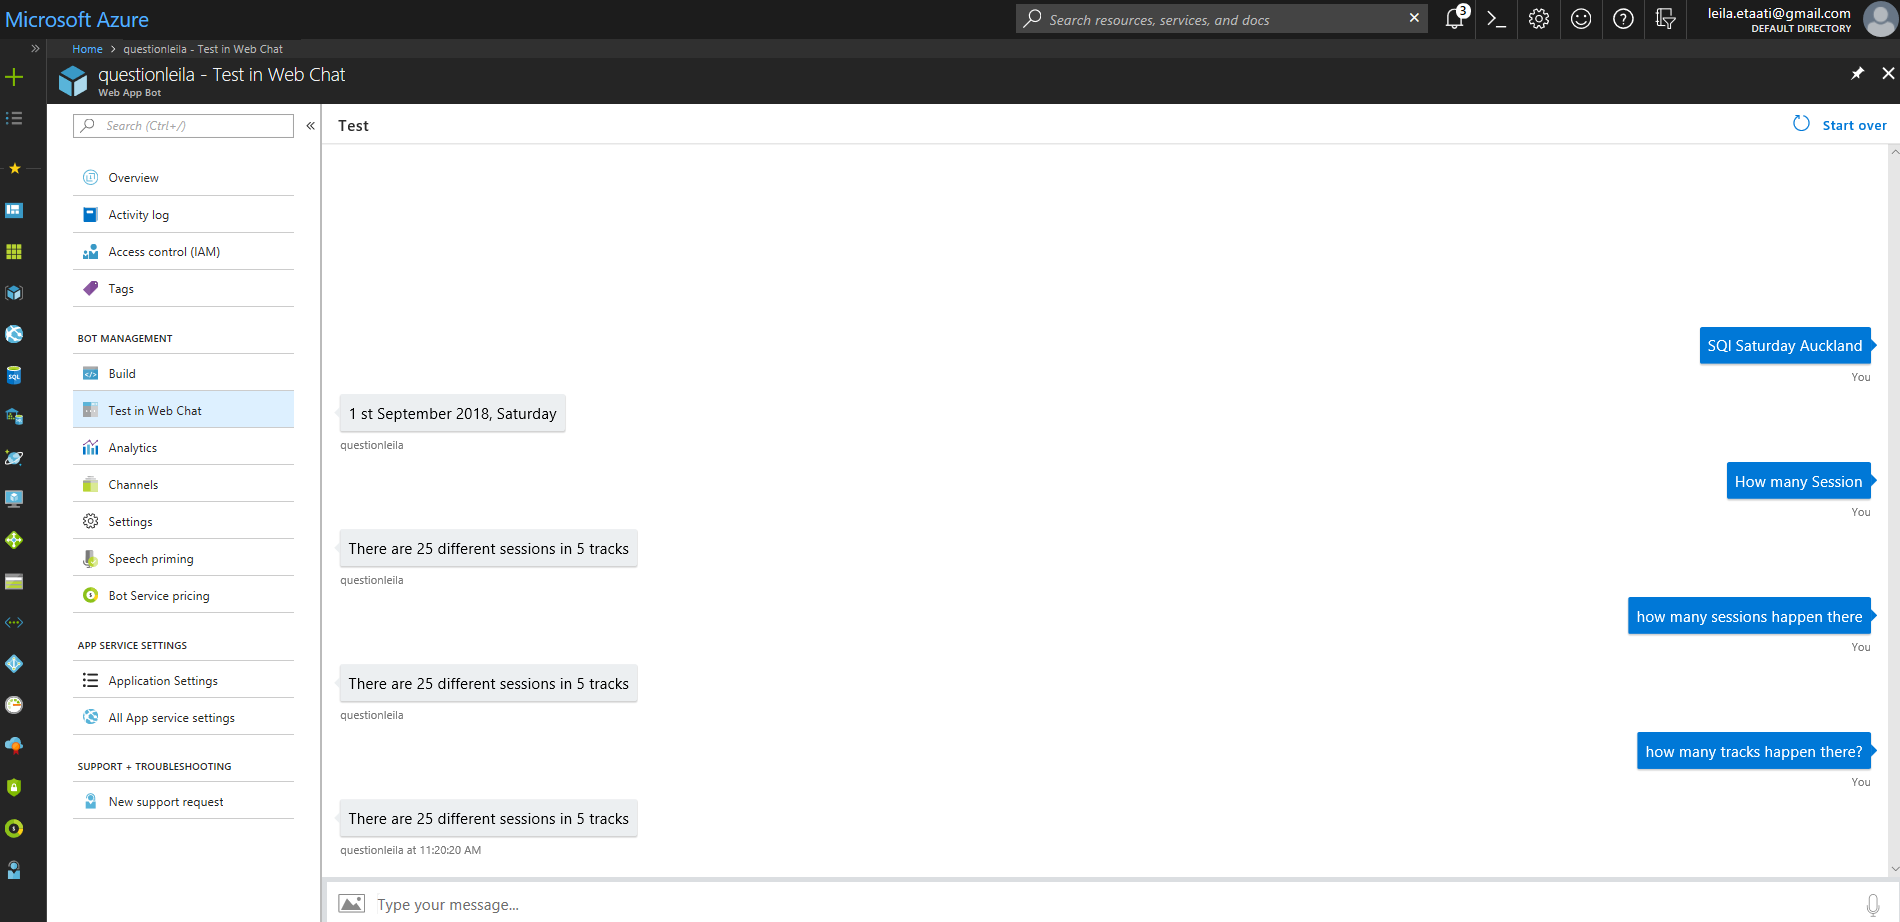
Now you need to check the app in the Test in Web Chat.
As I have explained in the last post, you able to embed the Bot in the Power BI, Telegram, or any website as below.

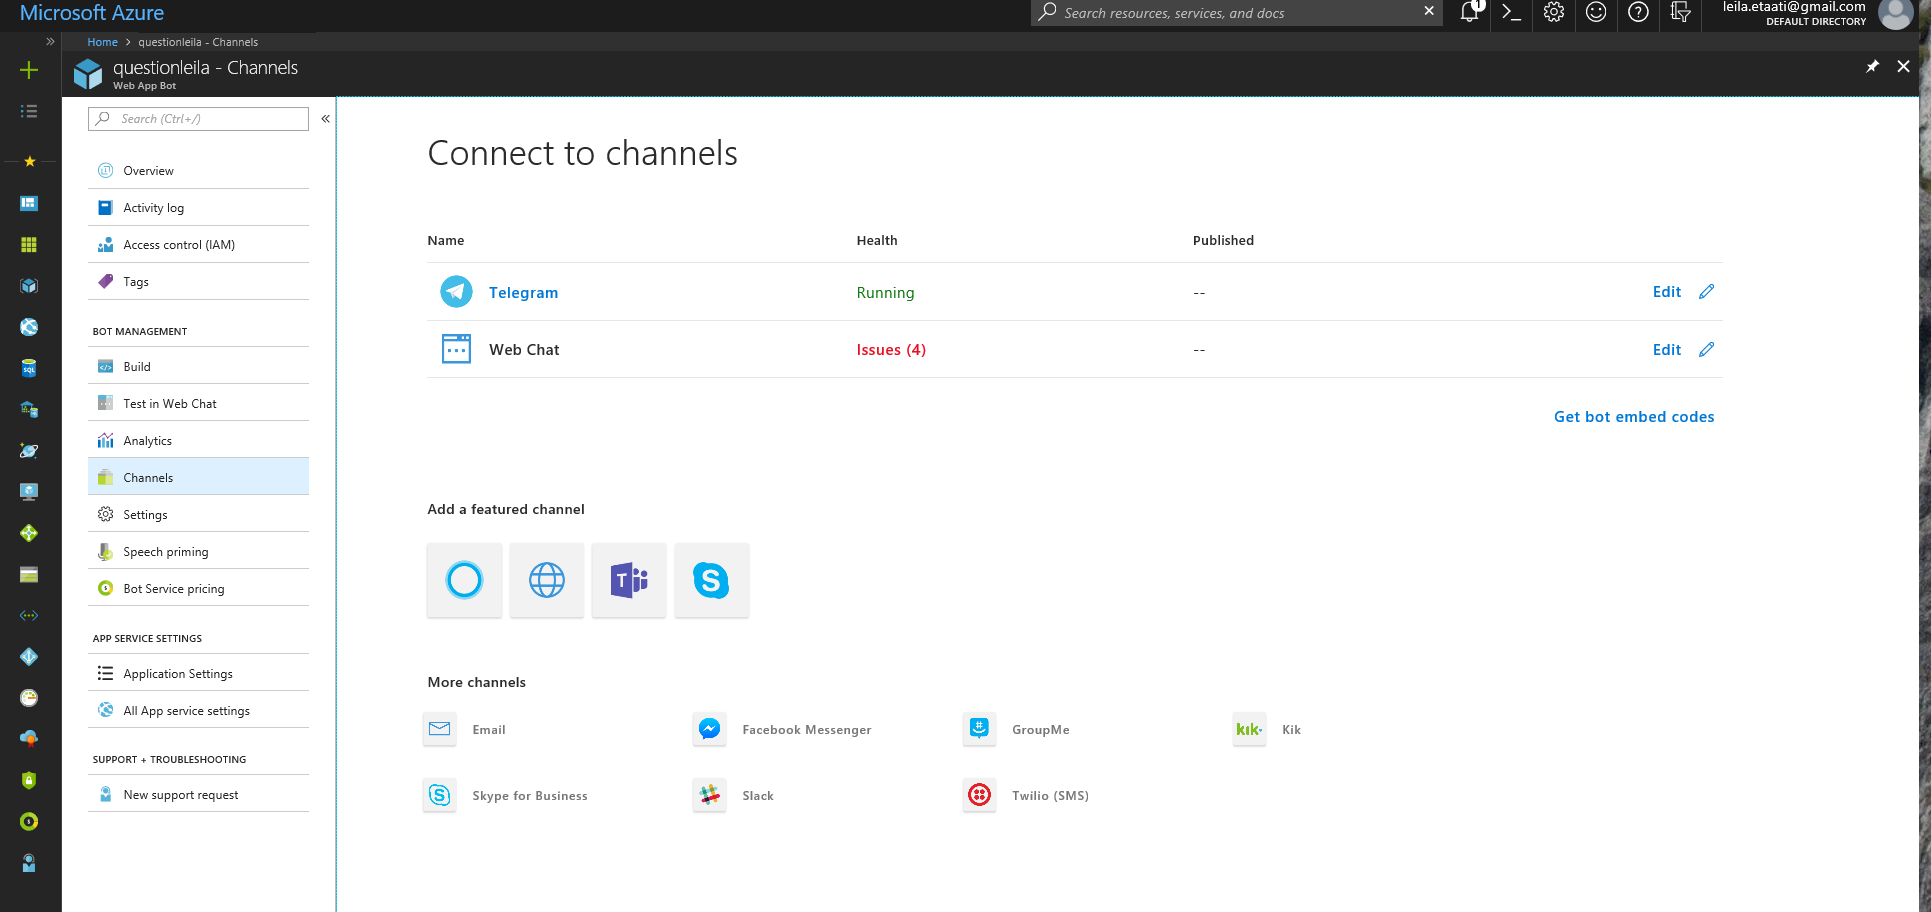
Now, to connect it with telegram you need to get some Access Token from your telegram and put it in the requested field.

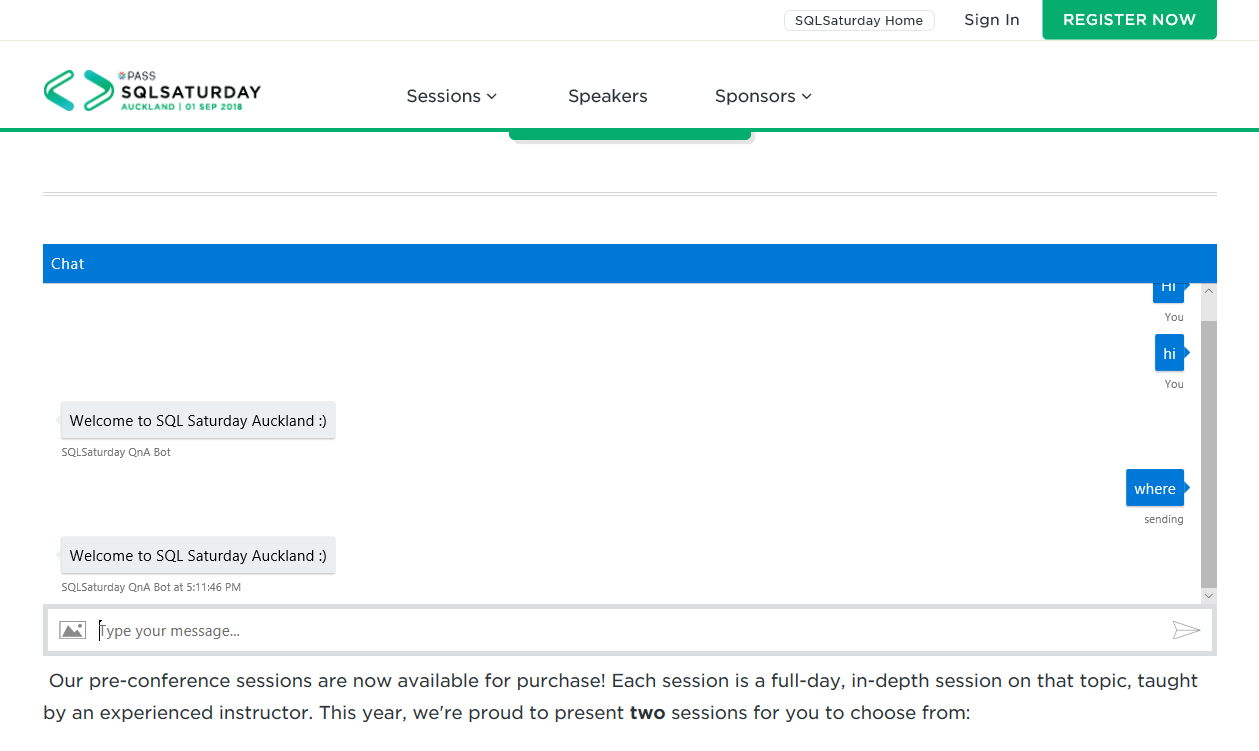
Now you need to put the key and embed the HTML code in the website.
<iframe width=”100%” height=”400px” src=”https://webchat.botframework.com/embed/questionleila?s=Secret Key”></iframe>
I recorded the process in a video: https://www.youtube.com/watch?v=5HGd6hQ49SE&t=6s


