
Microsoft Fabric is an end-to-end Data and Analytics software-as-a-service cloud offering by Microsoft. One of the important objects of Microsoft Fabric is Lakehouse. In this article and video, you will learn what Microsoft Fabric Lakehouse is and how to create it, load data into it, and read data from it.
Video
What is Microsoft Fabric?
Microsoft Fabric is an end-to-end data and analytics Saas cloud suite announced recently by Microsoft. To learn more about it, read my article below;
When we talk about data, there should be a structure to store the data. Lakehouse is one of the objects in which you can store data (logically). Let’s understand more about it in this article.
What is a Lakehouse?
The term Lakehouse is derived from two other words; Data Lake and Data Warehouse. A Lakehouse is a place to store structured data (such as Data Warehouse) and unstructured data (such as a Data lake) in a single location. Lakehouse is capable of scaling up to handle large amounts of data. Other tools and services can be used to interact with the lakehouse, for example, to load or read data into it.
In simple words, consider a Lakehouse like a database that not only you can store tables in it but also you can store files in it.
Creating a sample Lakehouse
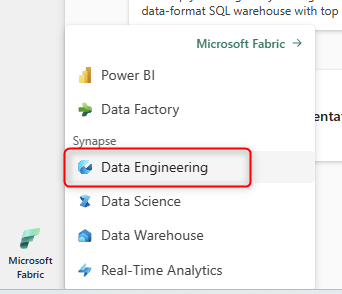
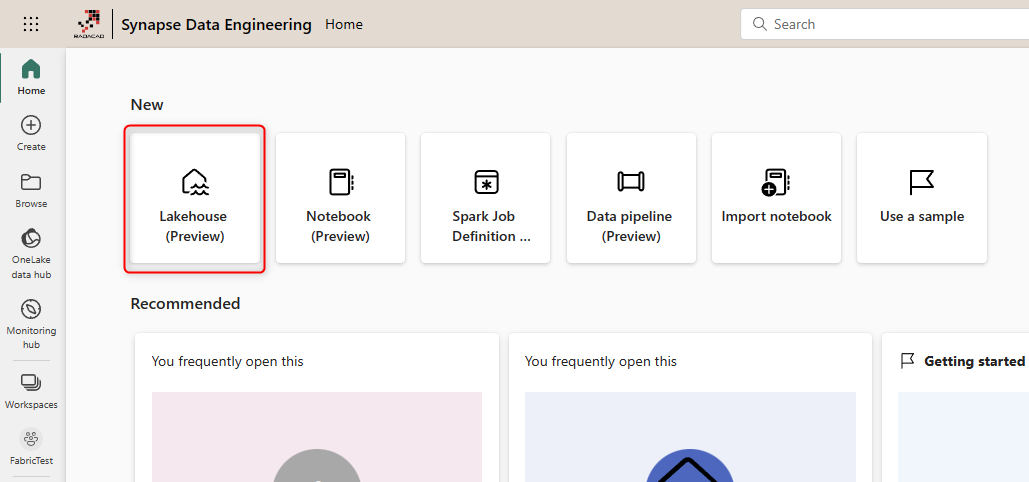
A Lakehouse is an item in the Data Engineering workload of Microsoft Fabric. To create it, you can go to the Microsoft Fabric portal and then navigate to the Data Engineering home page.
If you don’t have Microsoft Fabric enabled in your organization, my article here would help you to enable it.
On the Data Engineering home page, you can create a Lakehouse. Note that to work with these objects, you have to be in a workspace with a Microsoft Fabric license assigned to it.
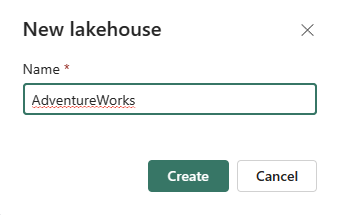
Assign a name to the Lakehouse and then create.
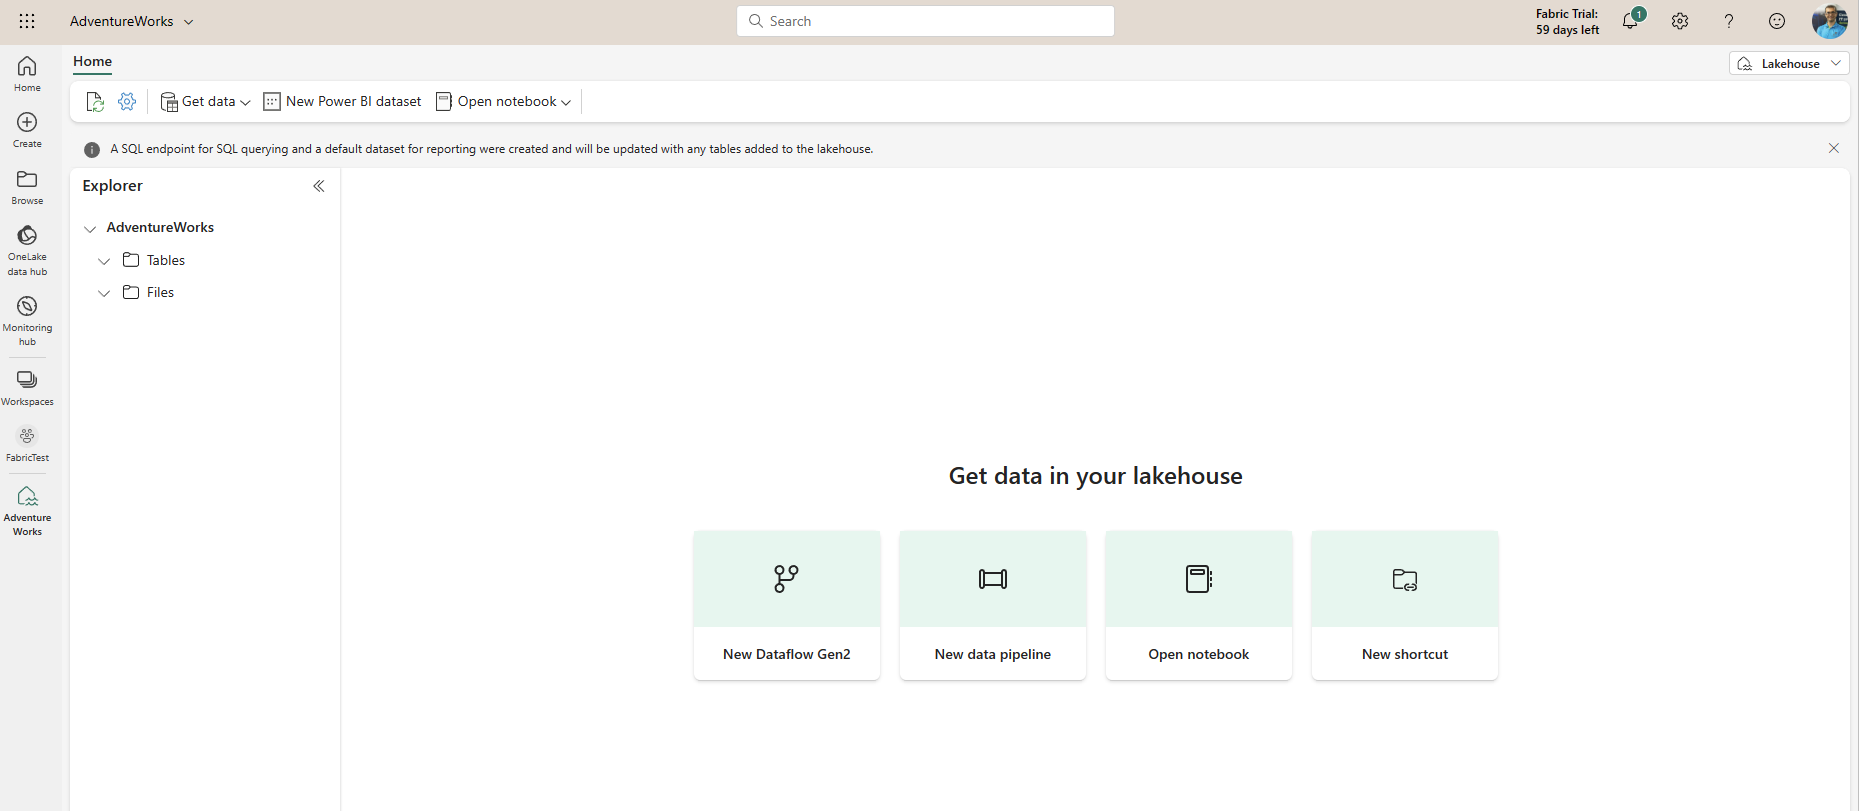
The creation of the Lakehouse is done!
The Lakehouse is now created. It doesn’t have any tables or data in it. So we are going to add that to it shortly.
Load data into Lakehouse
You can load data into the Lakehouse in a few ways. Any of the methods below can be used to load data into the Lakehouse;
- Dataflows Gen2
- Data pipelines
- Notebooks
- Apache Spark job definitions
- the Lakehouse explorer
The Lakehouse Explorer is what you see when you create the Lakehouse. In this same environment, you can upload a file into the Lakehouse. Or you can use any other methods mentioned above to load files or data into the Lakehouse.

Sample Data Load using Dataflow Gen2
Dataflow Gen2 itself requires other articles and videos to explore. However, this short example shows you how to create a simple Dataflow Gen2 to load data into our sample Lakehouse.
Start by creating a new Dataflow Gen2. This can be created from the Lakehouse Explorer itself, or it can be done from the Data Factory home page in the Microsoft Fabric portal.
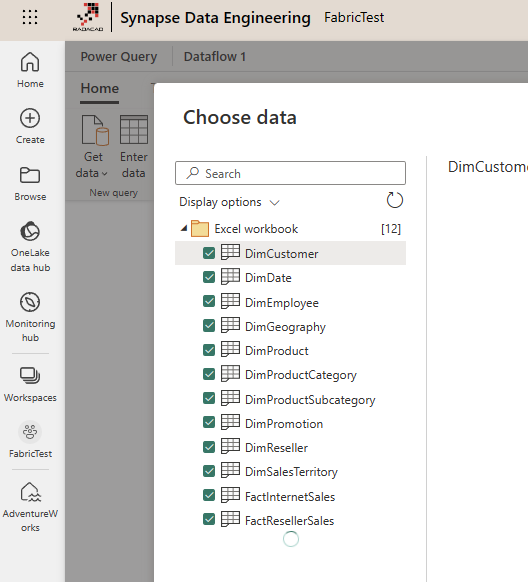
In the Dataflow editor, start by getting data from a source. I use an Excel file in my OneDrive for Business as a source.

I use the AdventureWorksDW Excel file and select a few tables from there,
In the Dataflow editor, you can apply transformations before loading the data into the Lakehouse. However, For simplicity, I want to load it as is. For this, you can set up a data destination: Lakehouse.
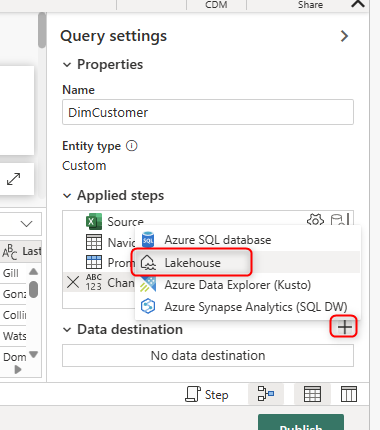
You can then navigate to the Lakehouse you just created (after entering the credentials if the Lakehouse is created by others and shared with you). Note that your Lakehouse will appear under a folder, which is your Workspace name. An interesting thing here is that the Lakehouse destination navigator shows all the folders in OneDrive for Business, which shows the concept of Lakehouse being a place for storing files too.
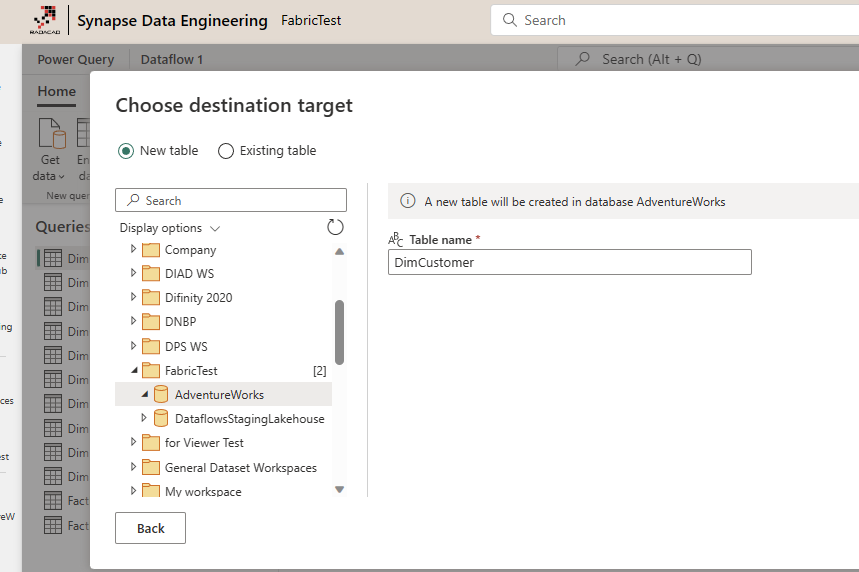
You can choose the method to load data to be Replace (for loading whole new data) or Append (to append it to the old data). For simplicity, I use Replace.
Then apply the same settings for every other table in the Dataflow, and finally, publish. You should see these objects now in your Workspace, Lakehouse, with a Staging Lakehouse plus the Dataflow.

You have to then Refresh the Dataflow to get the data loaded into the Lakehouse. The Publish of Dataflow won’t load the data.

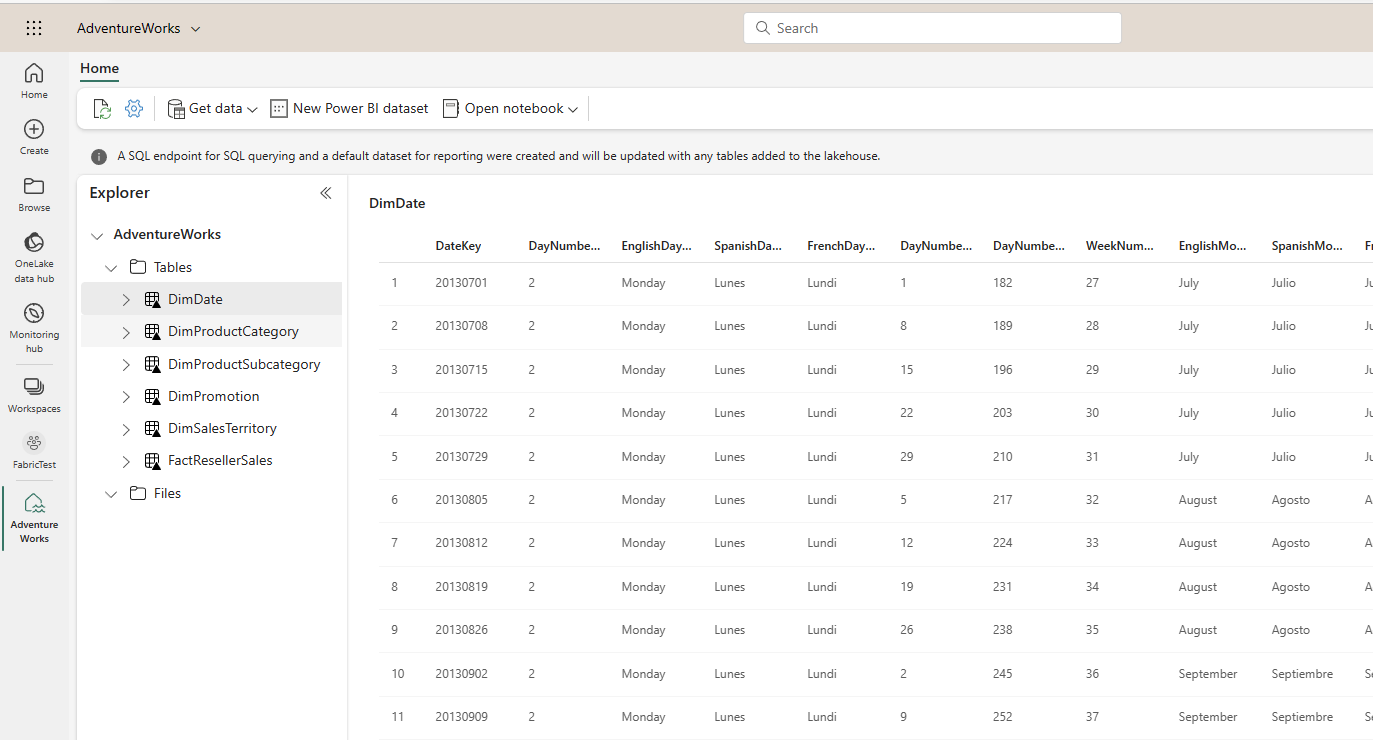
Once the refresh is completed, navigate to the Lakehouse Explorer by clicking on the Lakehouse name.
As you can see, our sample Lakehouse now has the data, which is explorable using the Lakehouse Explorer.
In addition to the tables above, a Lakehouse can contain files too.
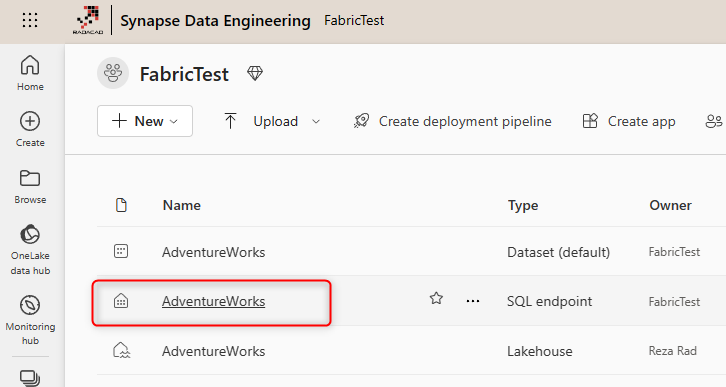
SQL Endpoint for Lakehouse
I mentioned previously that the Lakehouse is a combined Data Warehouse plus Data Lake. A Lakehouse allows you to write SQL codes to query the data in its tables. This is called SQL Endpoint.
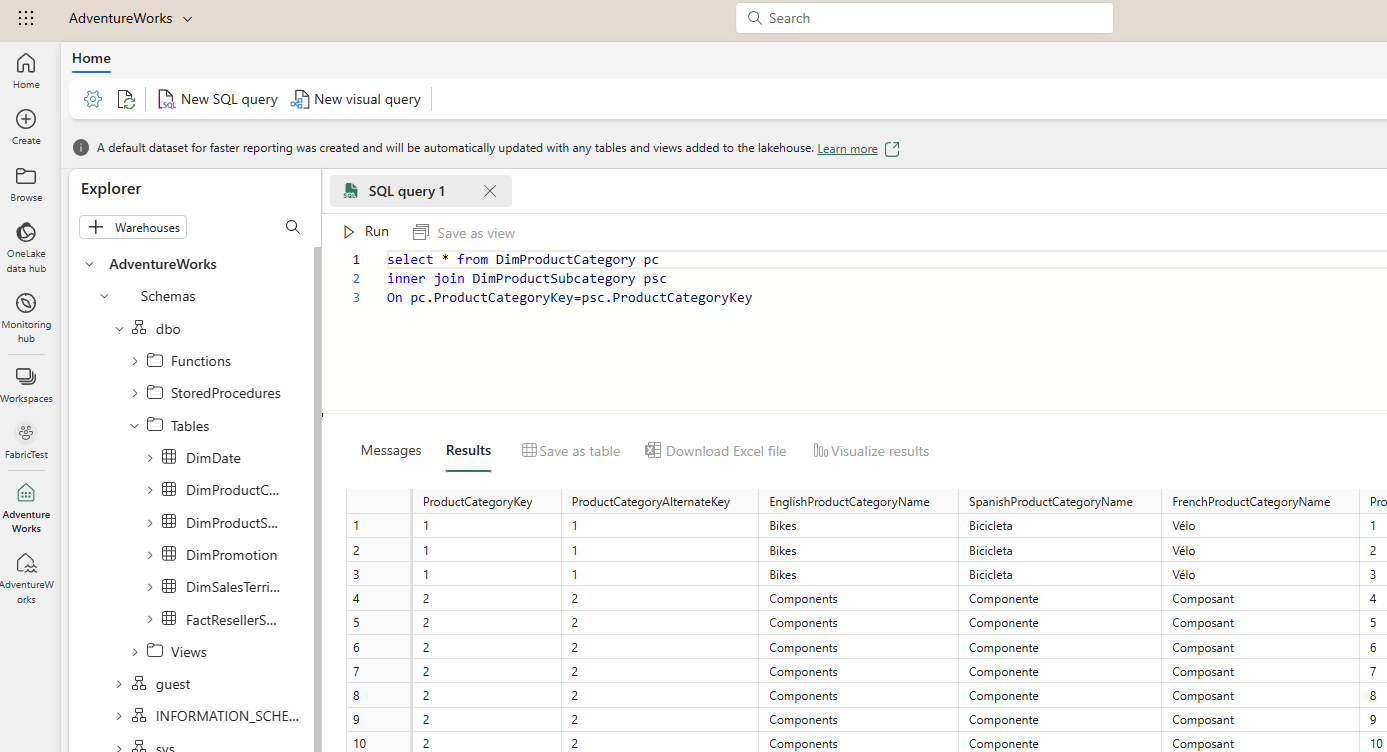
The SQL Endpoint, however, only allows querying the data from the Lakehouse, not inserting, updating, or deleting the data. This is one of the differences between the SQL Endpoint of Lakehouse vs. Data Warehouse.
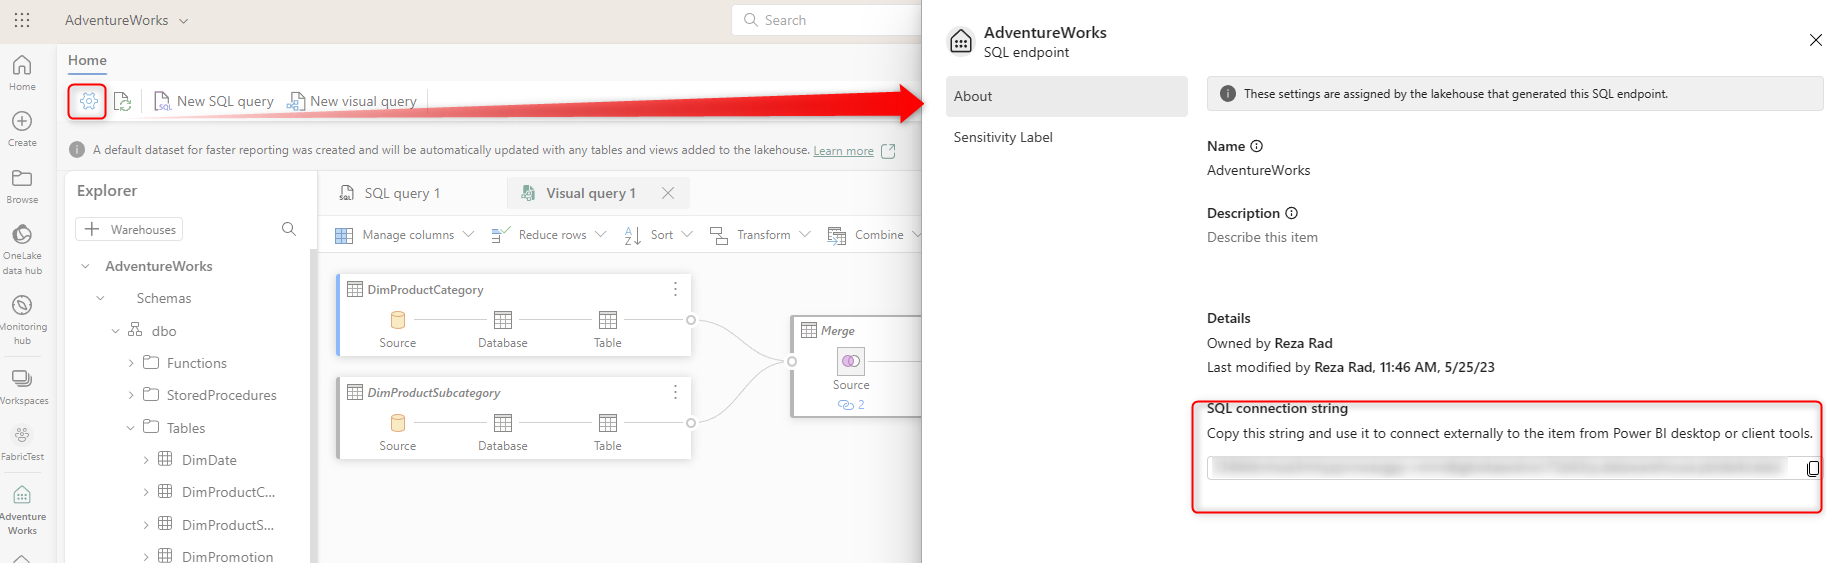
You can access the SQL Endpoint directly from the Workspace, by clicking on it.
This will open a SQL editor where you can write SQL queries. Note that you won’t have all the SQL functionality, but you can do the most querying functions.
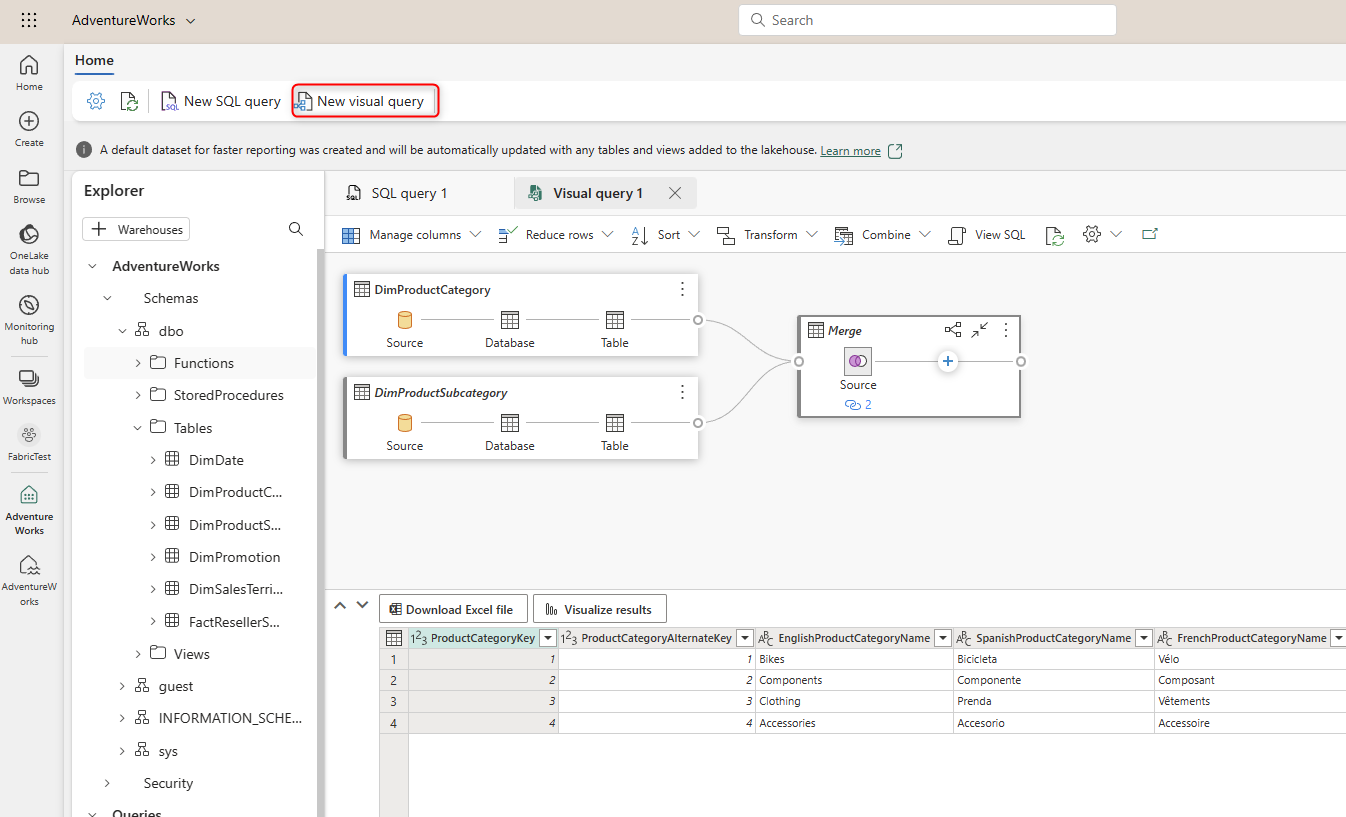
You can also use the Visual query editor, which will be Power Query editor.
And you can also get the connection string of the SQL Endpoint for the Lakehouse so that you can connect to it from other tools such as SSMS (SQL Server Management Studio). The connection string can be found under settings, SQL Endpoint.
Power BI, Get Data from Lakehouse
In addition to reading data from Lakehouse using the SQL Endpoint, you can use other tools, such as Power BI, to read from it and visualize the data.
To start, Get data from Lakehouses in the Power BI Desktop.
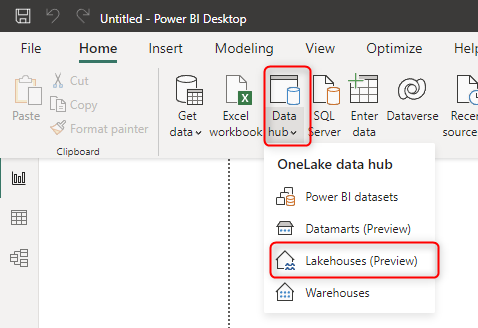
Then you can choose the Lakehouse. You also have the option to connect to the SQL Endpoint of it (which in this case, it would bring the option to Import the Data or use a DirectQuery connection to the Lakehouse).
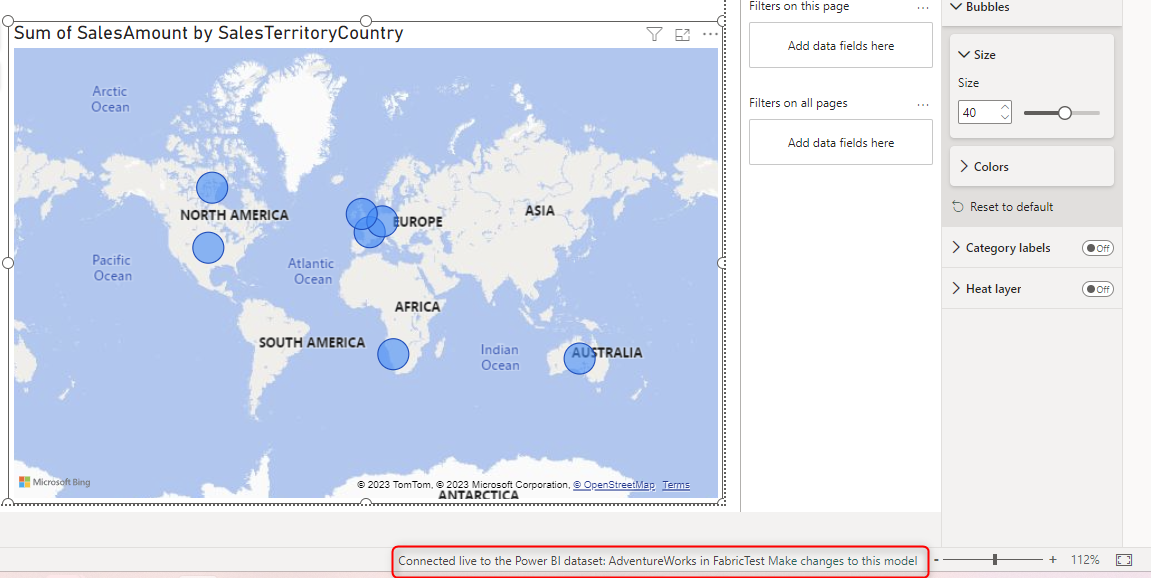
When you connect to the Lakehouse, you are actually connecting to a Dataset that is automatically created for it. The Power BI report will have a live connection to that dataset.
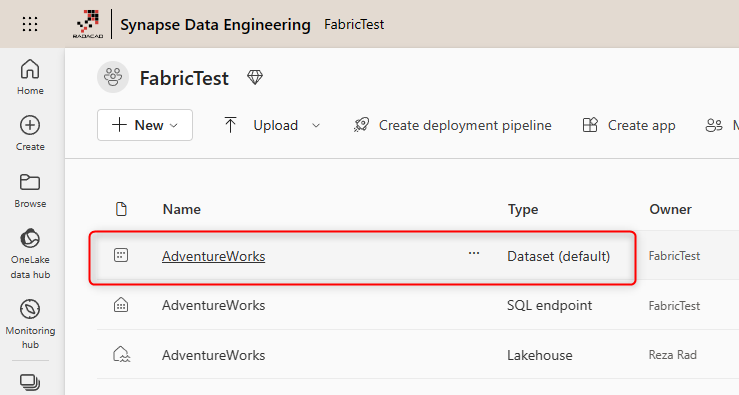
When you look at the Workspace that the Lakehouse exists in it, you will notice a Dataset automatically created there.
This is in some ways very similar to the Power BI Datamart experience which I explained here.
If you want to edit this auto-generated dataset, you can go back to the SQL Endpoint, and manually update it from there.
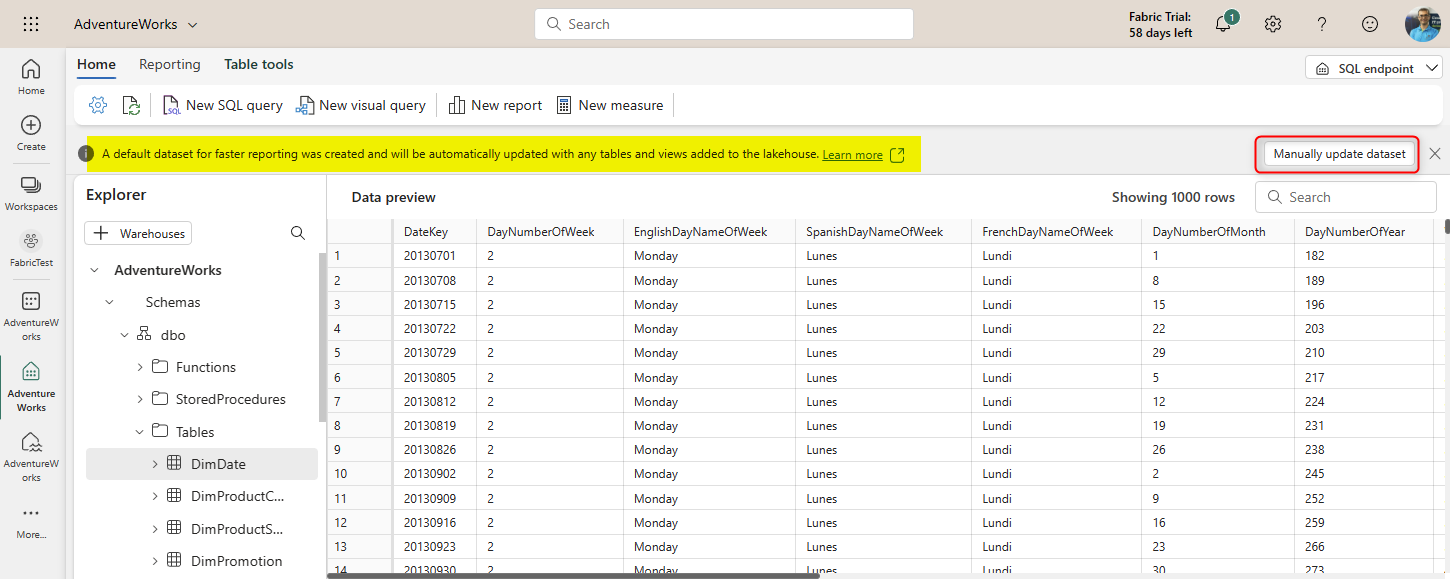
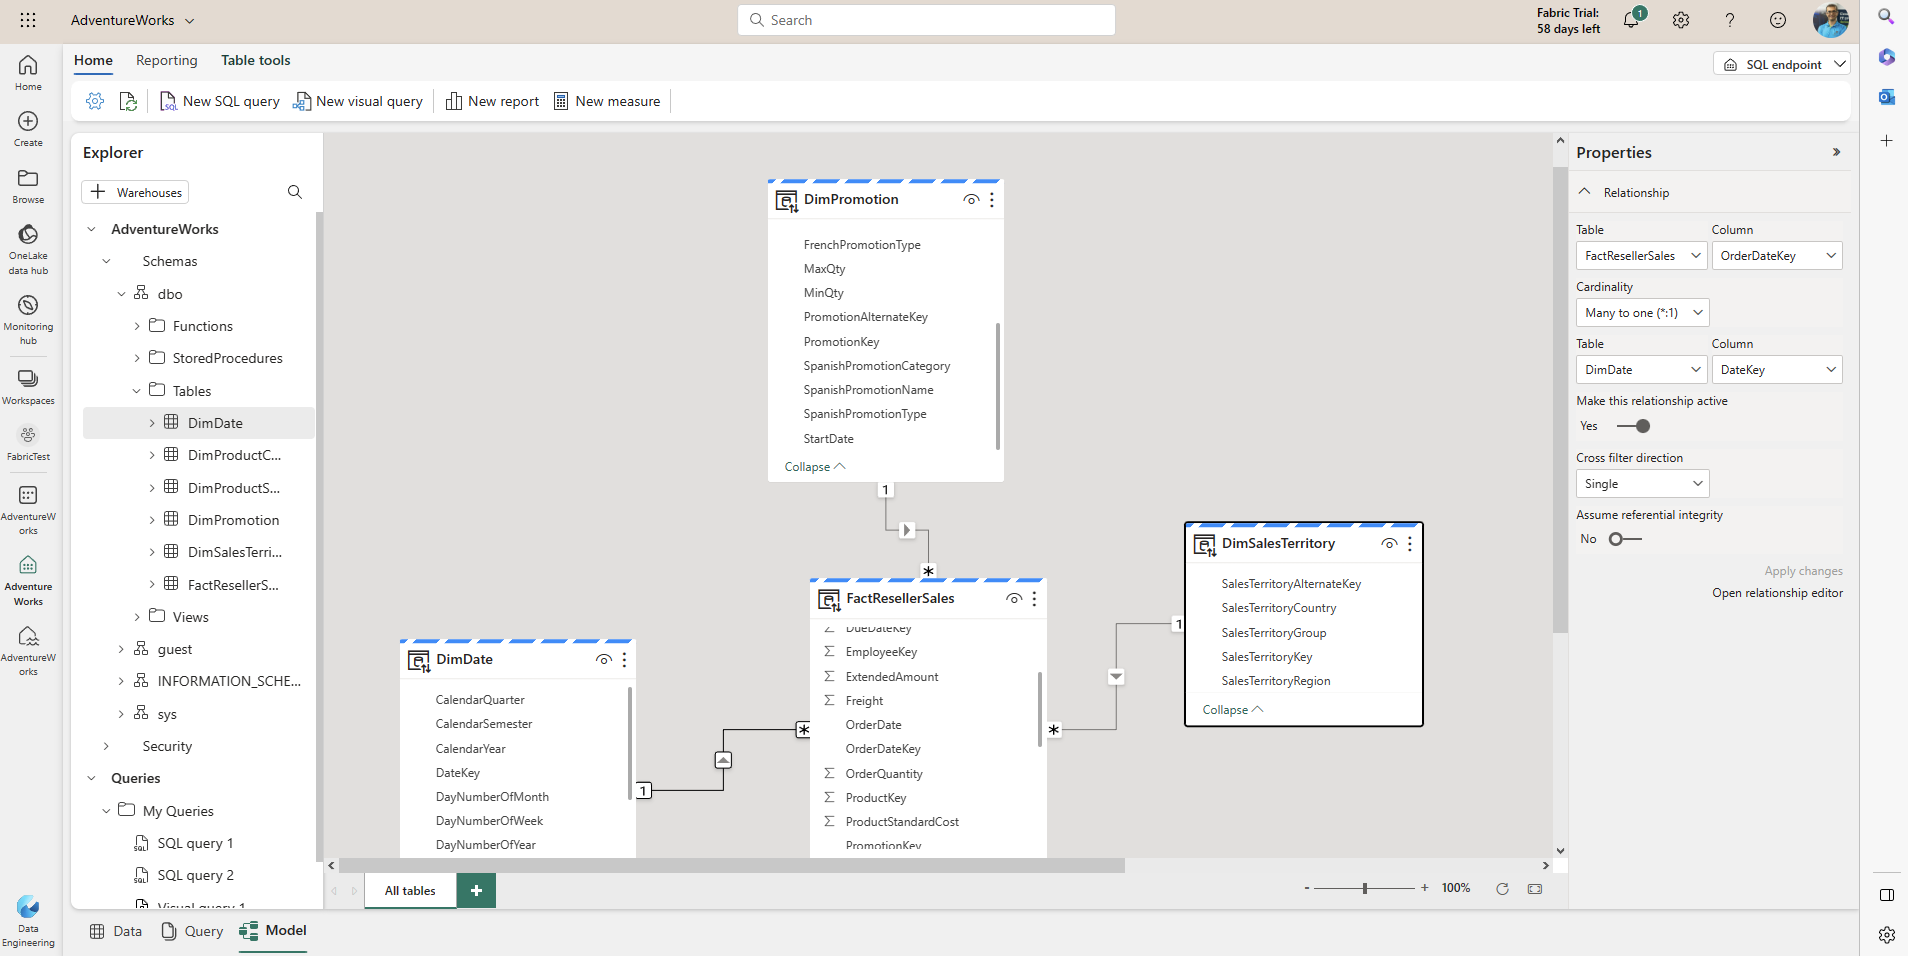
This will open the Dataset editor online, where you can make changes to the data model.
Summary
It would be a lot to explain Lakehouse in one article. This was a getting started to the Lakehouse, You learned that it is a place that can be used for tables and files. The data can be loaded into it using multiple ways, for example Dataflows Gen2. The data then can be consumed in multiple ways, for example using a Power BI report. The Lakehouse also comes with a SQL Endpoint which allows querying the data using SQL editor or visual query editor.


Reza is author of more than 14 books on Microsoft Business Intelligence, most of these books are published under Power BI category. Among these are books such as Power BI DAX Simplified, Pro Power BI Architecture, Power BI from Rookie to Rock Star, Power Query books series, Row-Level Security in Power BI and etc.
He is an International Speaker in Microsoft Ignite, Microsoft Business Applications Summit, Data Insight Summit, PASS Summit, SQL Saturday and SQL user groups. And He is a Microsoft Certified Trainer.
Reza’s passion is to help you find the best data solution, he is Data enthusiast.
His articles on different aspects of technologies, especially on MS BI, can be found on his blog: https://radacad.com/blog.
Great Summy Reza