
In last two steps you learned how you can create a date dimension that has calendar columns, and fiscal columns. In this step we are going to look at how Power Query can be leveraged to fetch public holidays live from APIs, and add that information into the date dimension. This step shows the importance of Power Query compared to DAX for generating a date dimension. There are lots of data analysis that can be done based on public holidays, and that can be done when public holidays information is up-to-date in the date dimension. If you like to learn more about Power BI; read the Power BI book from Rookie to Rock Star.
Prerequisite
Prerequisite of this step is to have the result of previous two steps ready;
Step 1 – Generate Date Dimension with Calendar Columns
Live API for Public Holidays
To get public holidays live, you first need an API that is giving you up-to-date information. There are some web pages that has the list of public holidays. I have already explained in another blog post how to use a web page and query public holidays from there. That method uses custom functions as well, here you can read about that.
The method of reading data from a web page has an issue already; Web.Page function from Power Query is used to pull data from that page, and this function needs a gateway configuration to work. There is another function Xml.Document that can work even without the gateway. So because of this reason, we’ll use Xml.Document and get data from an API that provides the result set as XML.
WebCal.fi is a great free website with calendars for 36 countries which I do recommend for this example. This website, provides the calendars through XML format. There are other websites that give you the calendar details through a paid subscription. However, this website is a great free one which can be used for this example. WebCal.fi is created by User Point Inc.
There is a page in this website, that gives you the access to calendar in XML format. You can choose the country, and type of calendar and the period;
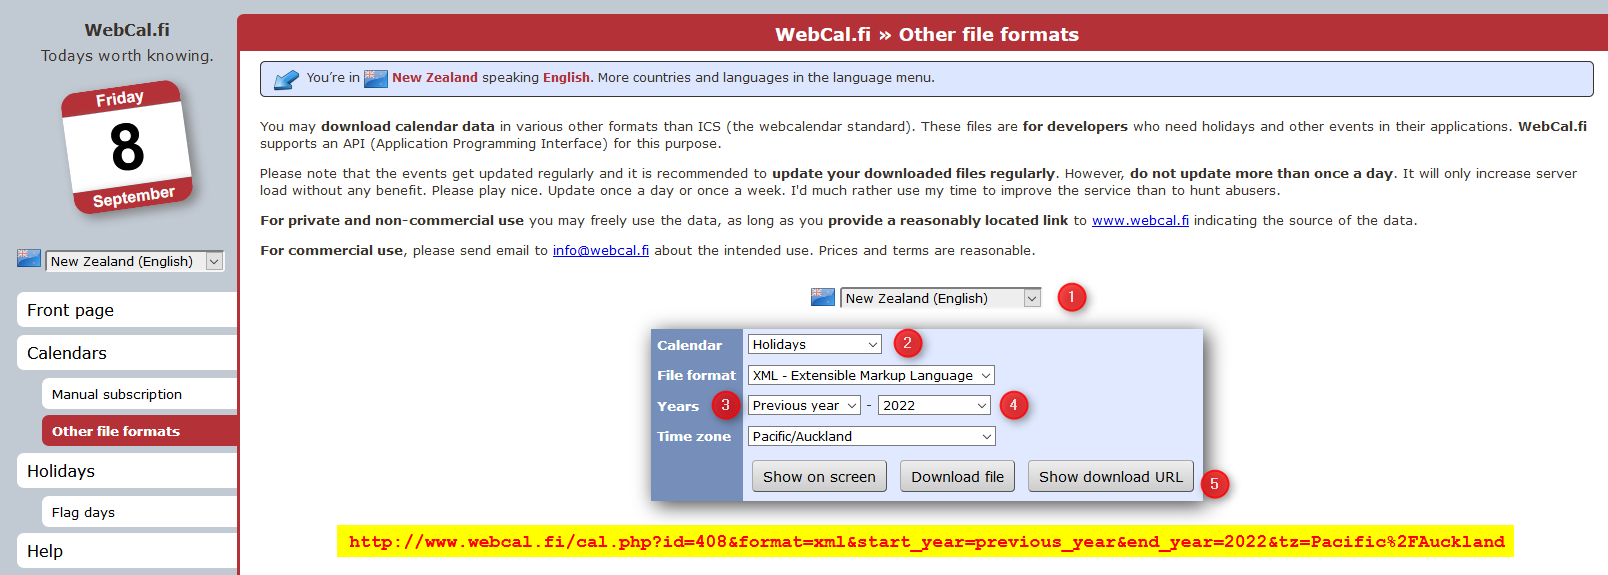
In the page above you can choose country, calendar, file format, years (from and to), and then click on Show download URL. The URL you see highlighted above is for public holidays of New Zealand from previous year to 2022. You can generate it for your country and date period. you can even change the previous_year in the URL above to 2010, and you would still get the same result.
This is the URL I am going to use in this example;
www.webcal.fi/cal.php?id=408&format=xml&start_year=2010&end_year=2022&tz=Pacific%2FAuckland
browsing this URL will download an XML file with data as below;
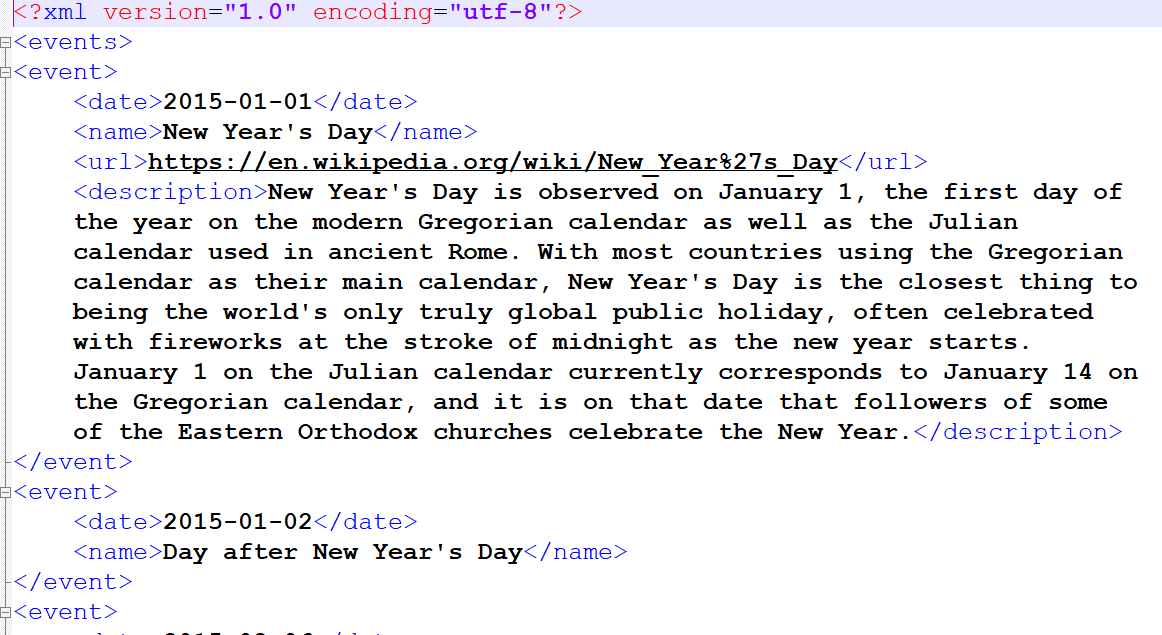
Now let’s have a look at this data from Power BI
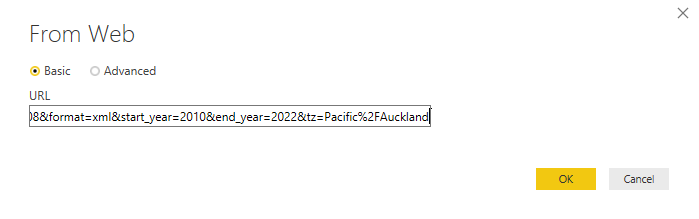
Get Data from Web API
Get Data from Web, and use the URL you got from above;
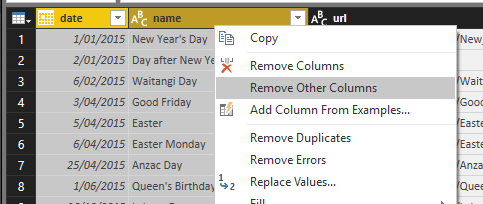
Select the result set and bring it into Power Query;

The table includes everything in it. You can just keep the first two columns which are date and the name of public holidays. remove other columns;
Also if you note in the first step of this script; the function used is Xml.Tables, not Web.Page. So this function won’t need gateway to work.
Let’s know make this public holidays parametric;
Add Parameters to Public Holidays URL
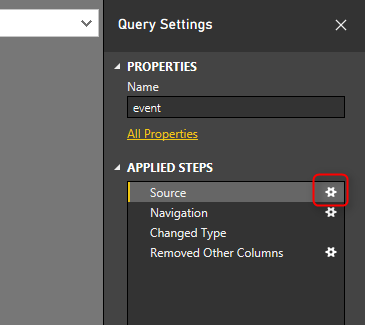
in the first step for event query, click on setting for Source step.
select Advanced mode for get data from web, and change the URL as below;

As you can see I split the URL into 5 parts;
- everything before first parameter
- first parameter
- text between first and second parameter
- second parameter
- text after second parameter
The URL Preview is still the same at the end. Now we can replace “2010” and “2022” with values from parameters. Click on OK, and then go to Advanced Editor.
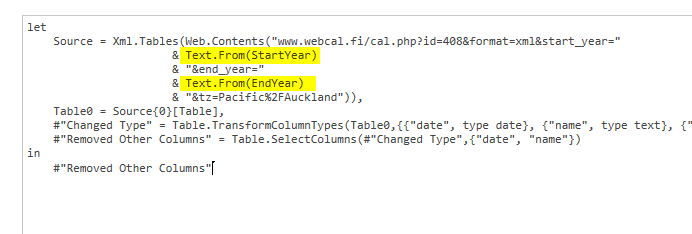
In advanced Editor make below changes;
let
    Source = Xml.Tables(Web.Contents("www.webcal.fi/cal.php?id=408&format=xml&start_year=" & Text.From(StartYear) & "&end_year=" & Text.From(EndYear) & "&tz=Pacific%2FAuckland")),
    Table0 = Source{0}[Table],
    #"Changed Type" = Table.TransformColumnTypes(Table0,{{"date", type date}, {"name", type text}, {"url", type text}, {"description", type text}, {"flag_day", Int64.Type}, {"age", Int64.Type}, {"alternate_names", type text}}),
    #"Removed Other Columns" = Table.SelectColumns(#"Changed Type",{"date", "name"})
in
    #"Removed Other Columns"
Note that in the second line; Text.From(StartYear) replaced the “2010”, and Text.From(EndYear) replaced the “2022”. Now the query is parametric.
after clicking OK on advanced editor, you should see now result based on values of parameters.
Merge Date Dimension with Public Holidays
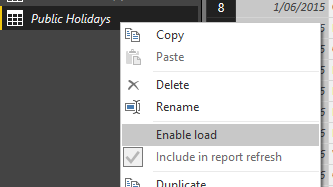
Now that we’ve got list of public holidays, we can merge that back with date dimension. Before that, rename the event query to Public Holidays, and set it to Uncheck enable load. To know why you can read this post.
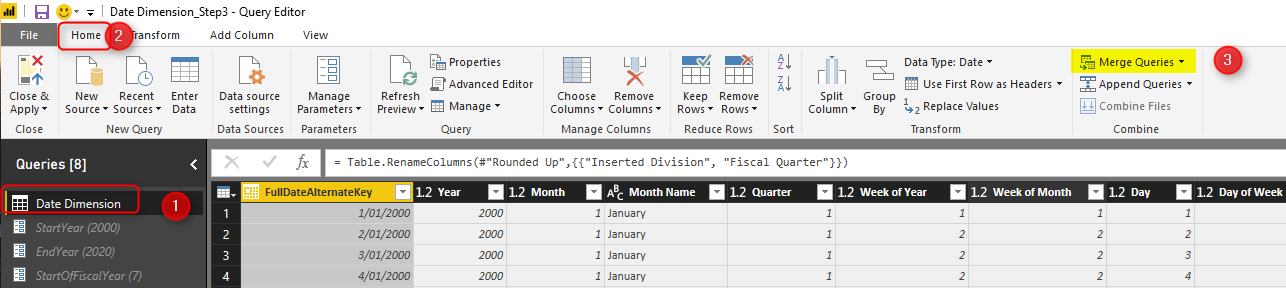
Then click on Date Dimension, and from Home tab at the end select Merge Queries
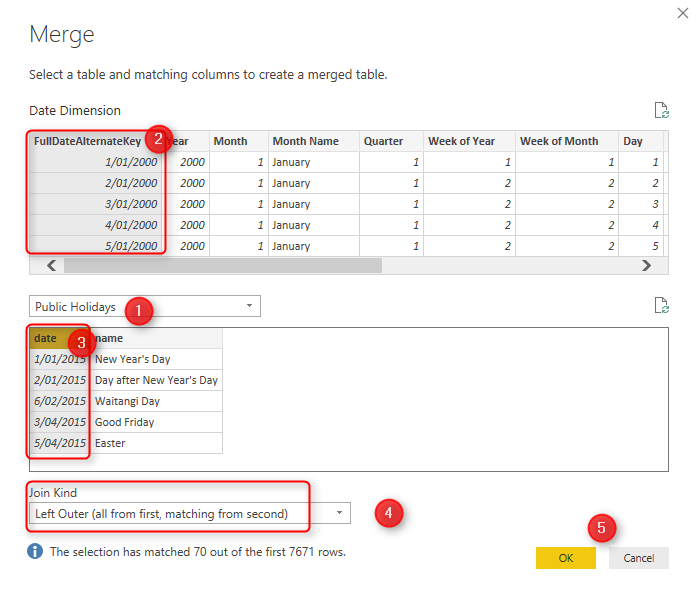
in the Merge Join window; select second table as Public Holidays (1), then choose FullDateAlternateKey from date dimension (2), and select date column from Public Holidays (3), make sure join kind is left outer join (4), and click on OK.
To learn more about Merge Join and different types of it, read this blog post.
After merging two queries, you will see a result, which has a table in every cell; you can expand that cell easily with clicking on the expand button at the top right corner of that column.
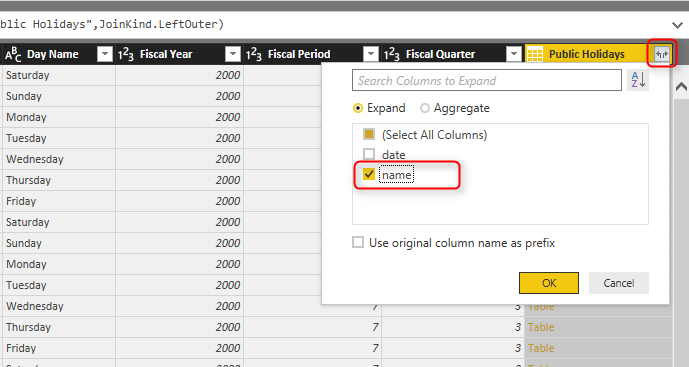
Select name only. because we do have date already in the table. we just need to know public holiday information which is in name column.
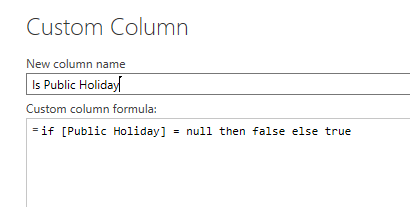
You can also add another column at the end that has true or false value of is that date a public holiday or not. This would be simply a custom column with a conditional expression;
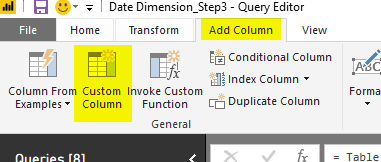
the condition can be easily written with an “if” statement as below;
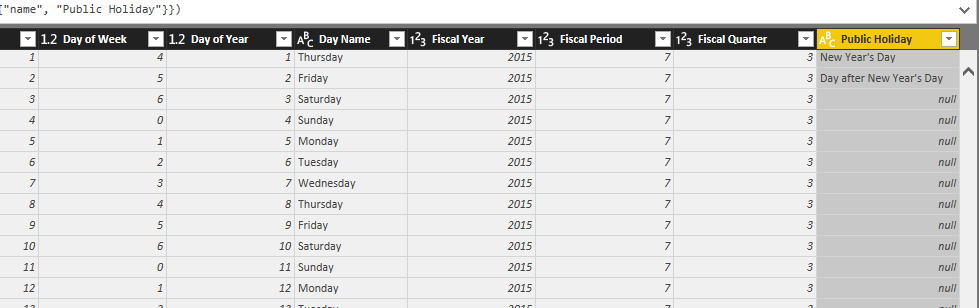
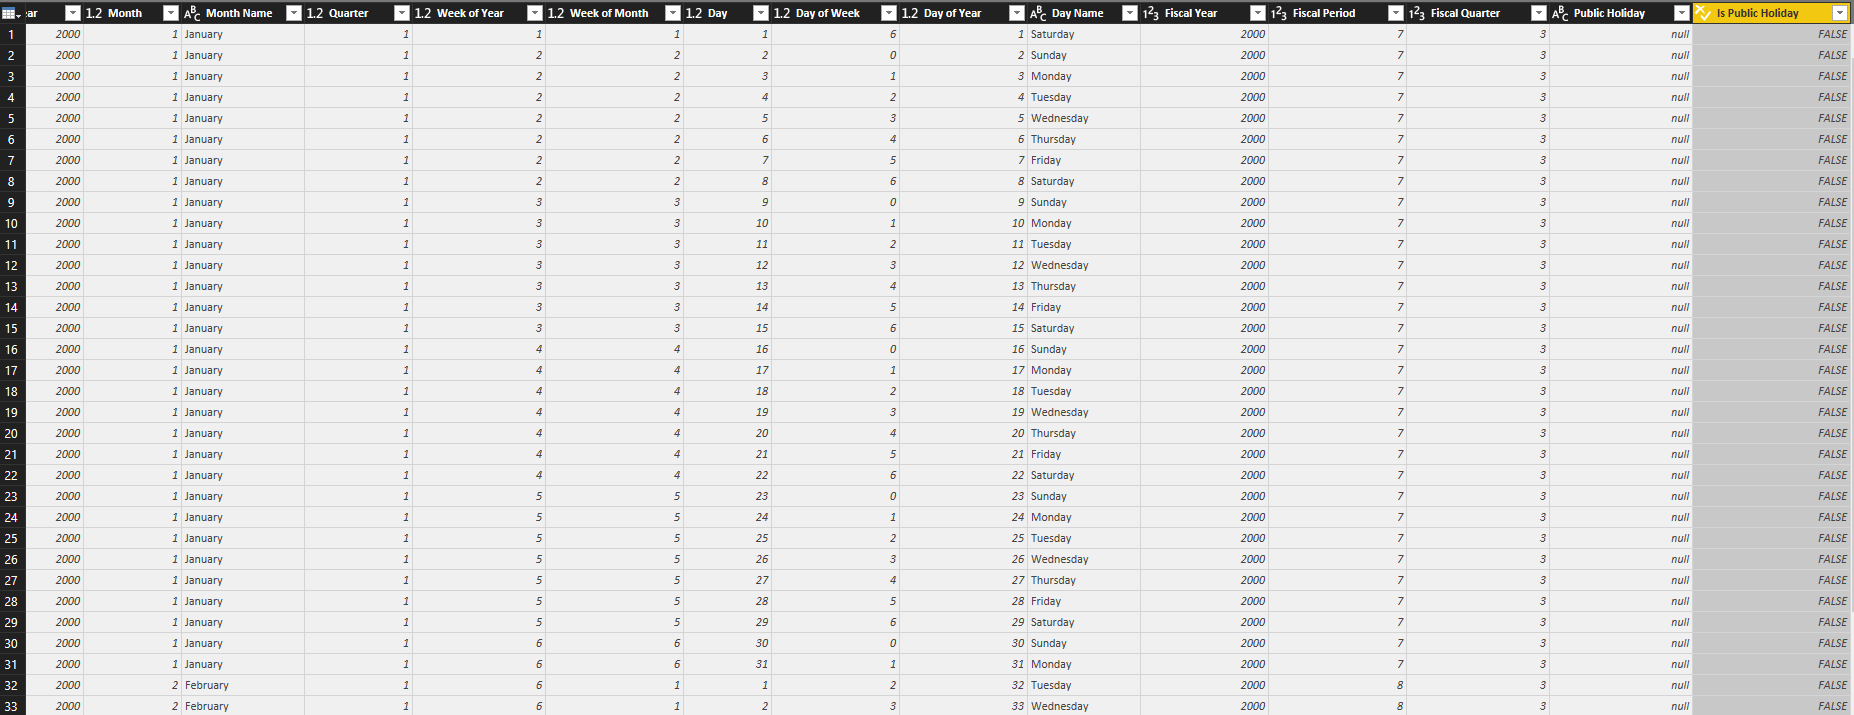
Final result got everything in it;
Summary
in Summary you have learned so far through three steps how you create a full general purpose date dimension with Power BI and Power Query. This date Dimension has calendar columns in it, and fiscal columns, and in this post you’ve learned how to fetch live public holidays into this. anytime this date dimension get refreshed the new public holiday’s data will be loaded into it. So you don’t need to be worried about the data to be up-to-date.


Reza is author of more than 14 books on Microsoft Business Intelligence, most of these books are published under Power BI category. Among these are books such as Power BI DAX Simplified, Pro Power BI Architecture, Power BI from Rookie to Rock Star, Power Query books series, Row-Level Security in Power BI and etc.
He is an International Speaker in Microsoft Ignite, Microsoft Business Applications Summit, Data Insight Summit, PASS Summit, SQL Saturday and SQL user groups. And He is a Microsoft Certified Trainer.
Reza’s passion is to help you find the best data solution, he is Data enthusiast.
His articles on different aspects of technologies, especially on MS BI, can be found on his blog: https://radacad.com/blog.