

For a month I am looking to create a Microsoft App that user able to take a picture from an invoice then able to see the items in Power BI or store it in storage such as SQL server, excel and so forth.
In this posts, first I will show how to create a Power APP for taking a photo, then the process of how to create a Microsoft Flow to apply the cognitive service, convert image to text service (OCR), then post back data to Power APP and also to Power BI.
The first step is to create a Microsoft Power APP
Create a Microsoft Power App for taking Photo
first, you need to go to the https://powerapps.microsoft.com/en-us/, log into the account that you have or simply sing up for the free one. Power App is an easy to use tool to create mobile and tablet app.
For this scenario, we need to capture the image. IN Power app we able to have a different page that has been shown in SCREENS pannel in the left side of the window.
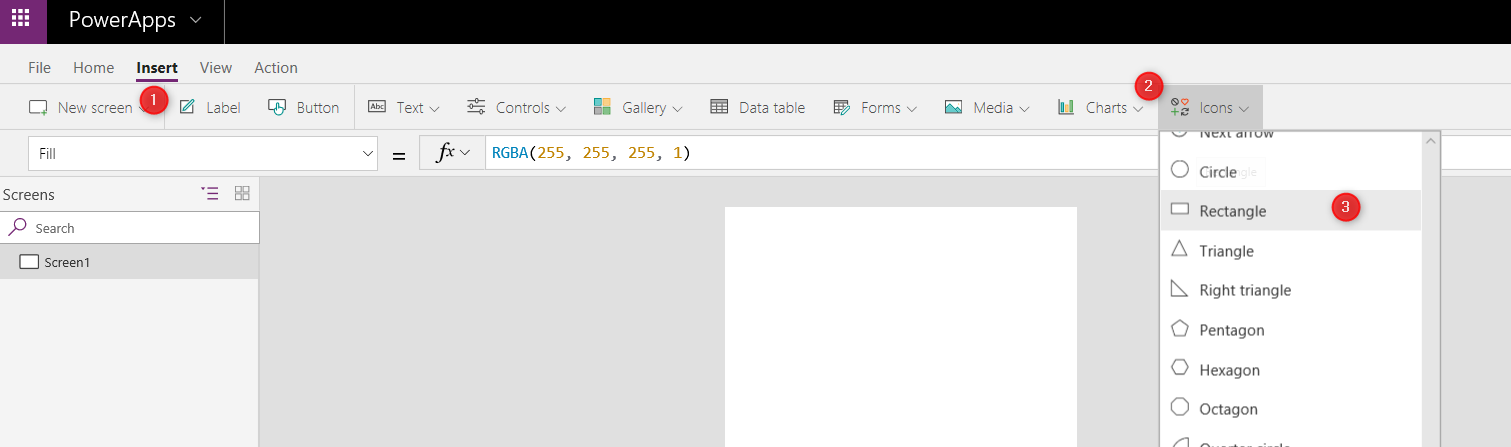
first, I am going to create a page header for the app
click on the Insert and choose the Icon scroll down to fin the rectangle.
then, I put the rectangle on the top of the page. I want o to follow the same color theme for my app, so I am going to create a separate screen (page) to define the color them. I want to make all button and rectangle red and the icon black. Just recommend to Save the app by click on the File save the app by allocating a name to it to not lose it 🙂

I create a new screen by click on the New Screen option at the top of the page and rename it to Theme Color.

Now I define a new label to assign it the color theme, then reuse it in other tools. So click on the Insert then choose the Lable. As you can see in the picture, on the left side of the page there is a dropdown that shows Text, this drop-down also holds other attributes regarding the label such as color, on select action and so forth. You able to change the text by changing the text in the Function area. I changed the text from Text to Red Color as shown below. Also
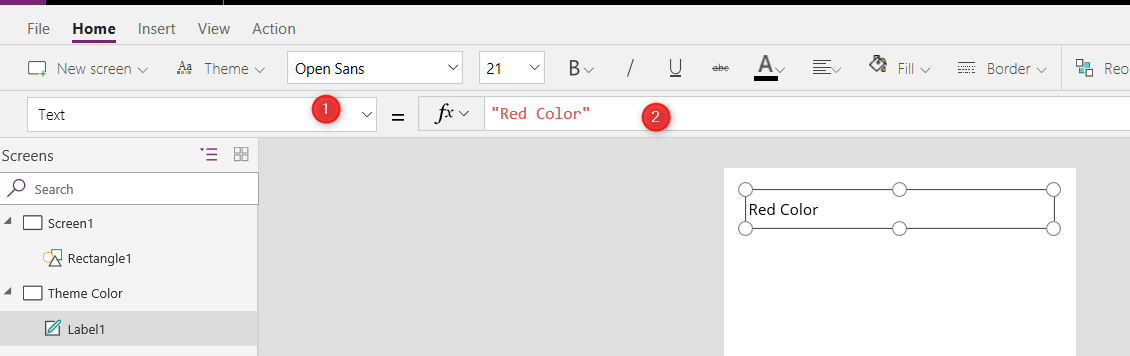
Now, I will change the Text to Color and replace the RGBA(0, 0, 0, 1) with ColorValue(“Red”)

also, I change the label name from Lable1 to Redcolor.
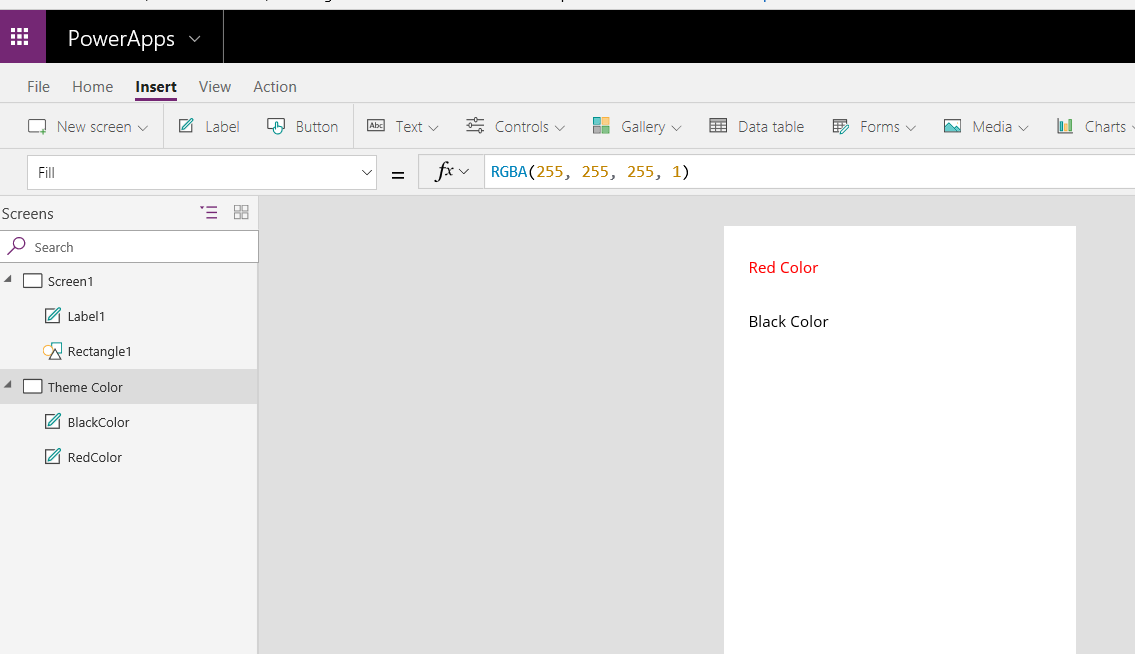
Now, you able to back to the screen1 and change the rectangle color to RedColor. Click on the rectangle and from the drop-down in the left side of the window choose the Fill and replace the current value with RedColor.Color. Now I define another label in Theme color screen for texts black same as one I define for Red color.

After creating the second label, I rename it to BlackColor
In screen one, I am going to change the title of the APP by adding a new Lable object to the rectangle.
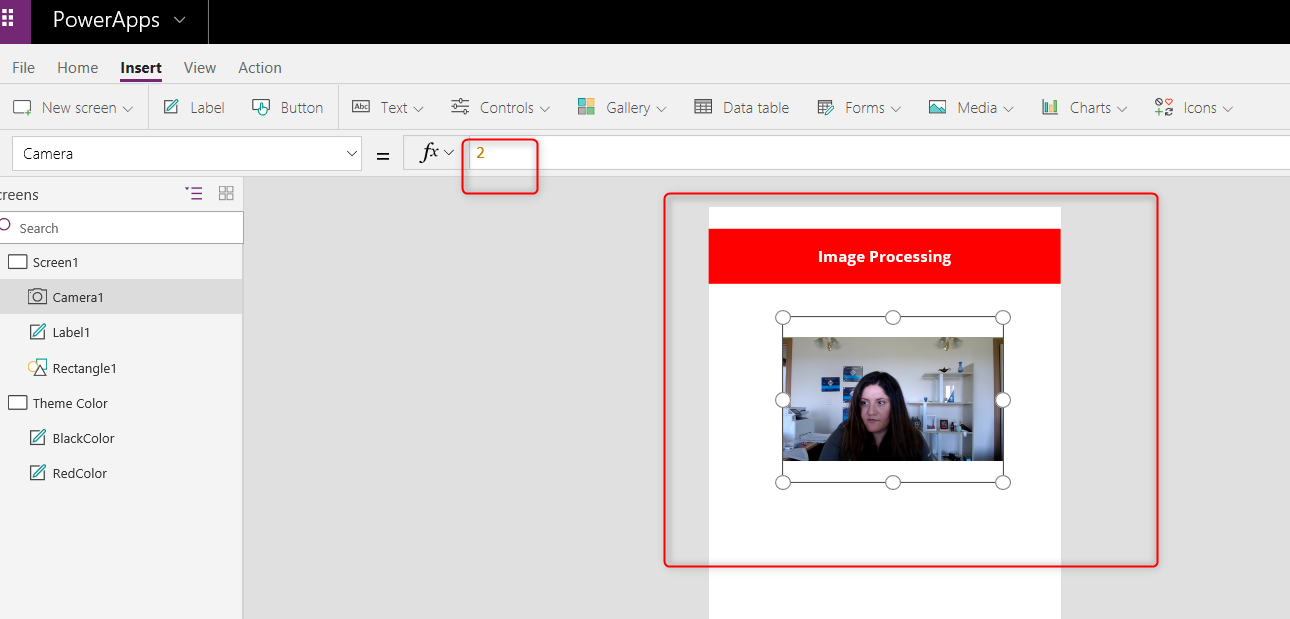
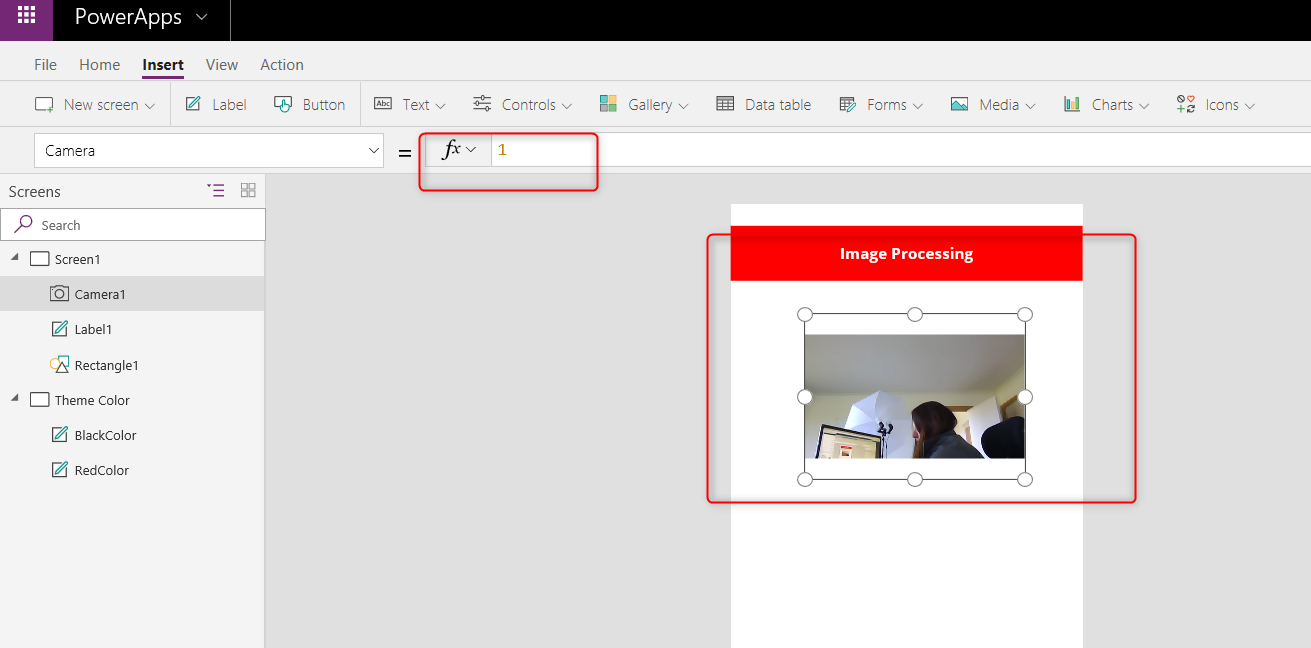
The other object we need is the Camera, from the option Insert->Media-> Camera chooses the camera object. The camera Object shows the default camera on your machine. there is a properties name Camera that the default value is 0, which is the default camera number you able to change it to 1 or 2 or more to switch between camera.
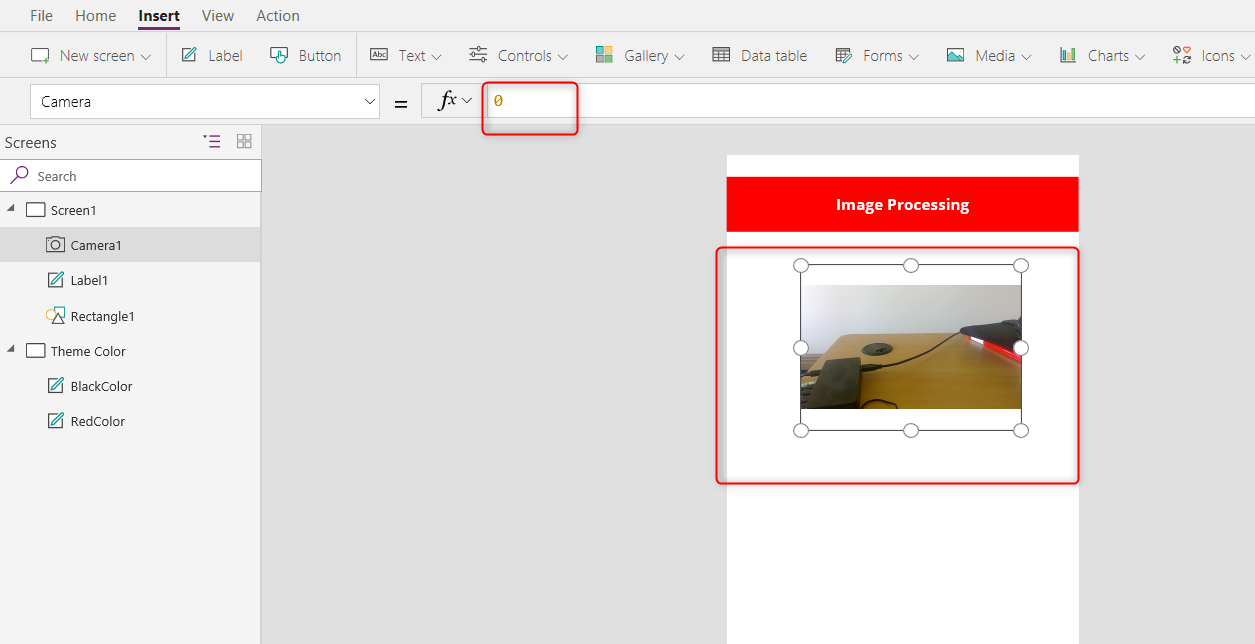
I will show you later how to change the camera setting via some codes.
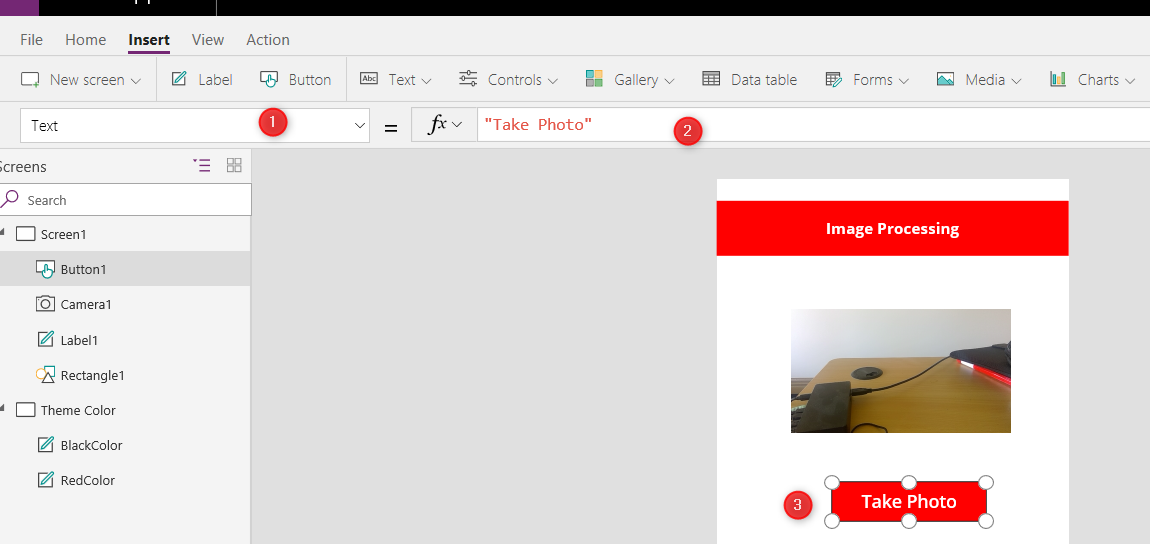
Now we need a Button to take a photo and an image Object to show the captured image.
Click on the Button, and change the color same as before (choose the fill attribute and
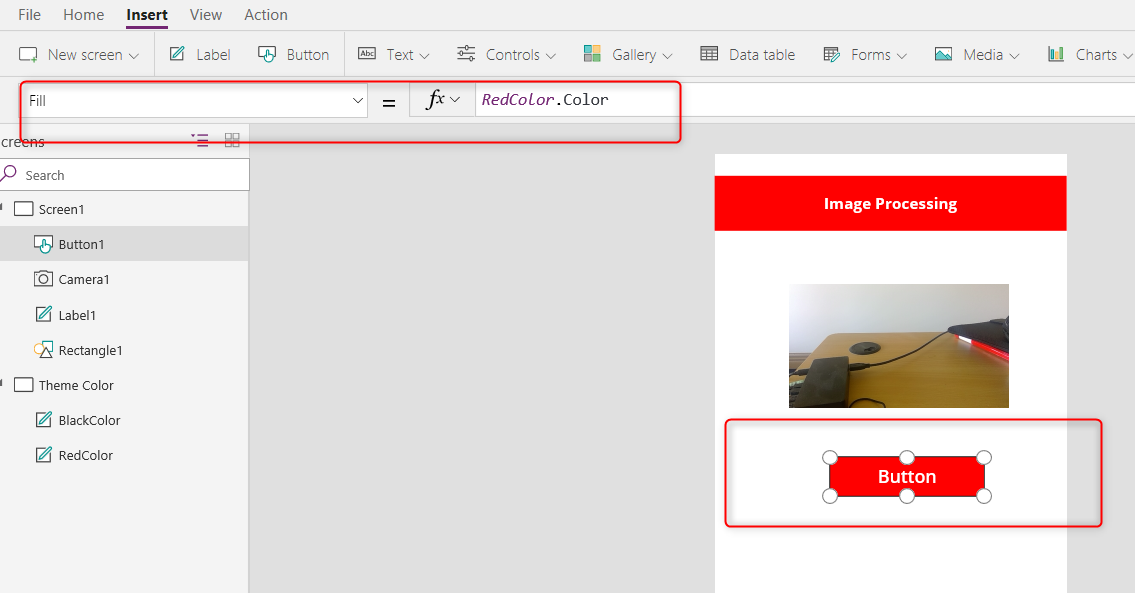
Then choose the Text attribute and change it to “Take Photo”.
Now we need t capture the picture in the camera by writing some codes. Click on the Take Photo button and select the OnSelect properties.
initially, it has false value, but we are going to change it from false to UpdateContext({TakenPic:Camera1.Stream})
now, we need an image object to show us the taken image. it is an easy process, just click on the Insert->Media->Image. Now, an image object locates in the Power APP dashboard design. The image object needs to show the taken image.
so, click on the image attribute then change the initial one that is SampleImage to TakenPic. To see the run, click on the run option at the top right of the page
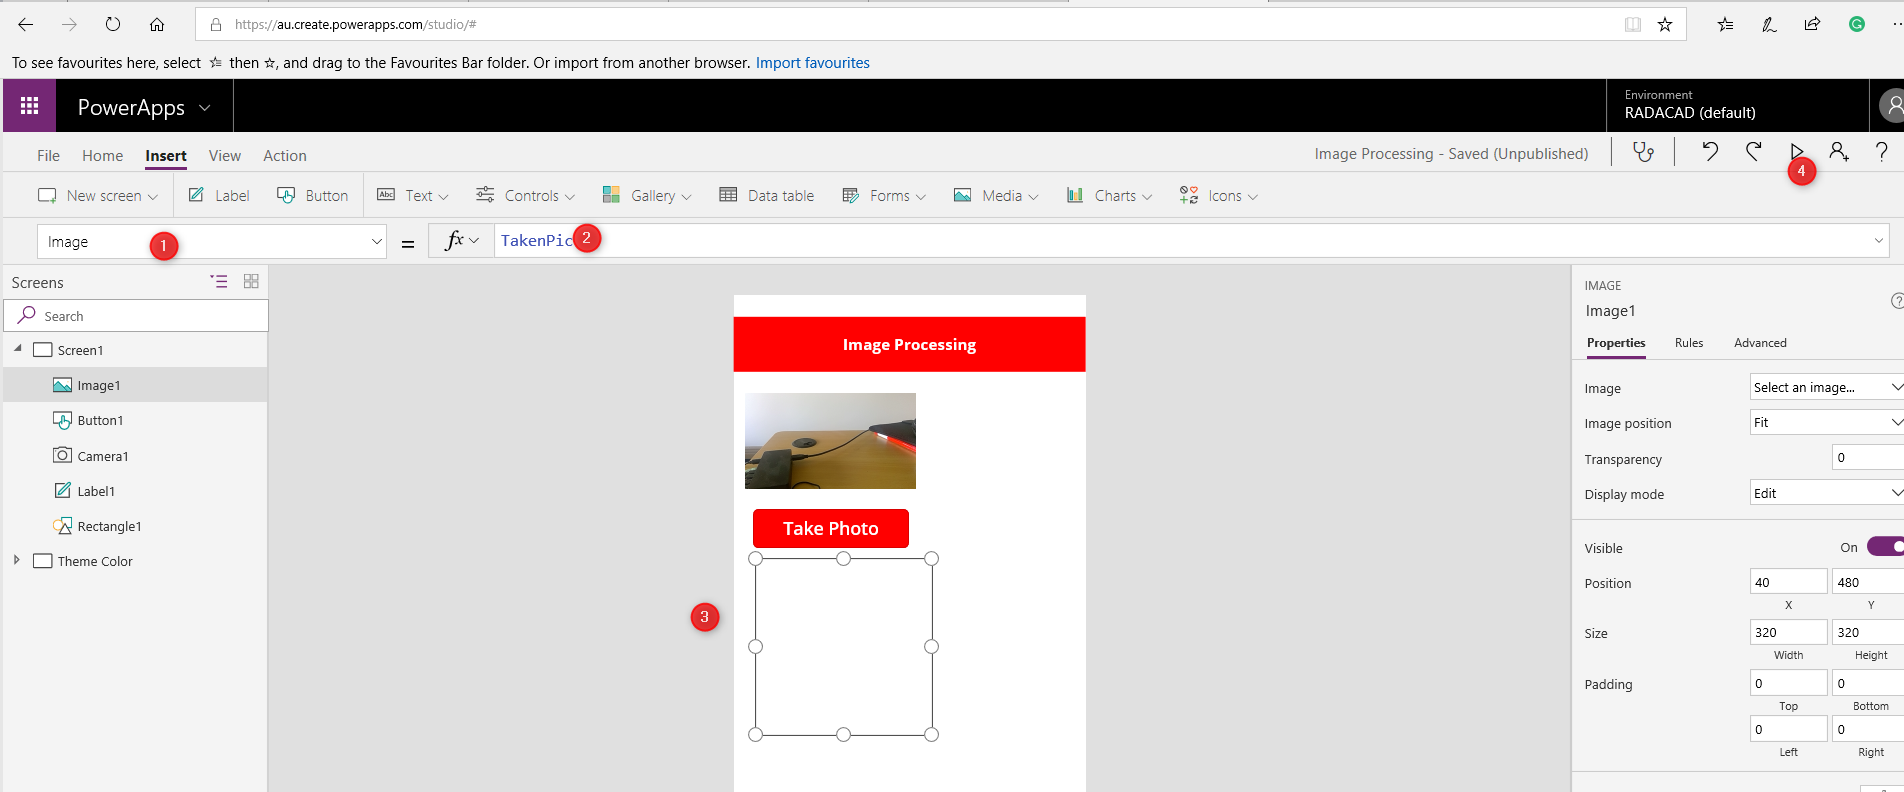
Before the run, click on the Camera1, then choose the setting StreamRate and set it to 100.
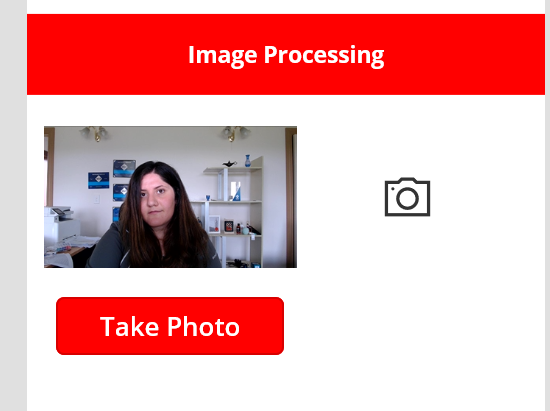
then run the app, you should see some thing as below!

There is a possibility that you need to change the camera via APP. so we can write some code to solve it.
we need to object: one camera icon and the other refresh icon to set the camera to default one
First, need to go to insert->icon->camera icon there. then, change the color of it to black.

this time I choose the color attribute instead of fill and then change the value to BlackColor.Color, now click on OnSelect object and change the formula to :
Switch(Cam,
0,UpdateContext({Cam:1}),
1,UpdateContext({Cam:2}),
2,UpdateContext({Cam:0}))
we define a varibale named Cam that we want any time we push the Camera icon, it change the Camera. from camera 0 to 1 or 2 then to 0.
however the variable Cam should be conneted to Camera1.
so click on the camera icon and chose the attribute Camera and in front of it write Cam. Now, if tou run the app, by clicking on the camera icon you will get a picture from the different camera:

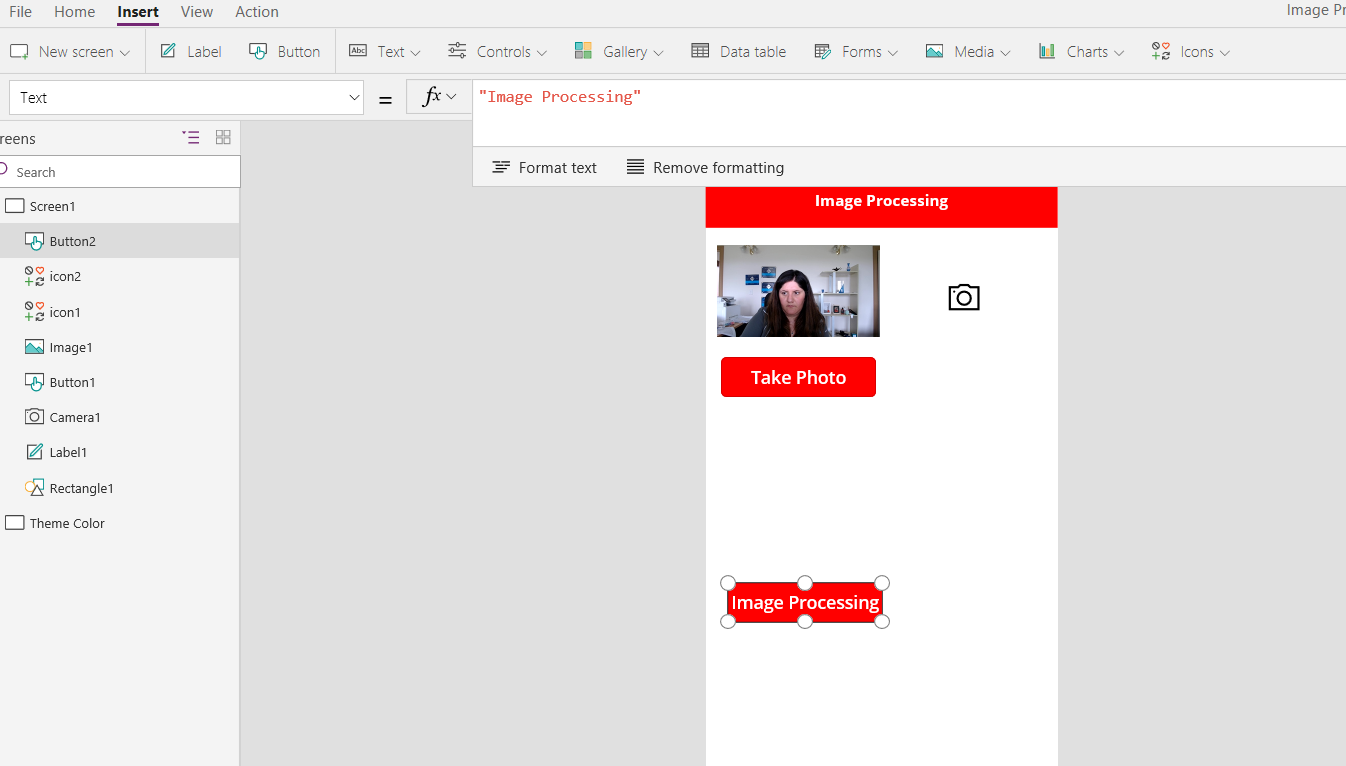
Now, I am going to create a button to send the picture to Microsoft Flow for image processing just create a button same as before.
However, for OCR we need to first set it up in Microsoft Flow (Which I will explain it in the next post).
we have our power app half ready, in the next post I will show how to connect it with a flow so able to call the OCR from cognitive service then store it in other resources
I get help from this video to set up the Power APP: https://www.youtube.com/watch?v=ovLIwnj6QjU


Nice idea 🙂
Good topic.
I have quick to you.
How to take picture to keep in Onedrive (excel file or access) ?
Thanks so much, nice idea, I will check it and hopefully write a blog on it