
In this series, I am going to show how to create an application that able to detect a face in a picture and able to identify the age, gender, emotion, hair color and so forth for each person in a picture using Microsoft Power Apps, Microsoft Flow and Cognitive Service.
In the first Part, I will explain the process of how to create an App for the aim of aking a photo from the human face.
Power Apps
In the first step, you need to navigate to Power Apps (https://powerapps.microsoft.com/en-us/). Then Sign into account (Office365 should work for everyone).
from the Canvas App from Blank choose the Phone from Factor option.

click on the Make This App.
Next, you will navigate to the design area.
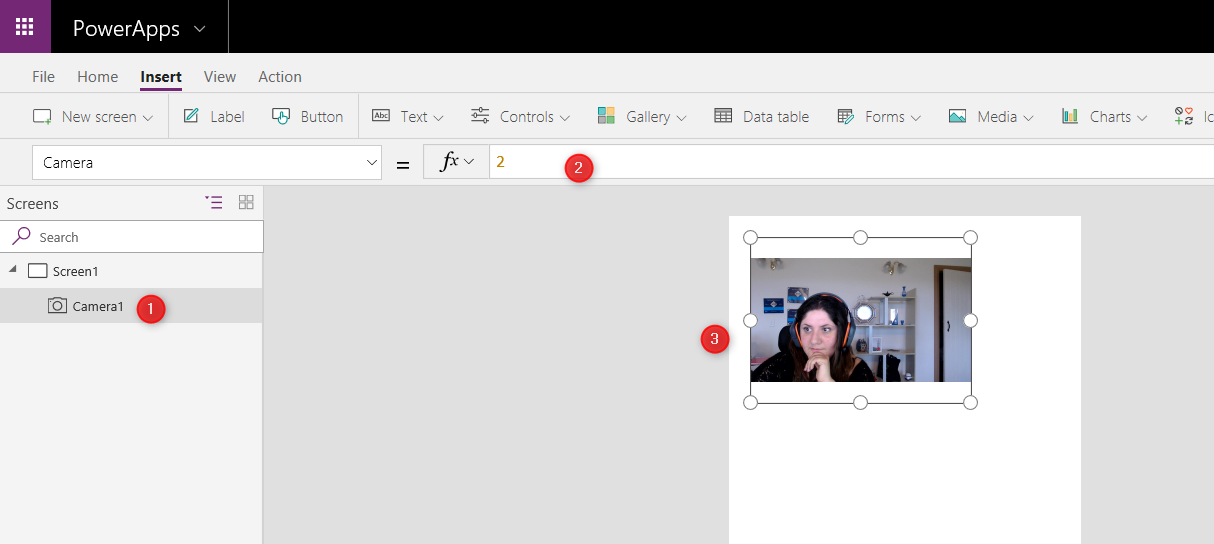
In the design area, I am going to insert a camera to take a picture. So, click on the Insert, then select the Camera to put it in the mage canvas.

if you have many cameras in your machine, it shows the camera with ID 0, to change it you able to change the camera ID from 0 to 2 or 3 (depends on how many cameras you have)
for my case Camera with ID 0 is my back laptop camera and One is the front laptop camera and number two is my individual camera. as I want a better view, I change the Camera to number 2.
Now a bit different action is about the click on the camera and takes a photo ( However in past I use a button but this time we are going to see how to click on the picture and take a photo while in the last posts )
so click on the Camera then choose the OnSelect properties. write the below codes
ClearCollect(collectphoto,Camera1.Photo)
The above codes are going to collect the picture using ClearCollect function then assign the data to collectphoto variable. So by clicking on the picture a picture will be stored in the collectphoto variable. The CollectPhoto attribute stores the image as a collection. to see the collection, first run the run button to take a photo.

Now, click on the View, then click on the Collections.
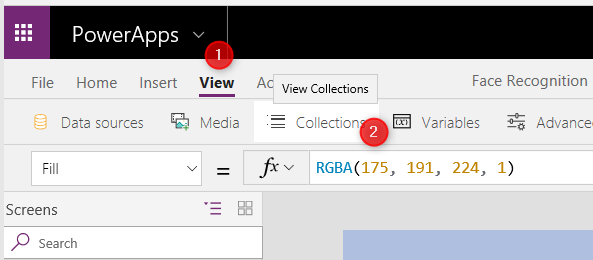
Then, in the collection, you able to see the picture as URL components.
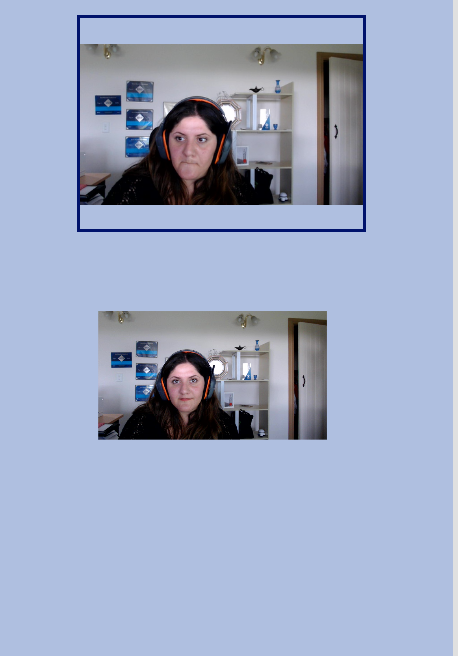
In the next attempt, we need to put an image in the canvas to show the taken picture. so click on the Insert then click on the Media and then image. After putting the image click on the Image attribute and change the value to
First(collectphoto).Url
The taken Photo will be stored in the image.
In the next posts, we are going to create a Microsoft Flow to pass the picture and apply the face recognition on the image.
Reference from: https://www.youtube.com/watch?v=KUtdnnYRpo4


