
Where is the Format visual option in the new Power BI Desktop? There is a simple answer to this question, which I explained in this blog and video. This change applied from March 2023 version of Power BI Desktop, and by the time you read this article, it might be at general availability and the only way to format a visual in the Power BI Desktop.
Video
The old way: Format pane
Previously, in the Power BI Desktop, we used to click on a visual, go to the Format pane under the visual setting, and do all the formatting there. Here is what the old way of formatting visuals in Power BI Desktop looked like;
The new way: On-Object Interaction
The new way that was introduced in March 2023 includes the on-object interaction. When you have a visual, you will see a Format button when you click on it, and that would be where you can do the formatting.
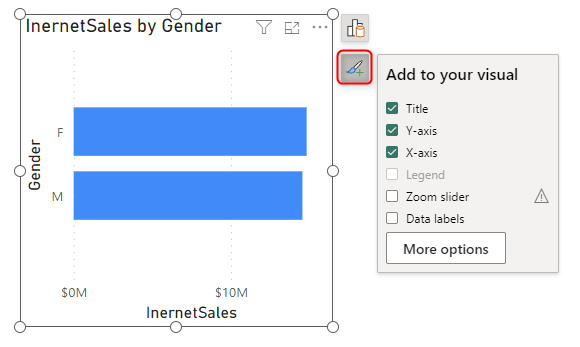
To get to the Format settings, you need to click on the object; Then, you will see the On-Object interaction, which usually consists of Data and Format parts.
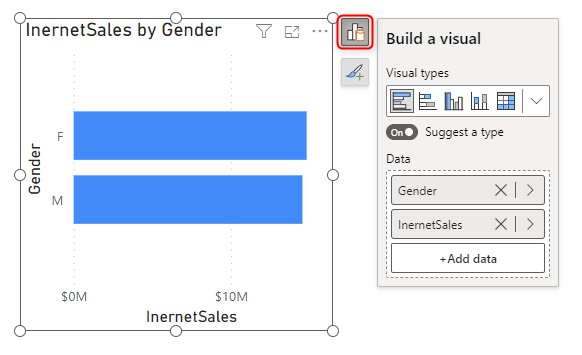
The Data Part is where the fields are assigned to the visual. Power BI Desktop also has this option to automatically suggest a visual type (which can be turned off or on).
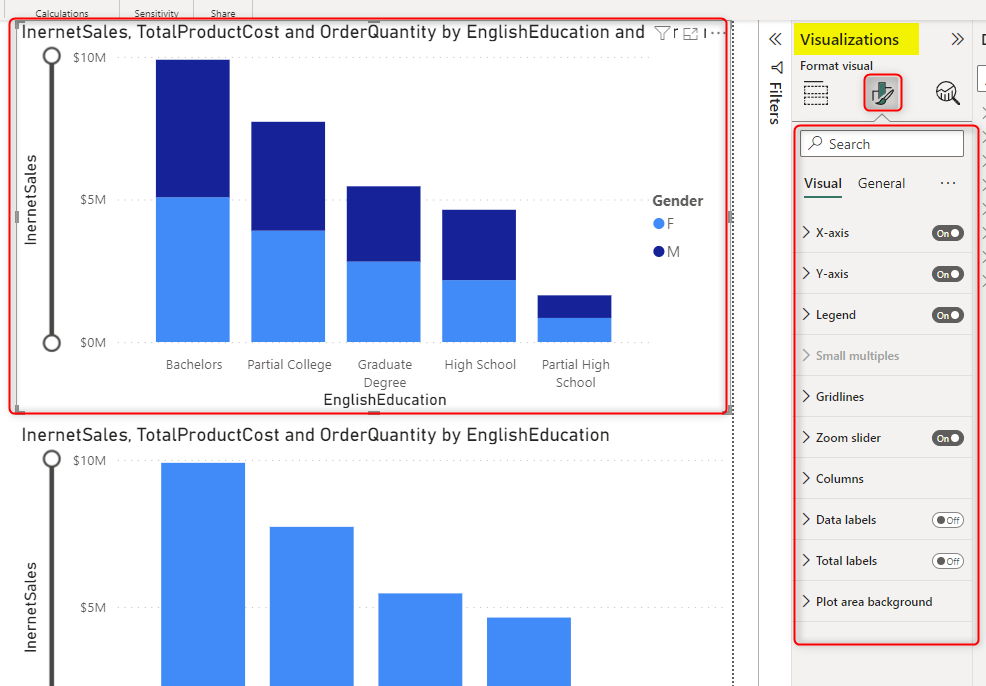
For the Format configuration, Some major configurations, such as adding Data labels, can be done using the On-Object interaction; however, if more formatting is needed, you can click on More Options.
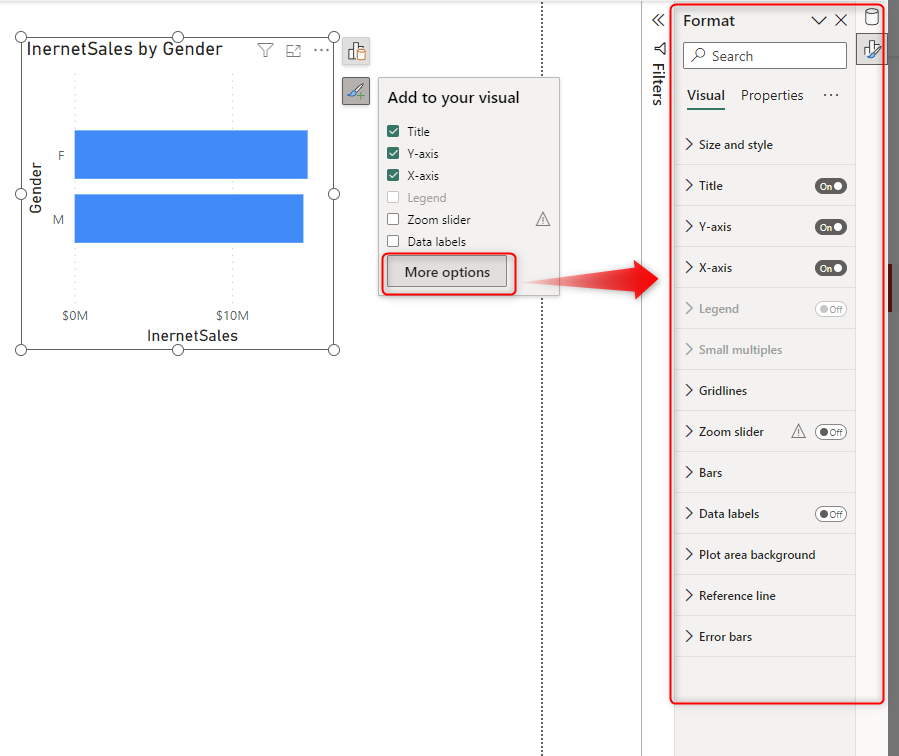
The Format pane will appear after clicking on More Options, and it is the place to do any custom formatting and configurations. You also switch between the Format and the Data panes in the top right corner.
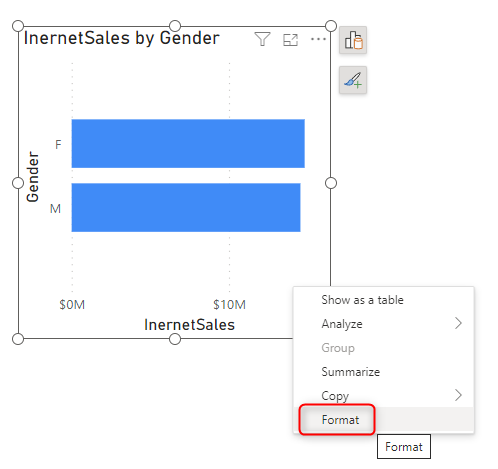
Another way to get to the Format pane is by right click on the visual and clicking on Format.
The On-Object interaction makes it easy to configure visuals in an office-like style. Microsoft Excel and Word are already been using this style for many years.
How to enable On-Object Interaction?
If the On-Object Interaction is not automatically enabled when you read this blog, then perhaps it is still a preview, and you must enable it in the Power BI Desktop.
Go to File > Options and Settings > Options to enable this feature. Under the Preview Features, select On-Object Interaction.
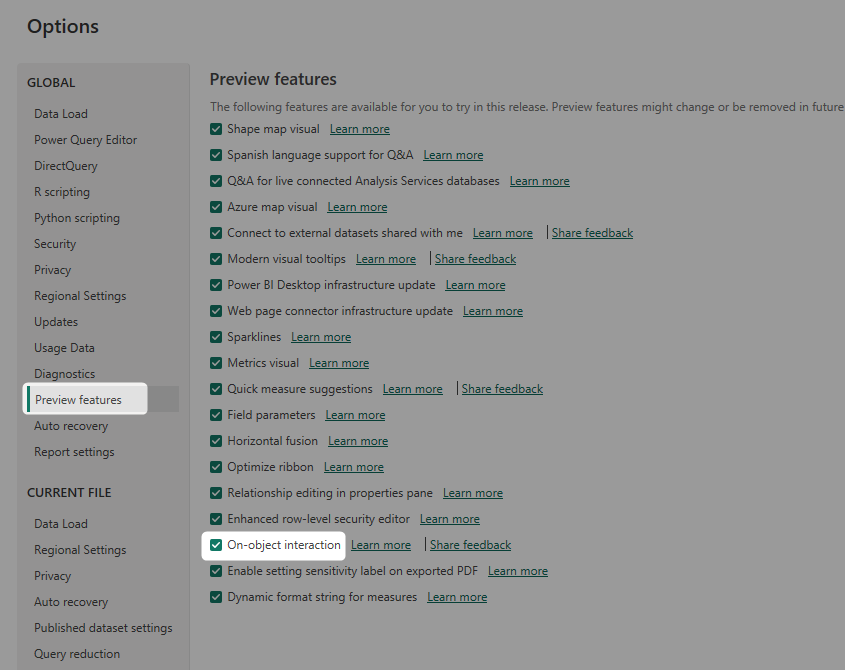
Once the change is applied, close the Power BI Desktop and open it again to see the new change in the layout.


Reza is author of more than 14 books on Microsoft Business Intelligence, most of these books are published under Power BI category. Among these are books such as Power BI DAX Simplified, Pro Power BI Architecture, Power BI from Rookie to Rock Star, Power Query books series, Row-Level Security in Power BI and etc.
He is an International Speaker in Microsoft Ignite, Microsoft Business Applications Summit, Data Insight Summit, PASS Summit, SQL Saturday and SQL user groups. And He is a Microsoft Certified Trainer.
Reza’s passion is to help you find the best data solution, he is Data enthusiast.
His articles on different aspects of technologies, especially on MS BI, can be found on his blog: https://radacad.com/blog.