
It happens that you might have two fields as From and To date (or Start and End date) in your dataset, and you want a date slicer in the report. The date slicer has to filter records in a way that the FROM and the TO dates are in the range of dates selected in the slicer. There are multiple ways of doing this. In this article and video, I’ll explain a simple but effective method for that. I have explained in another article, how this can be done using two date slicers, you can read that from here.
Video
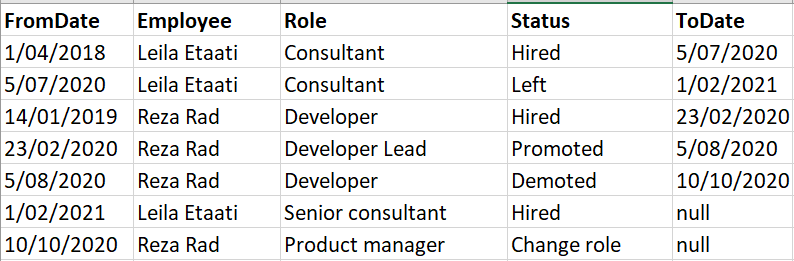
Sample dataset
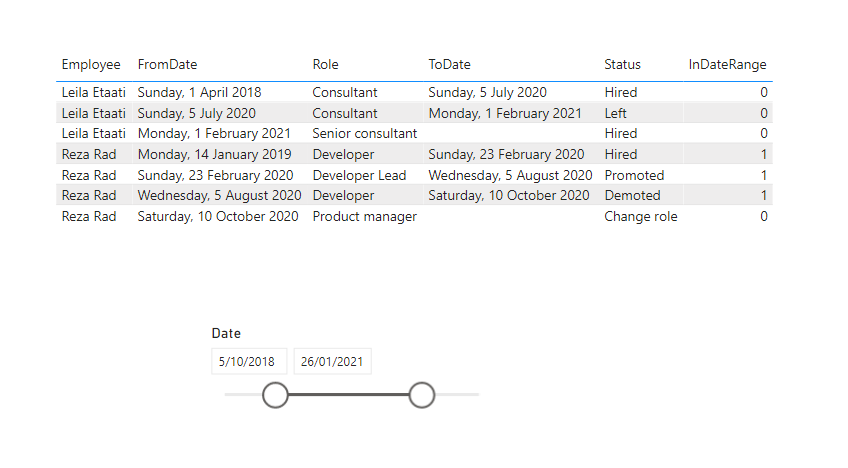
Let’s assume you have an employment history table with FROM and TO dates.
Assume that we want to have a report like below;
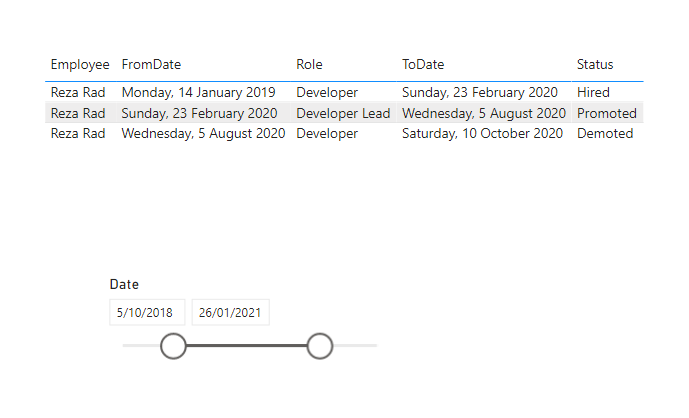
As you can see in the screenshot above, the Date slicer filters the transactions. The FromDate and ToDate both fall inside the date range selected in the slicer.
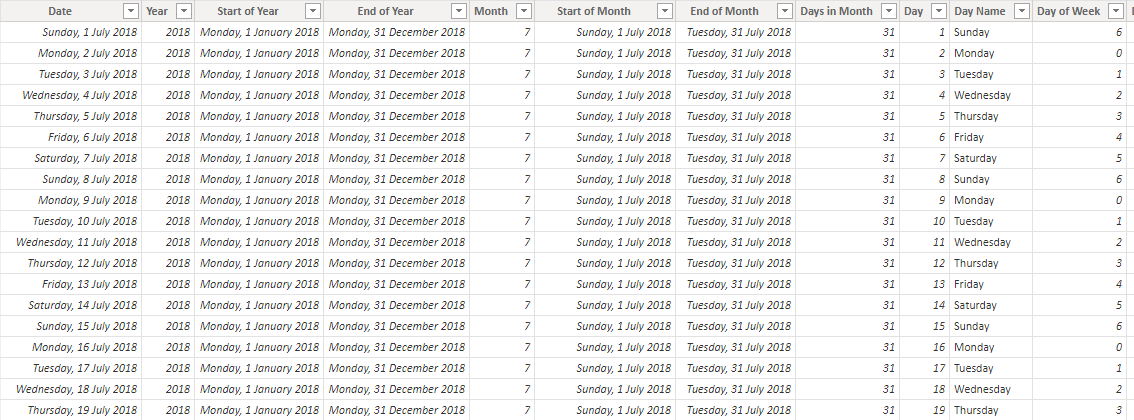
Date Table
For this solution, you need a custom Date table. You can either create it using the Power Query script, or DAX script or just as simple as a calendar function to create it. Here is my example of the Date table;
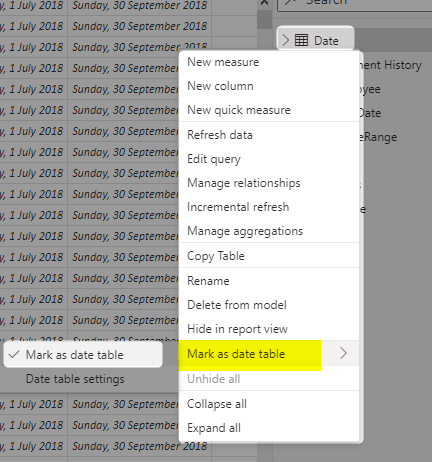
It is also important that you mark this table as a Date table, and choose the Date field for it.
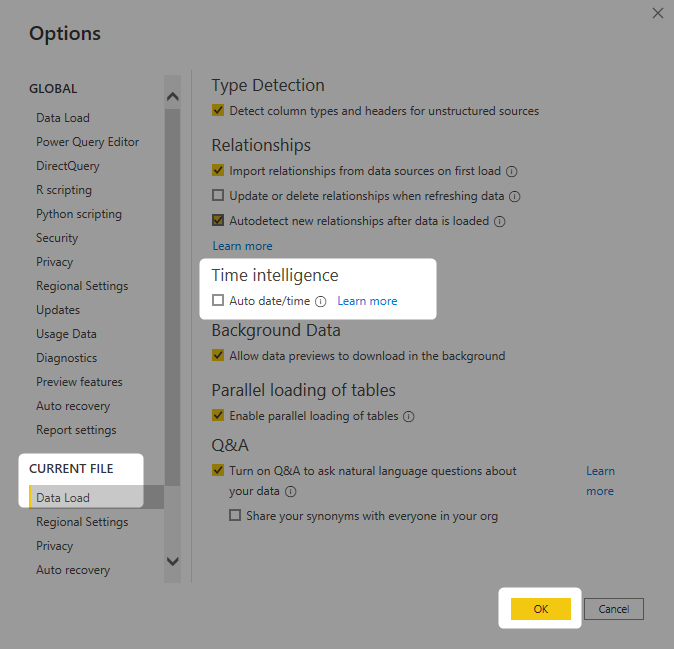
Another important thing to do is to turn off the auto date/time in the Power BI file options so that it won’t create extra unnecessary Date tables. You can find this under File > Options and Settings > Options
I have explained these steps and why they are necessary to be applied in my article here.
No relationship to the Date table
It is important not to create a relationship between the transaction table and this Date table.
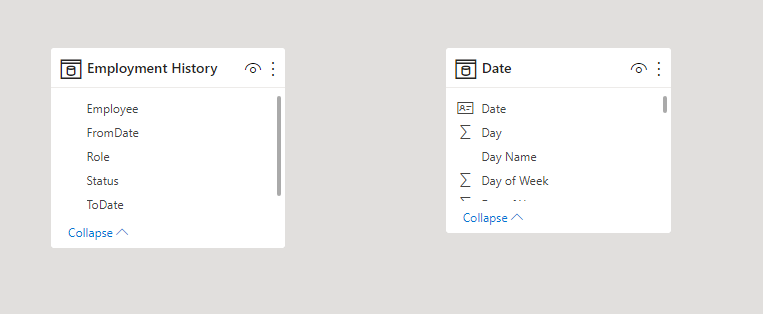
That is perhaps against all the rules you’ve heard in Power BI modeling that the relationship is necessary for filtering tables. Those rules are correct, but for scenarios that you are filtering based on one field. In this case, we want the Date table to filter the Employment History table based on TWO fields; The FromDate and the ToDate fields. You cannot create two active relationships between these two tables, so you have to either create a role-playing dimension, which ends up with using this method I explained here with two Date tables, or the method I am about to explain here using DAX expressions for filtering.
DAX Measure to Filter
The key for this pattern is to use a DAX measure to filter the data instead of the relationship. This means we create a DAX measure, and then use it as a filter for the visual. Let’s first go through the steps of creating the measure.
The DAX measure you can see here is using two variables to find out the start and end of the date range in the slicer. Then the SelectedValue is used to get the current row’s FromDate and ToDate values and compare it with the selected range. In the end, it returns the value 1 if is in the range, and 0 if not.
InDateRange =
var _rangeStart=FIRSTDATE('Date'[Date])
var _rangeEnd=LASTDATE('Date'[Date])
return
if(
    SELECTEDVALUE('Employment History'[FromDate])>=_rangeStart
    &&
    SELECTEDVALUE('Employment History'[ToDate])<=_rangeEnd
    &&
    SELECTEDVALUE('Employment History'[ToDate])<>BLANK(),
1,0)
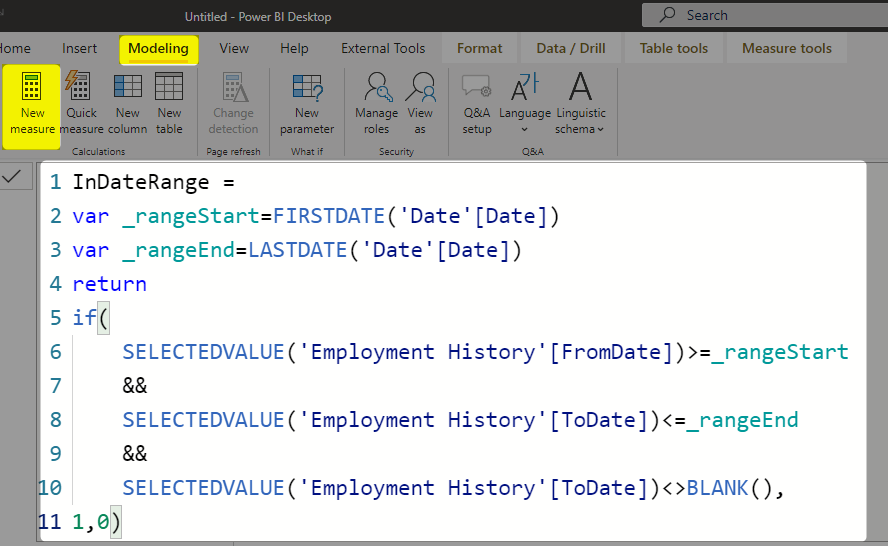
To explain things a bit more in detail read this:
- _rangeStart and _rangeEnd are variables that pick the selected date range from the slicer. To learn more about variables, read my article here.
- The IF statement checks if the FromDate is after the _rangeStart and the ToDate is before the _rangeEnd.
- As there might be Nulls (or blank) in the ToDate, there is a last check to see if the ToDate is not equal blank.
If this measure be added to the table visual, here is how it would work;
For the rows that are in the range, the measure will return 1 for them. and for the remaining rows, it will return 0.
This means you can use this measure just for filtering and not for showing in the visual.
Measure as a Visual Filter
We do not need the measure in the table visual, you can remove that. Instead, add the measure into the visual level filter.
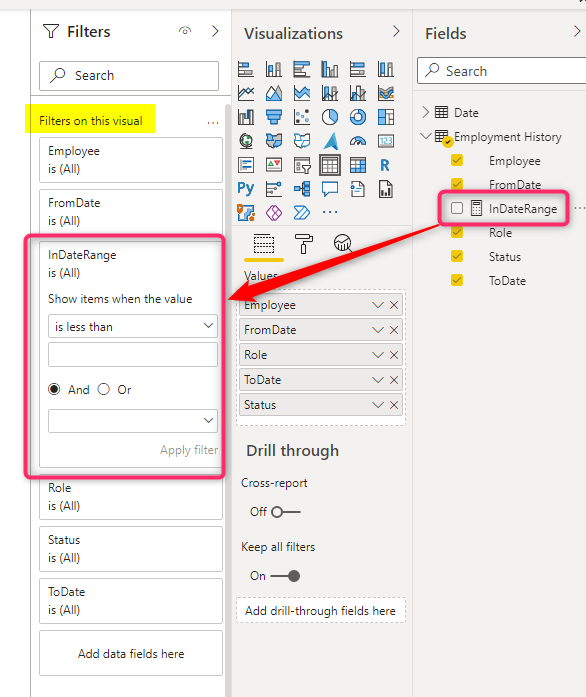
Now set the rule as Equal to 1. This means only those rows that fits in the range;
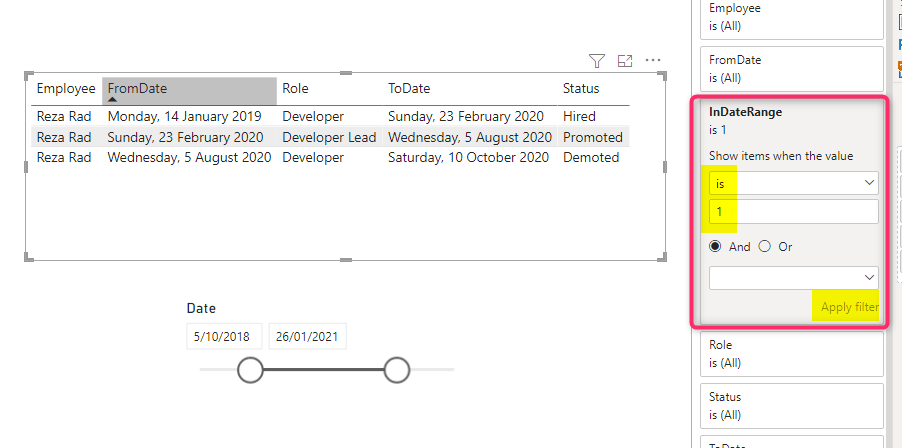
And here you go, the report working like a charm!
Summary
Filtering based on two fields using one single dimension table can be done by filtering data using DAX measure, which is the pattern I explained here. Please note that if you want to filter only based on one field. For example, find all records that their ToDate falls in the selected date range, no matter if the FromDate is in the range or not, then you can do it in a much simpler way, but creating a relationship based on ToDate and the Date table. Because in this case that is the only field that needs filtering.
Study More
There are other articles that I strongly suggest to get a full grasp of how this pattern works;
- Subscription Pattern in Power BI – DAX Measure for Active Subscribers or Open Tickets For All Dates
- From and To Date Slicers in Power BI: Filtering Based on Two Fields
- Power BI HR Pattern: DAX Measures for the Last Position to Date: Last Status to Date
- Power BI Pattern: Find Start and End Date of Task from Children


Reza is author of more than 14 books on Microsoft Business Intelligence, most of these books are published under Power BI category. Among these are books such as Power BI DAX Simplified, Pro Power BI Architecture, Power BI from Rookie to Rock Star, Power Query books series, Row-Level Security in Power BI and etc.
He is an International Speaker in Microsoft Ignite, Microsoft Business Applications Summit, Data Insight Summit, PASS Summit, SQL Saturday and SQL user groups. And He is a Microsoft Certified Trainer.
Reza’s passion is to help you find the best data solution, he is Data enthusiast.
His articles on different aspects of technologies, especially on MS BI, can be found on his blog: https://radacad.com/blog.