
As I mentioned in Post, Azure Notebooks is combination of the Jupyter Notebook and Azure. There is a possibility to run your own python, R and F# code on Azure Notebook. In post series, I will share my experience working with Azure Notebook. First, in this post, I will share my first experience of working with Azure notebook in a Workshop created by Microsoft Azure ML team, presented by Tzvi. https://github.com/tsikiksr/automl-workshop.
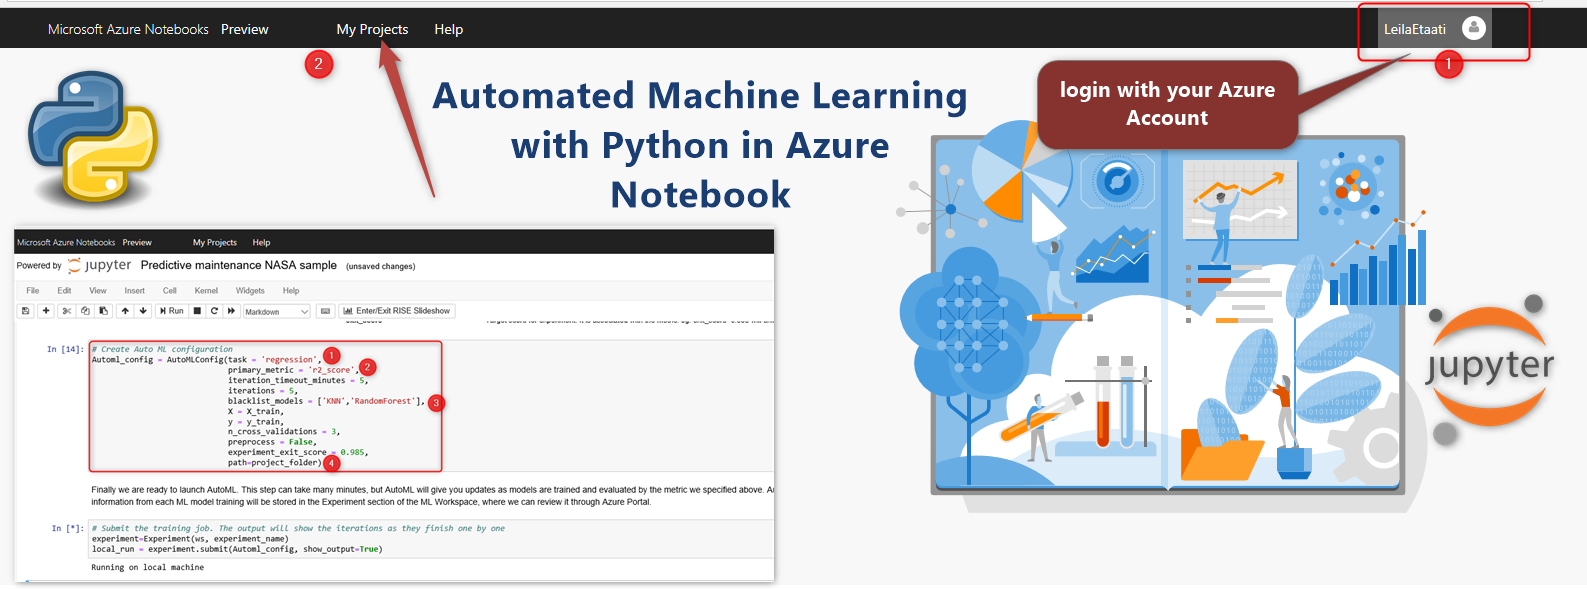
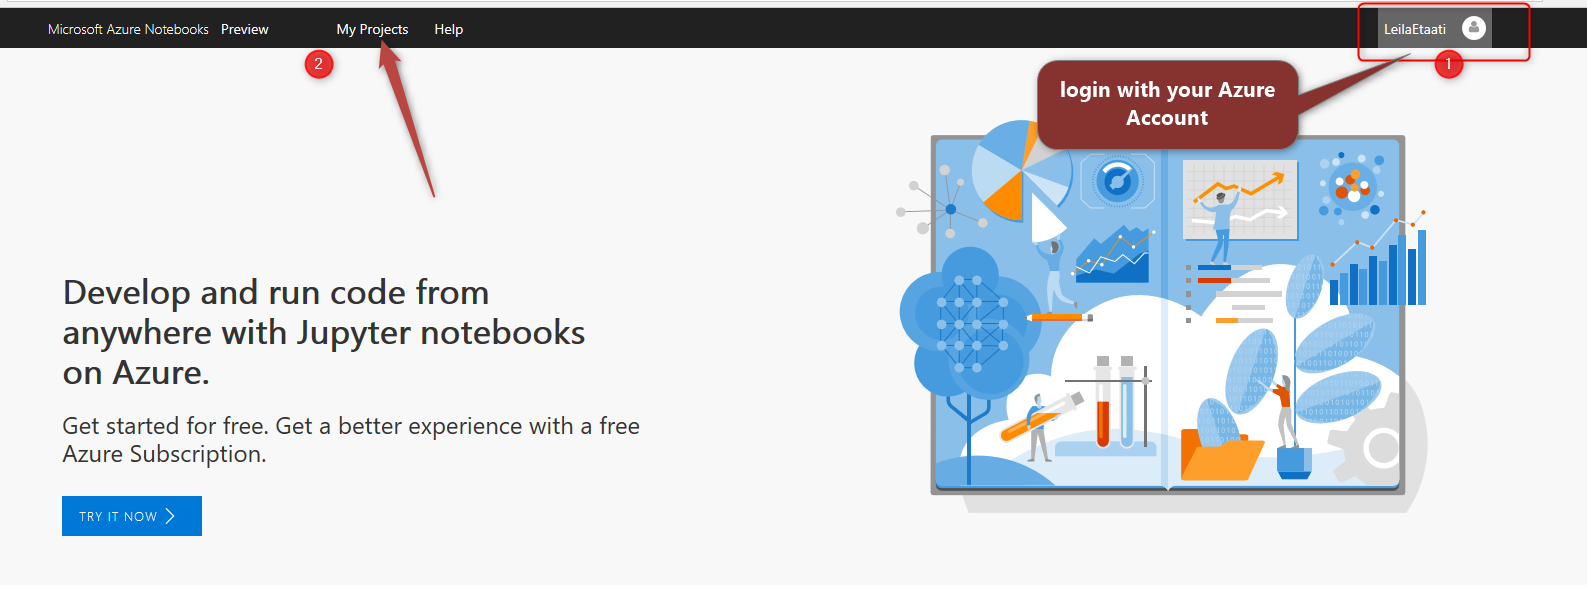
first, need to log in with your Azure account in Azure Notebooks (https://notebooks.azure.com/).
In the previous posts, I have shown how to use the Automated machine learning in Azure ML workspace. In this post, you will see how we can follow the same process with Python scripts using the predefined sample project and dataset.
To start, after login to the Azure Notebooks, click on the Upload GitHub Repo. We are going to load the project that has been created to help us to test this the environment. Also, this post show you the code behind the Automated ML that presented in

Set Up the Azure Notebooks
In the new page, first, you need to put the link to GitHub workspace
https://github.com/tsikiksr/automl-workshop [1]
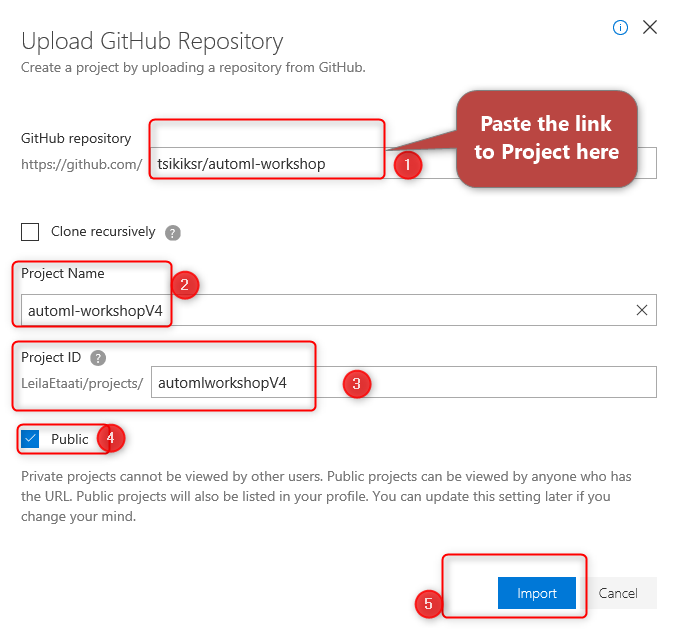
In the new page, set the project name and Project ID, also you can specify this project can be viewed or not by others, in this example, I make it public.
Next, import the project.
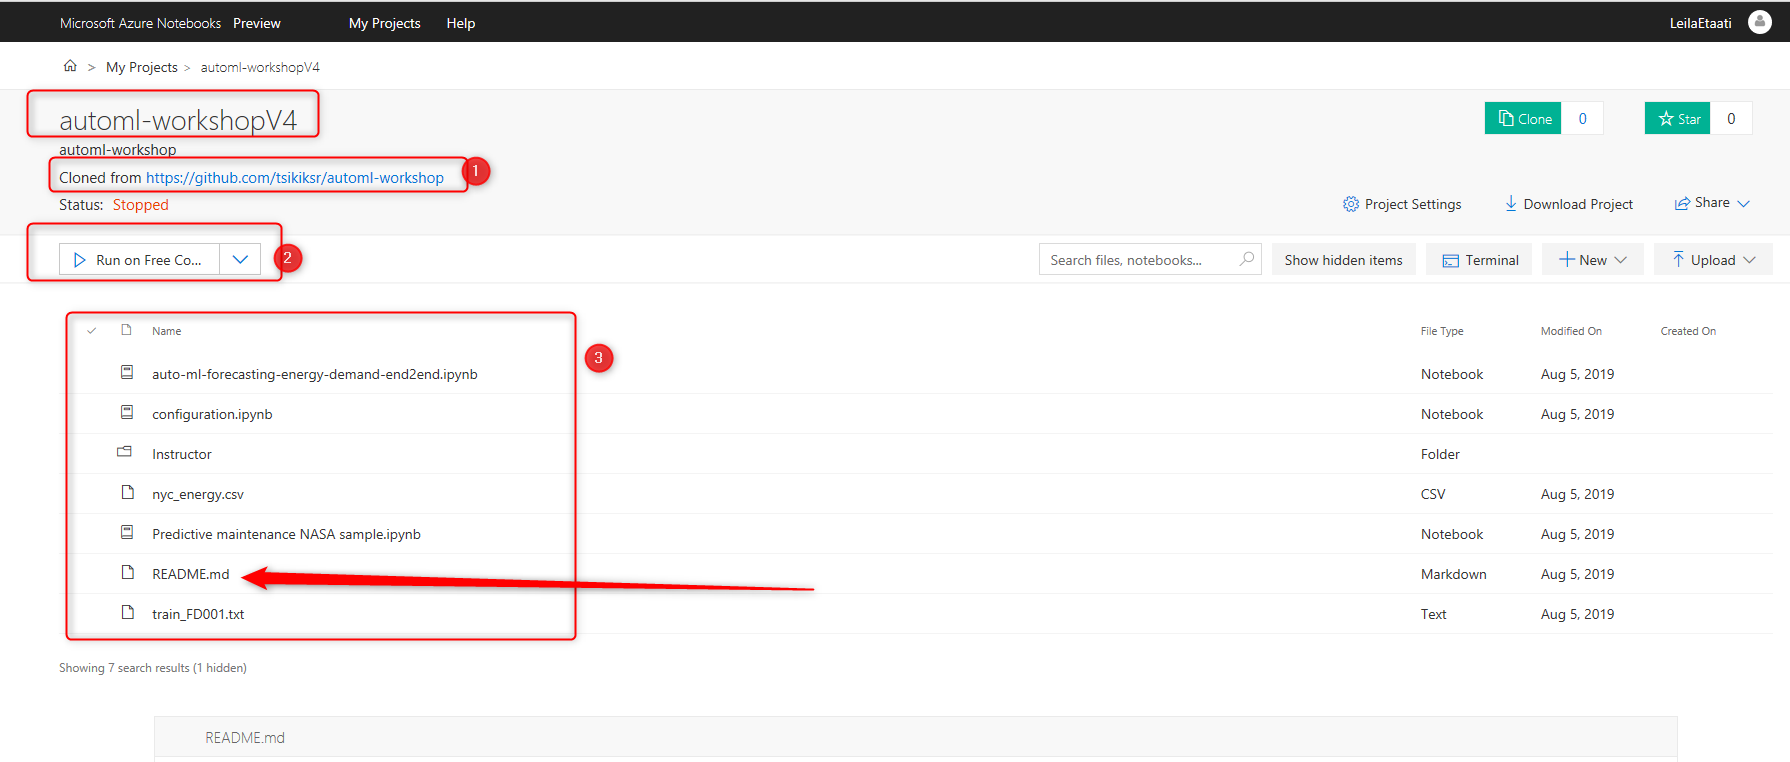
After importing the project, a new project with the name automl-workshopv4 has been created. Initially, the status of running is Stopped. To see more information about the project click on the README.md file
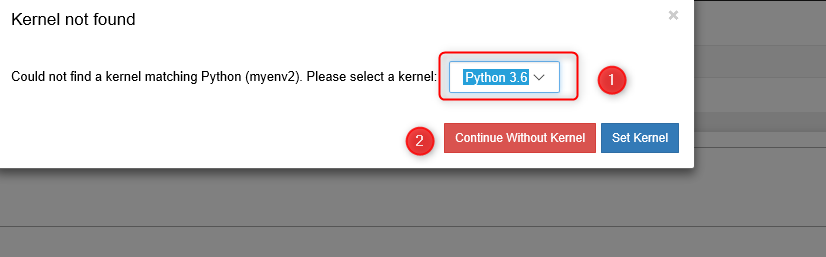
Next, click on the configuration.ipynb file, then click on it, it will ask you to set the kernel. for this project, choose the Python 3.6 and then click on the Set Kernel
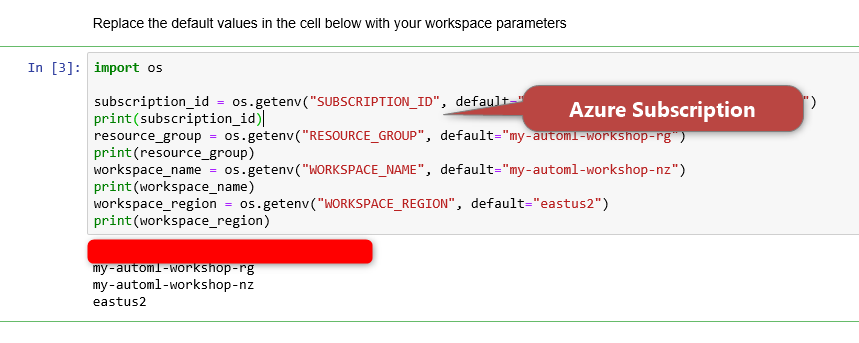
The configuration file contains some setting to configure the Azure workspace. Azure workspace
“The workspace is the top-level resource for Azure Machine Learning service, providing a centralized place to work with all the artefacts you create when you use Azure Machine Learning service. The workspace keeps a history of all training runs, including logs, metrics, output, and a snapshot of your scripts. You use this information to determine which training run produces the best model.”[2]
so, to connect our experiment to Azure ML Workspace, you need to set it up first.
Configuration
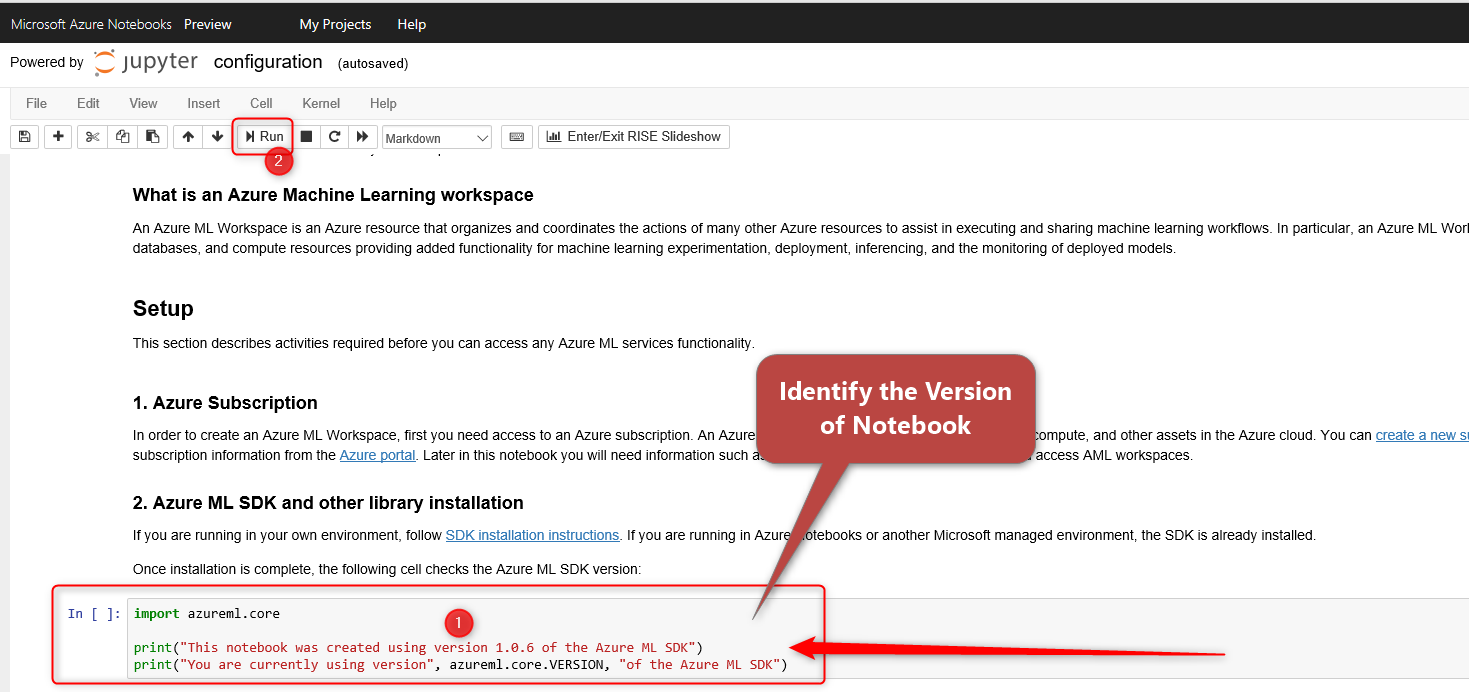
First-> Setup the Azure mL Notebook, first check the version of Azure Notebooks
using the azureml.core library then checks the version of Azure ML SDK: azureml.core.VERSION
import azureml.core
print(“This notebook was created using version 1.0.6 of the Azure ML SDK”)
print(“You are currently using version”, azureml.core.VERSION, “of the Azure ML SDK”)
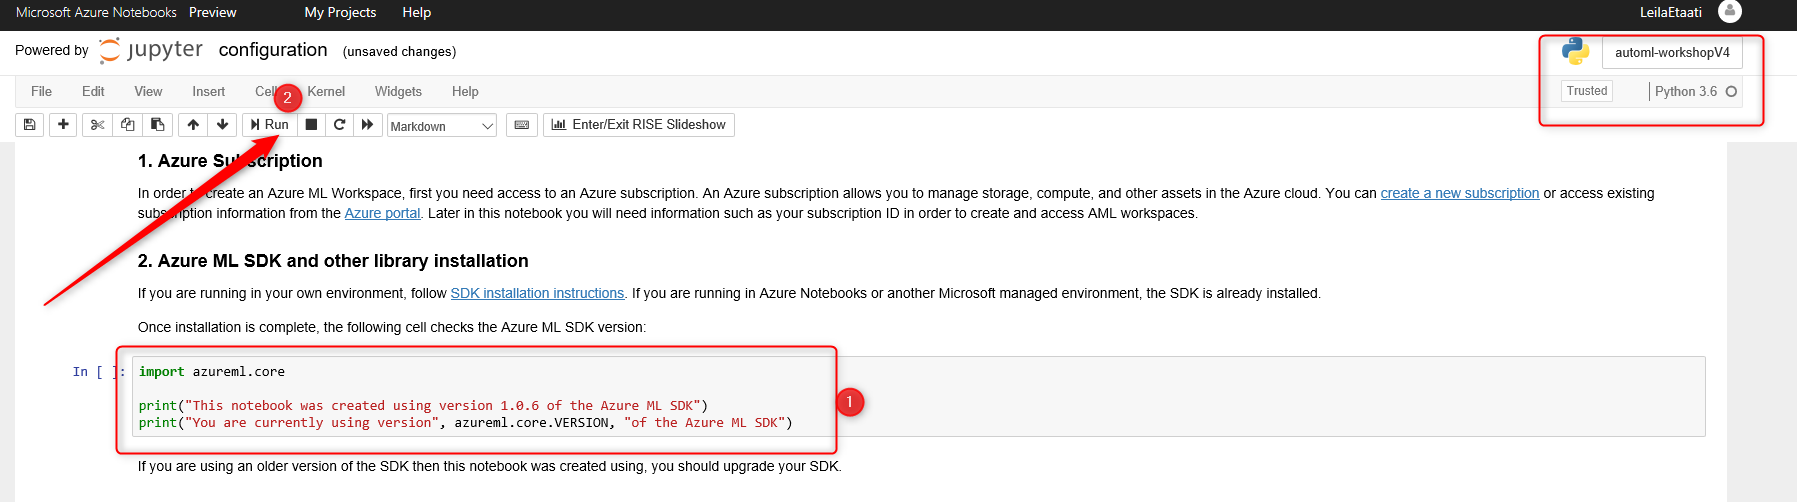
if the version does not match, you need to upgrade the Azure Notebook using below codes
!pip install –upgrade azureml-sdk[notebooks]
Just make sure you already set up the Kernel before opening the config file otherwise, at the top right of the page, you will see the message as No Kernel.
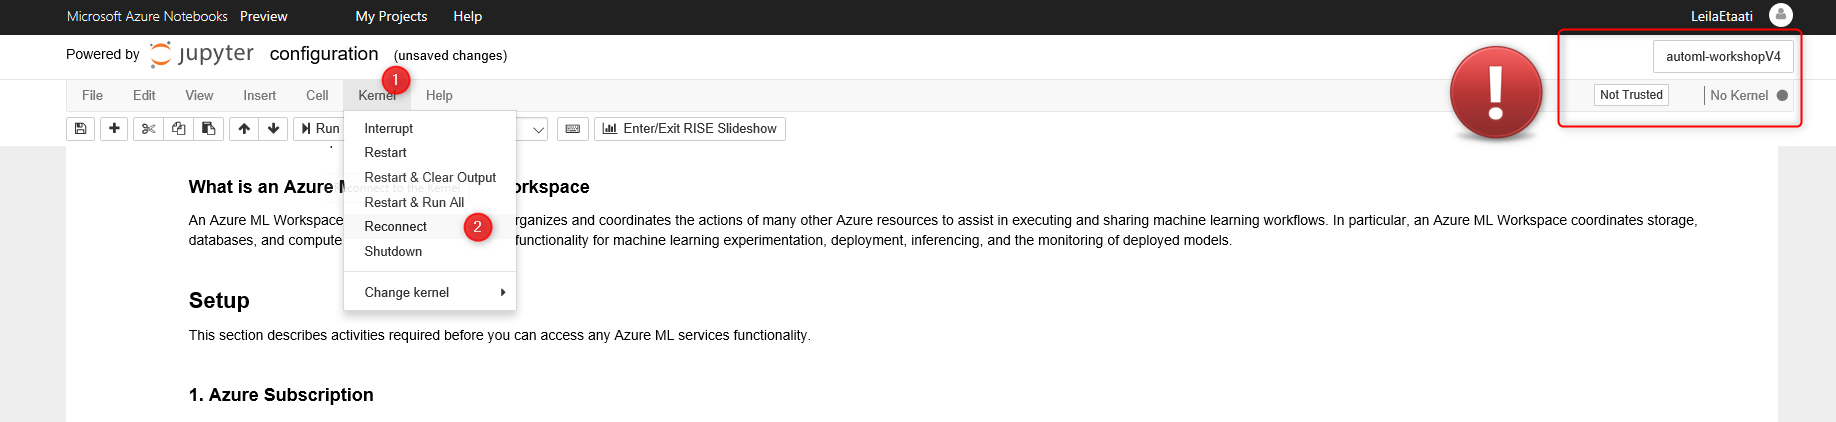
After setting up the Kernel, you need to run the Cell, click on the related cell, then click on the Run command at the top.
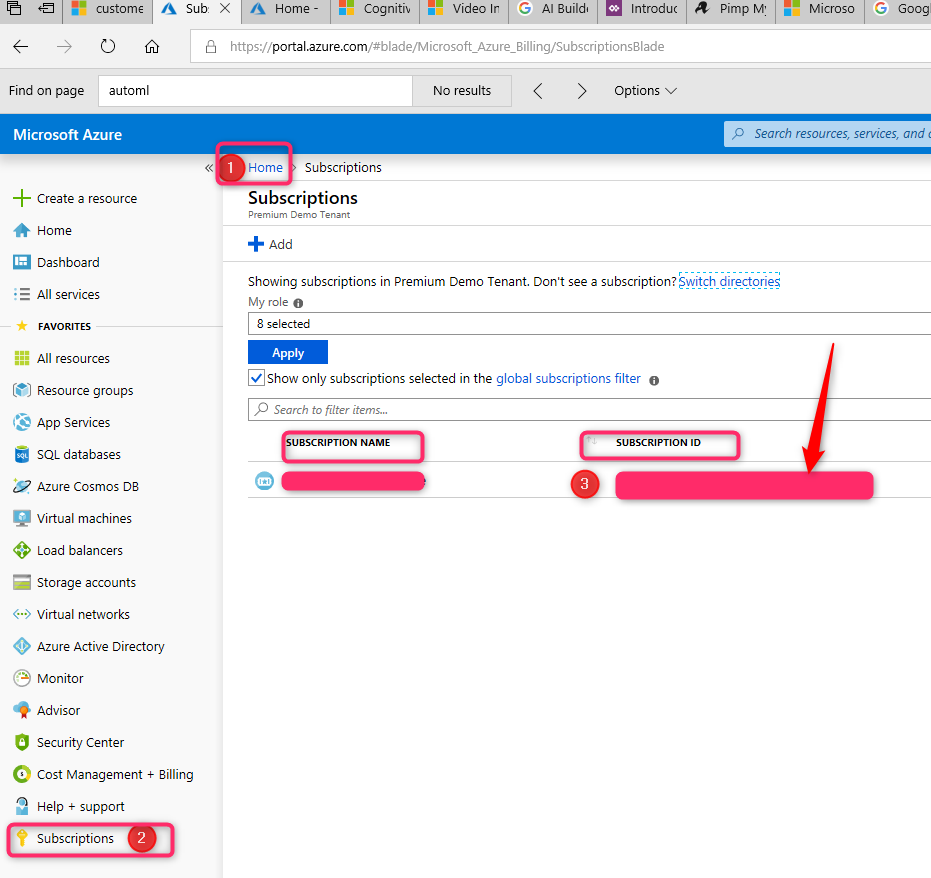
In the next step, we need to connect the workspace to the Azure Subscription. what you need to get the subscription ID from Microsoft Azure.
To find it the azure subscription ID, need to login to the Azure portal, then click on the subscription and then copy the ID.
Next, you need to create a workspace. You need to import the library
from azureml.core import Workspace from Azureml library. then using the command
Workspace.create(), this function will create a new workspace with below parameters
Workspace name, subscription id, resource group, and the location.
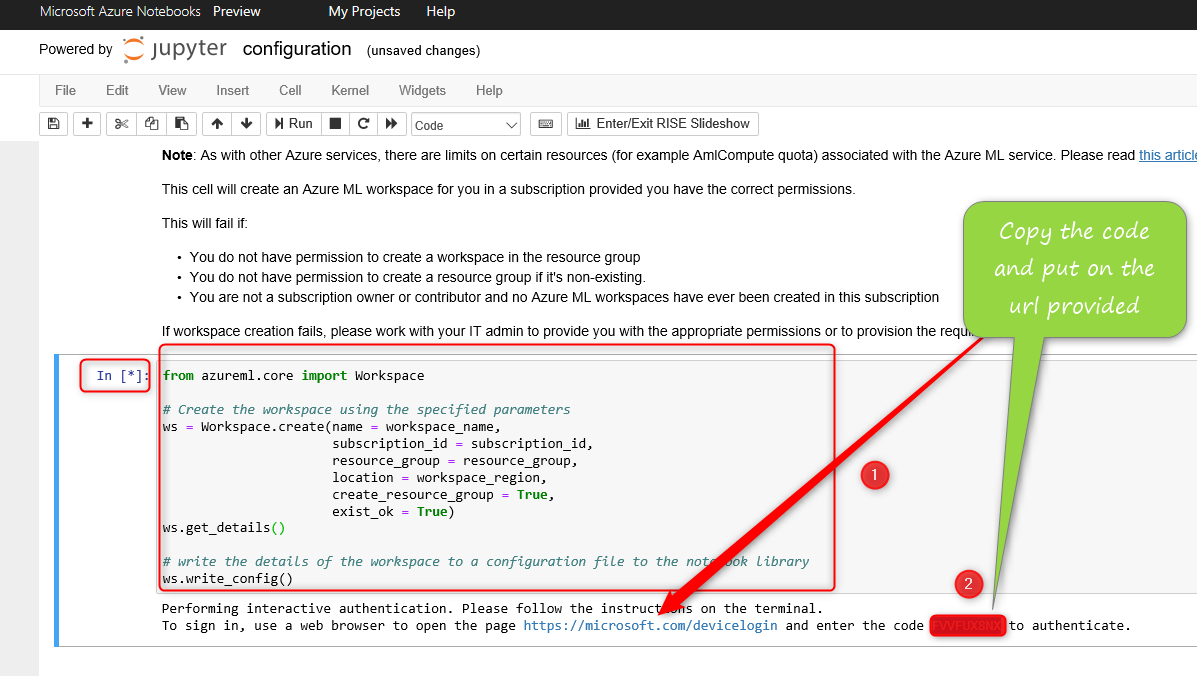
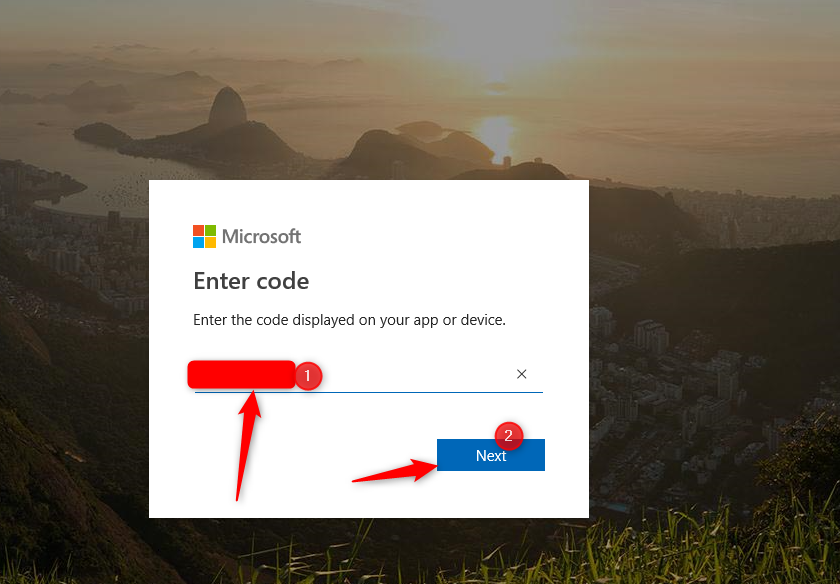
Next, you will navigate to the page asking about the code, “Microsoft.com/devicelogin” and copy and paste the code there.
Next, run the code to create a workspace.

After creating the workspace, if you navigate to portal.azure, in the Machine Learning Service Workspaces you should see the newly created workspace listed there.

from azureml.core import Workspace
# Create the workspace using the specified parameters
ws = Workspace.create(name = workspace_name,
subscription_id = subscription_id,
resource_group = resource_group,
location = workspace_region,
create_resource_group = True,
exist_ok = True)
ws.get_details()
# write the details of the workspace to a configuration file to the notebook library
ws.write_config()
Train Model
Next, on the GitHub page, there are some files related to predictive analytics example, we can train and create a model for Predictive maintenance with applying training data.
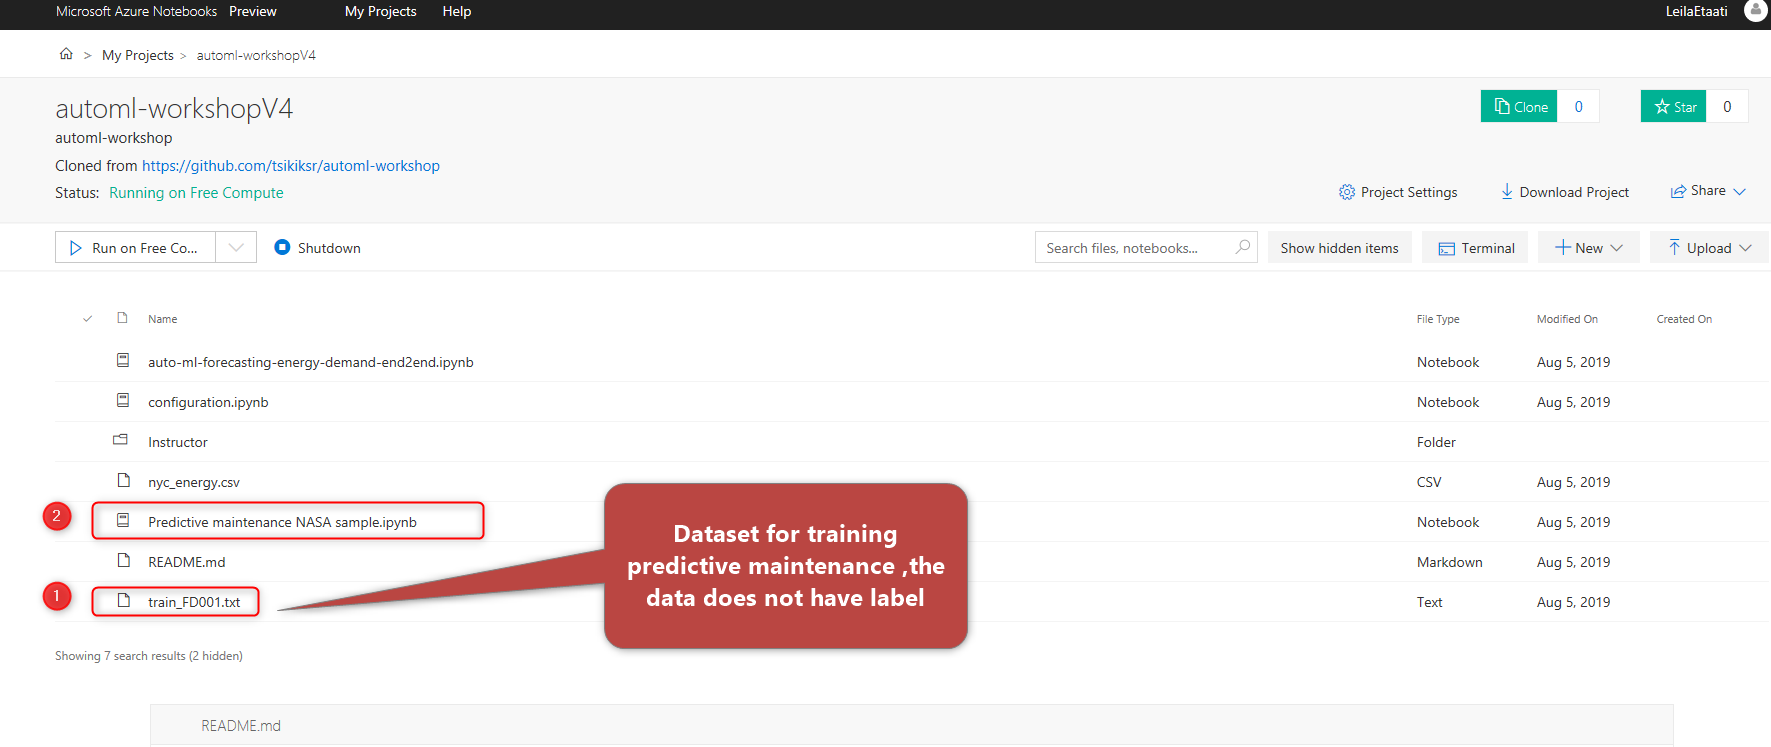
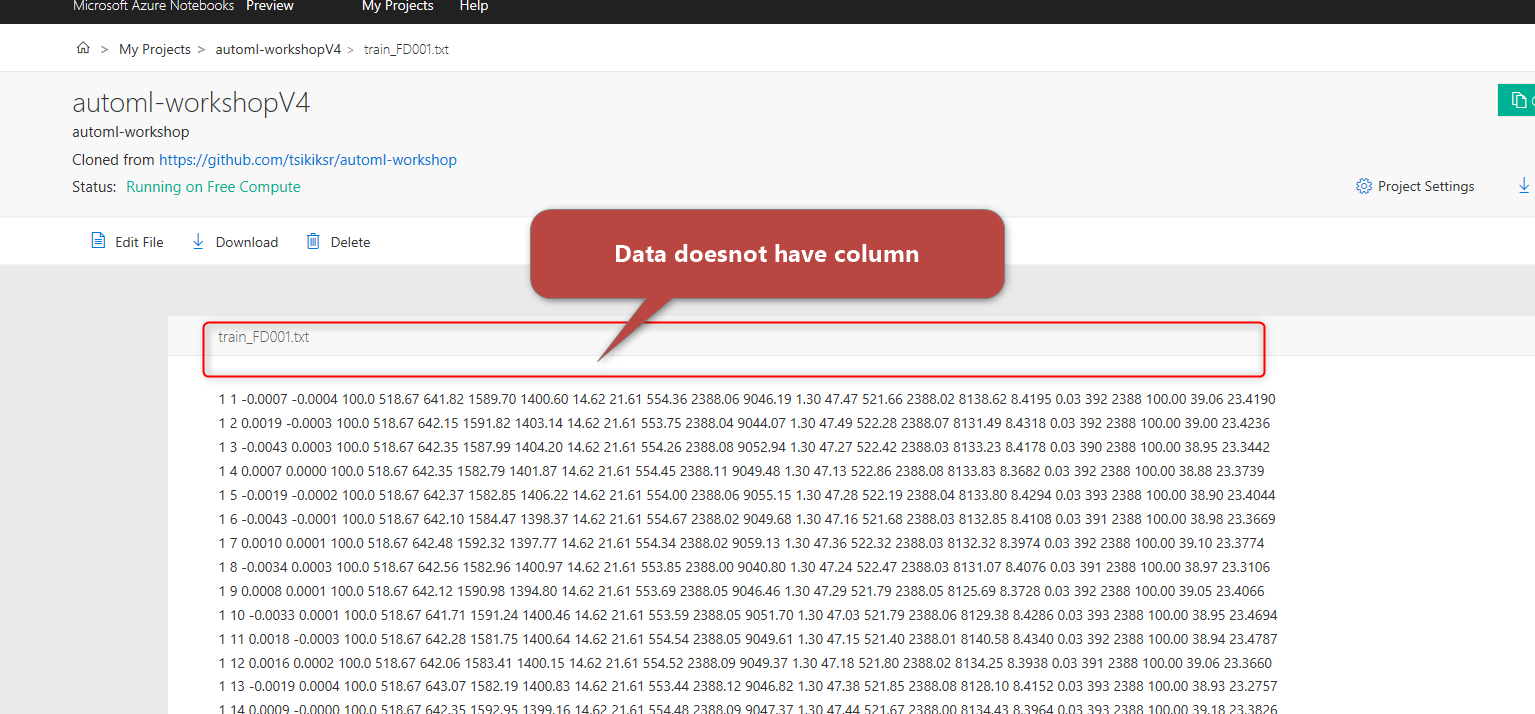
click on the training dataset, you will see the raw data there. The data does not have the column name yet that means we need to clean the data.
Next, click on the PredictivemaintenanceNASAsample.ipynb
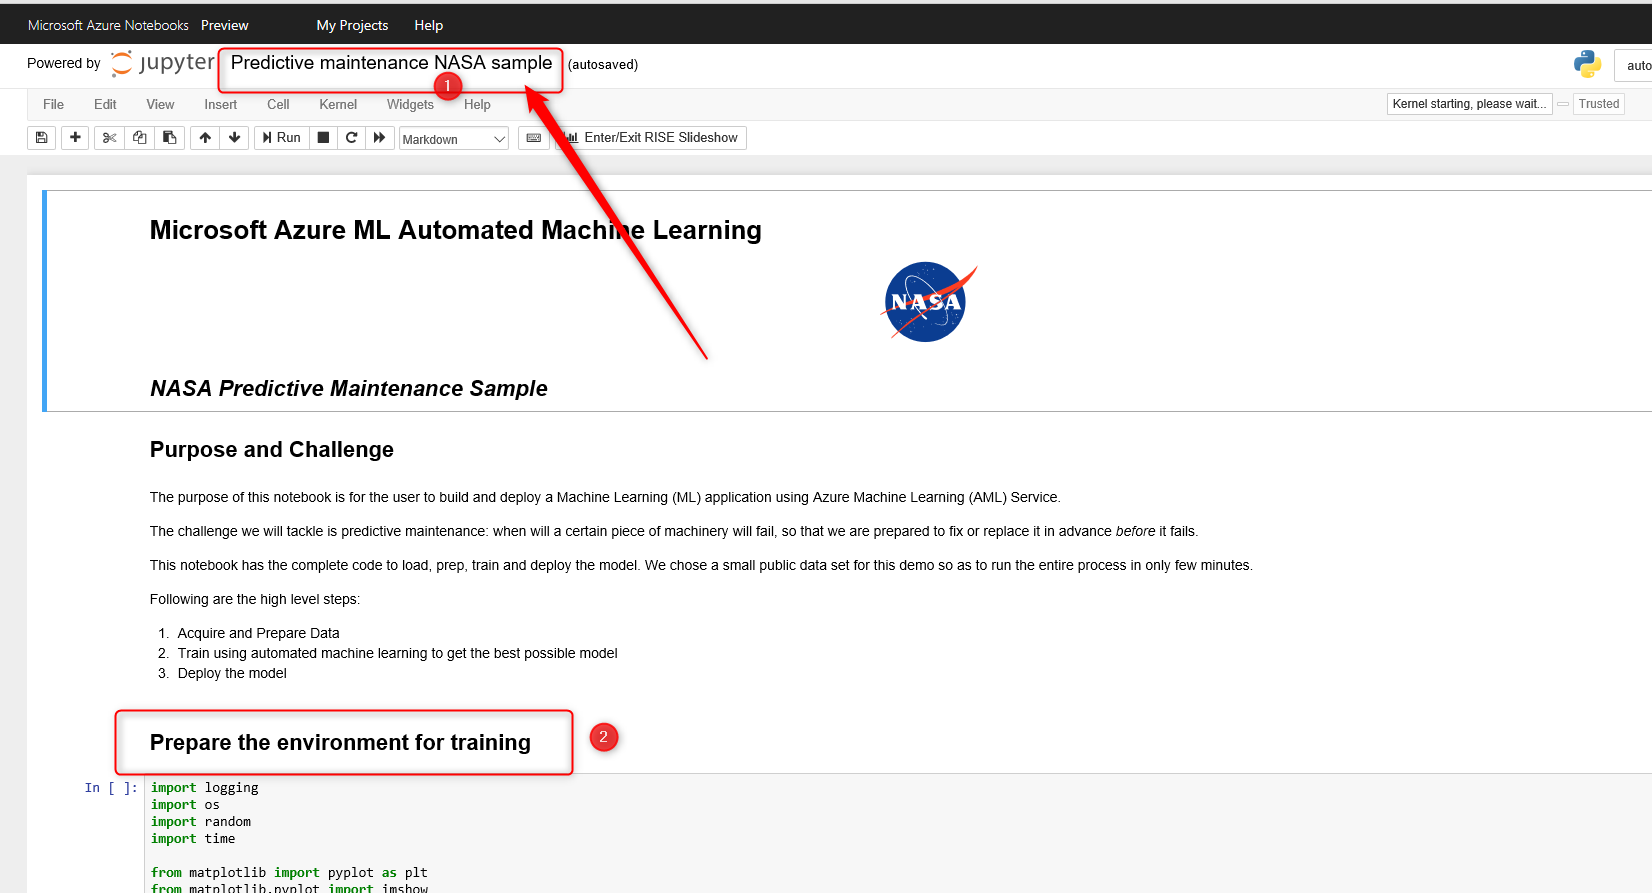
As you can see in the above picture, you need to setup the environment and install the libraries.
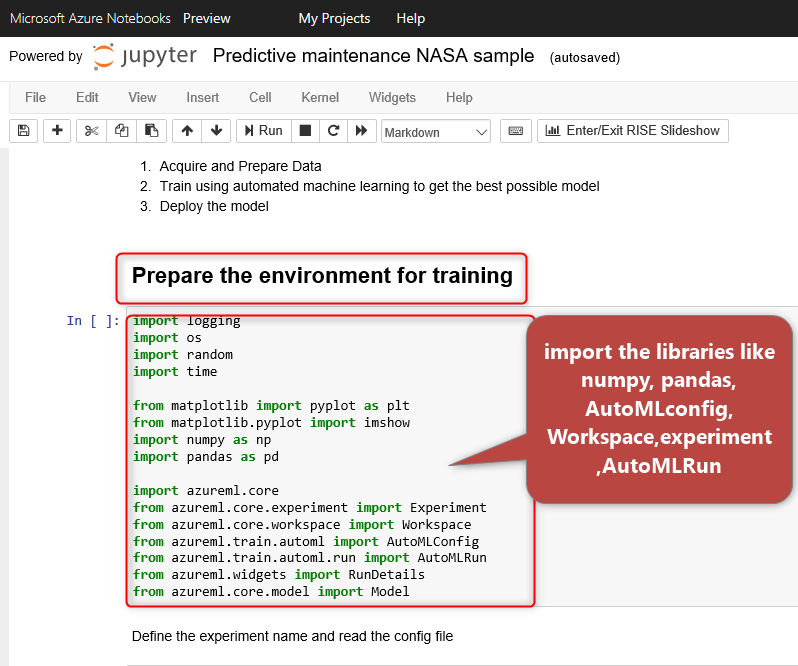
You need to import the below libraries such as azureml.core, pandas, numpy, workspace, experiment and so on.
# Import libraries
import azureml.core
import pandas as pd
import numpy as np
import logging
import warnings
# Squash warning messages for cleaner output in the notebook
warnings.showwarning = lambda *args, **kwargs: None
from azureml.core.workspace import Workspace
from azureml.core.experiment import Experiment
from azureml.train.automl import AutoMLConfig
from azureml.train.automl.run import AutoMLRun
from matplotlib import pyplot as plt
from sklearn.metrics import mean_absolute_error, mean_squared_error, r2_score
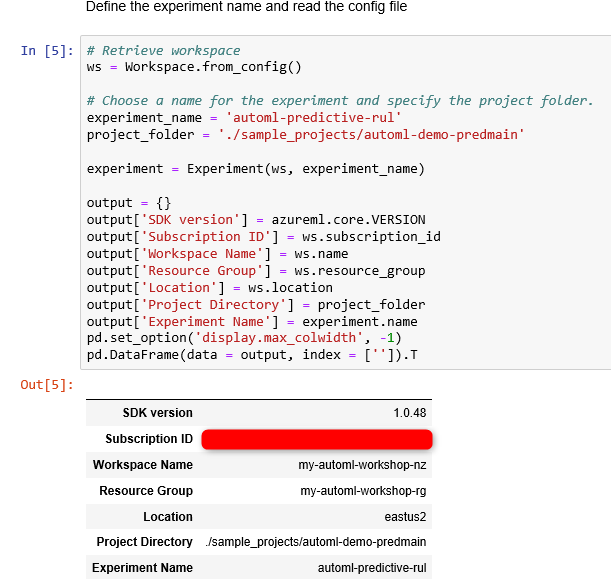
after running the code to check the environment is set correctly, you need to use the function
Workspace.form_config()
also to check the experiment()
import azureml.core
import pandas as pd
from azureml.core.workspace import Workspace
ws = Workspace.from_config()
output = {}
output[‘SDK version’] = azureml.core.VERSION
output[‘Subscription ID’] = ws.subscription_id
output[‘Workspace’] = ws.name
output[‘Resource Group’] = ws.resource_group
output[‘Location’] = ws.location
pd.set_option(‘display.max_colwidth’, -1)
outputDf = pd.DataFrame(data = output, index = [”])
outputDf.T
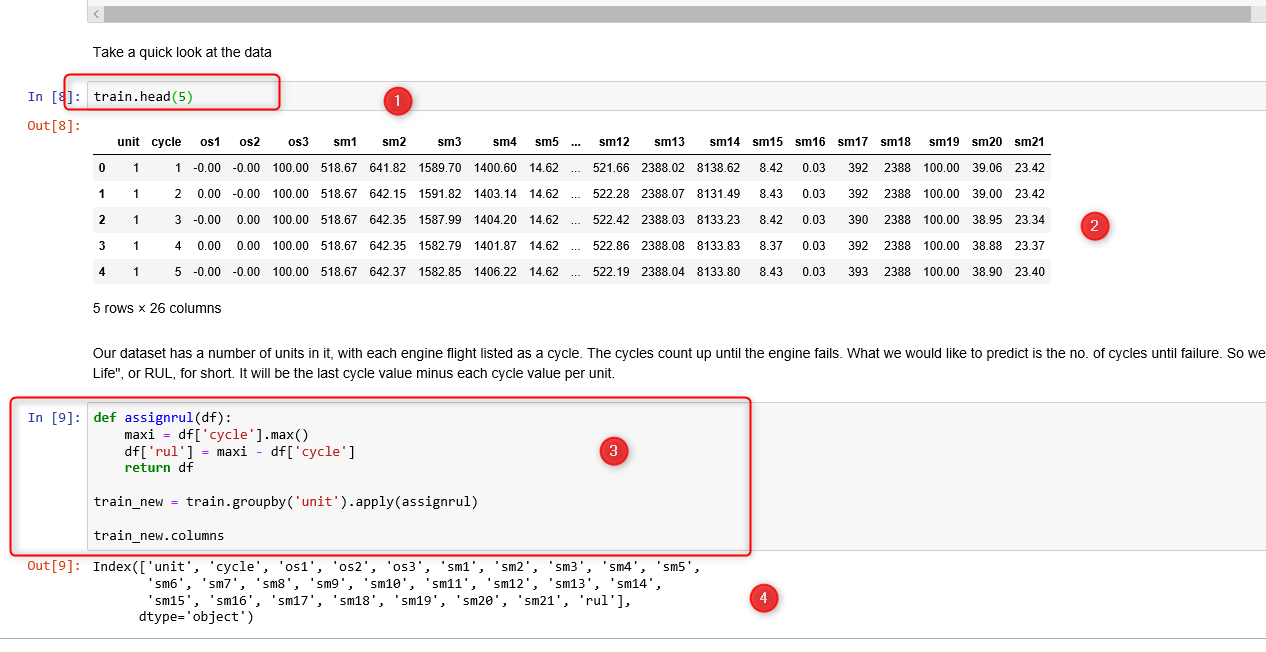
Next, the data preparation step need to be done as shown in the below picture.

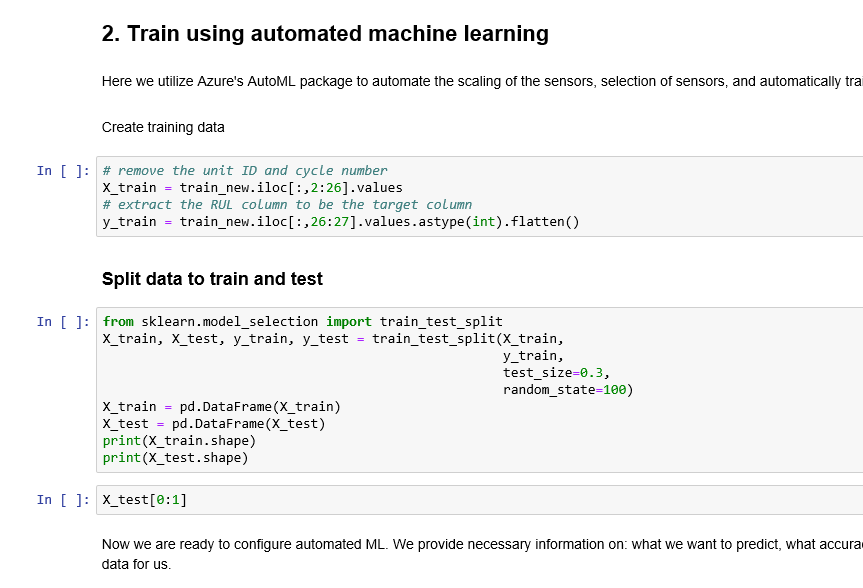
After creating the training and test dataset as shown in the below picture, you able to create the model
Automated machine learning in Python
In the post about Automated ML, I have shown how to access to automated machine learning via Azure ML Portal and then apply automated ML on the imported data. Below scenario shows the Python code behind the automated ML.
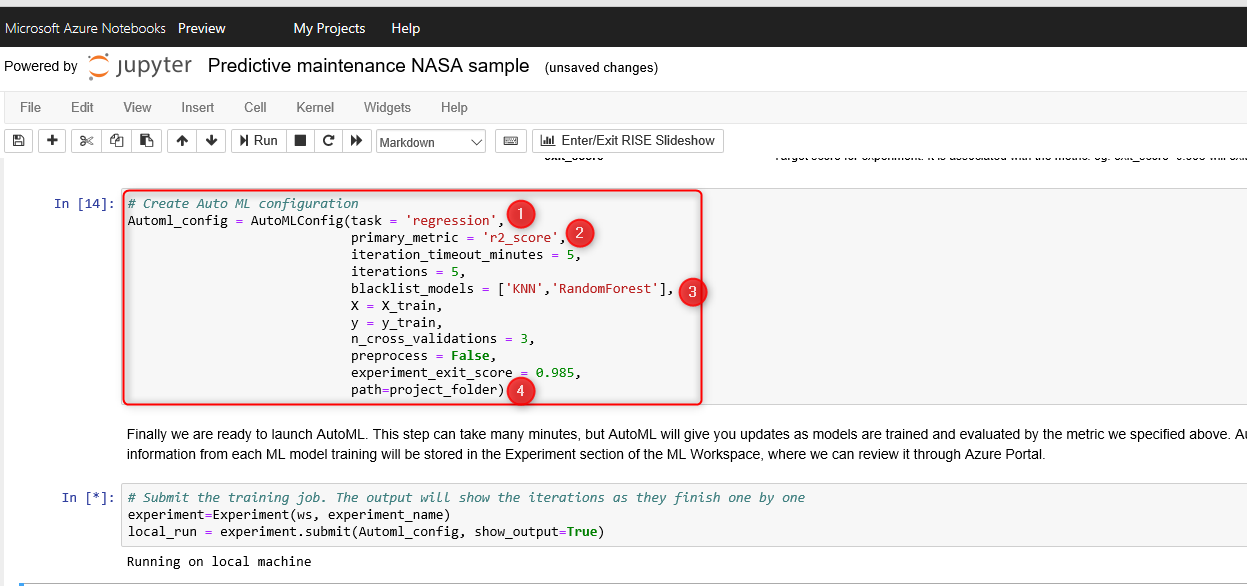
in the below code, AutoMLConfig () function has been used to apply different algorithms on the dataset and also applying the Hyperparameter tuning process.
Task: specify the main purpose of the machine learning
Block List Algorithms: ( as I mentioned in the post), there are different algorithm will be applied on the regression, classification and forecasting task, in this parameters you specify the algorithms that need to be blocked.
X and Y: Train and Test Dataset
the experiment.submit() you will pass the AutoML_config
local_run = experiment.submit(automl_config, show_output=True)
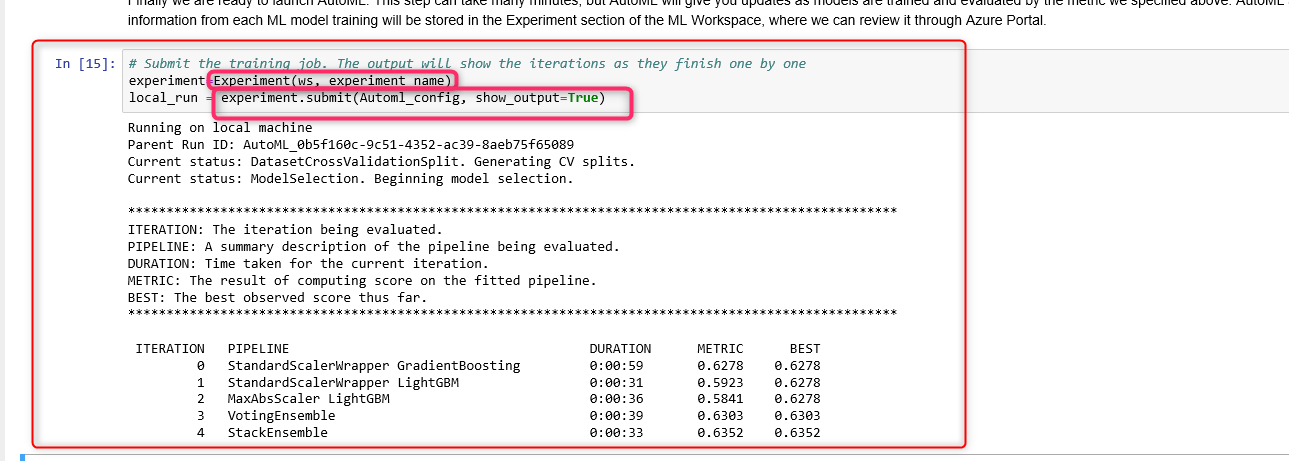
This process will take a couple of minutes to try different algorithms and apply different parameters on data. As you can see in the above code, the iteration number, the pipeline name, the duration of running each pipeline and accuracy ( metric) has been listed.
from azureml.widgets import RunDetails
RunDetails(local_run).show()
the function RunDetails().show()

You can see the best model.
you also can run the rest of the code to evaluate and deploy the model which will be explained in detail later.
In the next post, I am going to show, how to apply the Automated model in another example such as predictiving customer rate or survival of people.
[1]https://github.com/tsikiksr/automl-workshop
[2]https://docs.microsoft.com/en-us/azure/machine-learning/service/concept-workspace


