

In the previous article, I mentioned what is the Dataflow, how it can be helpful, and mentioned some of its use cases of it in real-world Power BI implementation. In this article as the second part of the series for Dataflow, I like to give you some hands-on experience with Dataflow and explain how Dataflow works. If you like to learn more about what and why about dataflow, read my article about; What are the Use Cases of Dataflow for You in Power BI. If you like to learn more about Power BI; read the Power BI book from Rookie to Rock Star.
Video
Prerequisite
Understanding what Dataflow is, and how it can be useful in a Power BI implementation is the first part of this blog series. read about it here: What are the Use Cases of Dataflow for You in Power BI
Things to Know Beforehand
Let’s start this example, by creating the very first Dataflow straight away. The first thing you need to know is that the Dataflow creation and maintenance process is happening all in Power BI Service, not in the Desktop because Dataflow is not part of any report or *.pbix file.
Developing or Editing Dataflows are possible through Power BI service (not the Desktop)
The second important thing you need to know is that Dataflow can be created only in an app workspace. You cannot create a Dataflow in the “My workspace”. So either create or navigate to an app workspace. As you can see in the below screenshot, I am in an app workspace called “dataflow”. The name of the app workspace can be anything you want.
Dataflow is only available in an app workspace (not in “My workspace”)
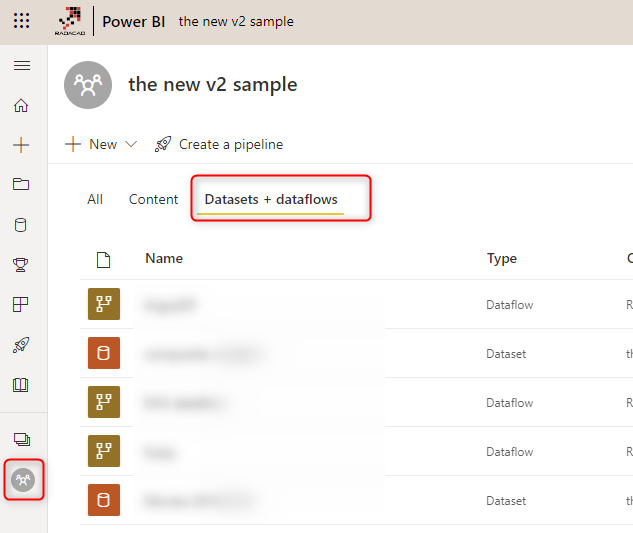
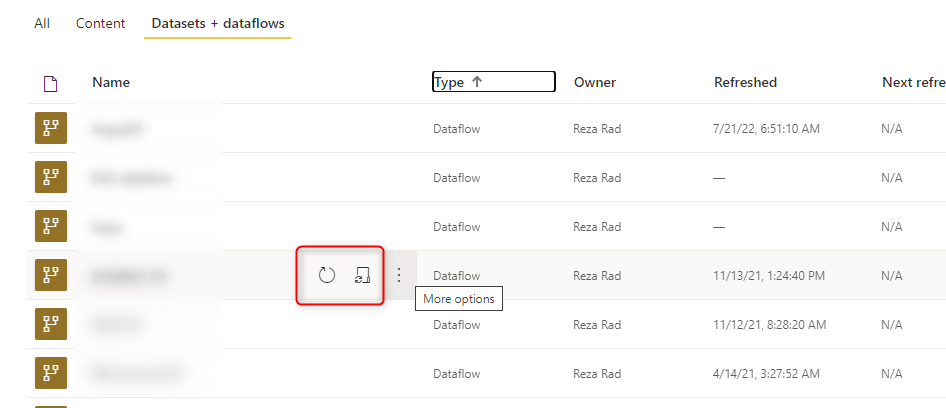
In the Datasets + dataflows tab, you will, later on, see those dataflows that you have created. If you don’t see the Dataflow tab, even in an app workspace, then there is something else you need to consider; the administration’s control of the Dataflow.
Administrative’s Control
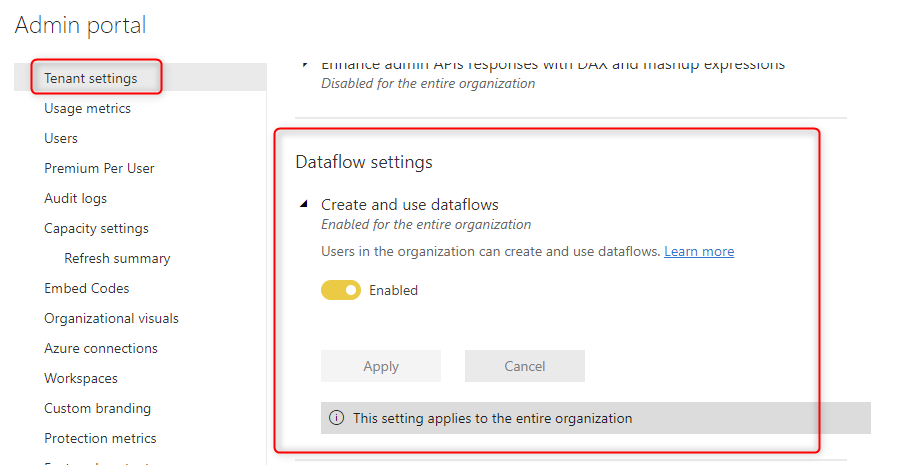
Power BI administrator can turn off or on the creating and use of the dataflow for users in the tenant. So if you don’t see the Dataflows option, it is probably because the Power BI administrator has turned off that feature. So contact your administrator to get that enabled. At the time of writing this blog post, this option can be only turned on or off for the entire organization (like many other options in the tenant setting at the very first few months of their appearance), but I believe this feature would be available for a select group of people (like many other options in the tenant settings in the future).
In the Admin Portal of Power BI service, under Tenant Settings. there is a configuration option for dataflow as shown in the screenshot below;
Creating the First Dataflow
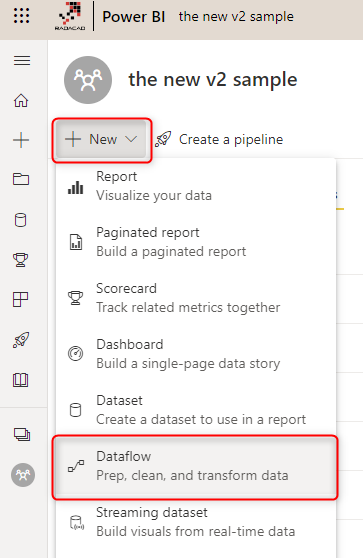
Now that we are ready, let’s start building the very first Dataflow. Start by clicking on the Create option, and then choose Dataflow.
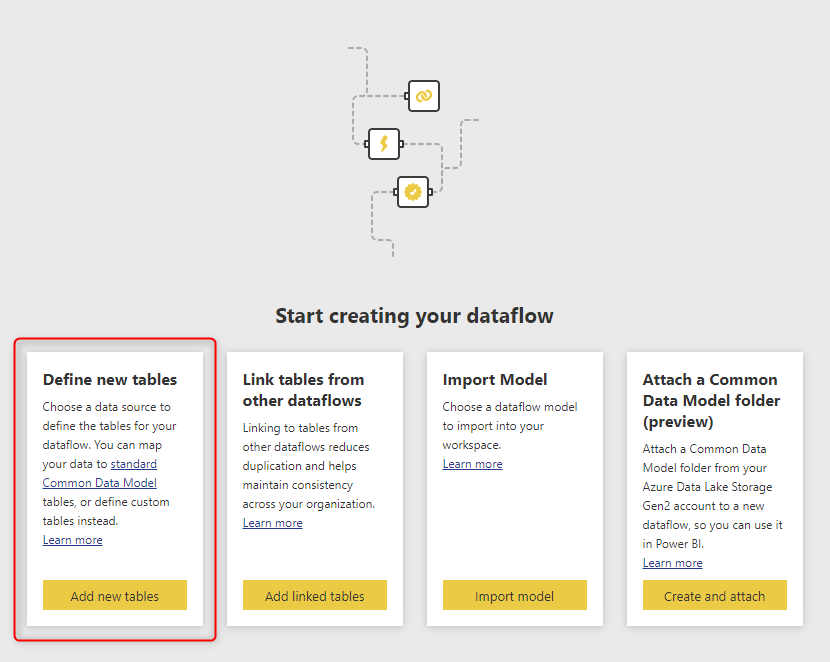
Each Dataflow is like a Job schedule process. It has one or more transformations in it and can be scheduled. These transformations can write data into some entities or tables. So let’s see how you can create the Entity (or table). In the screenshot below you see there is an option to Define new tables. Let’s start with that.
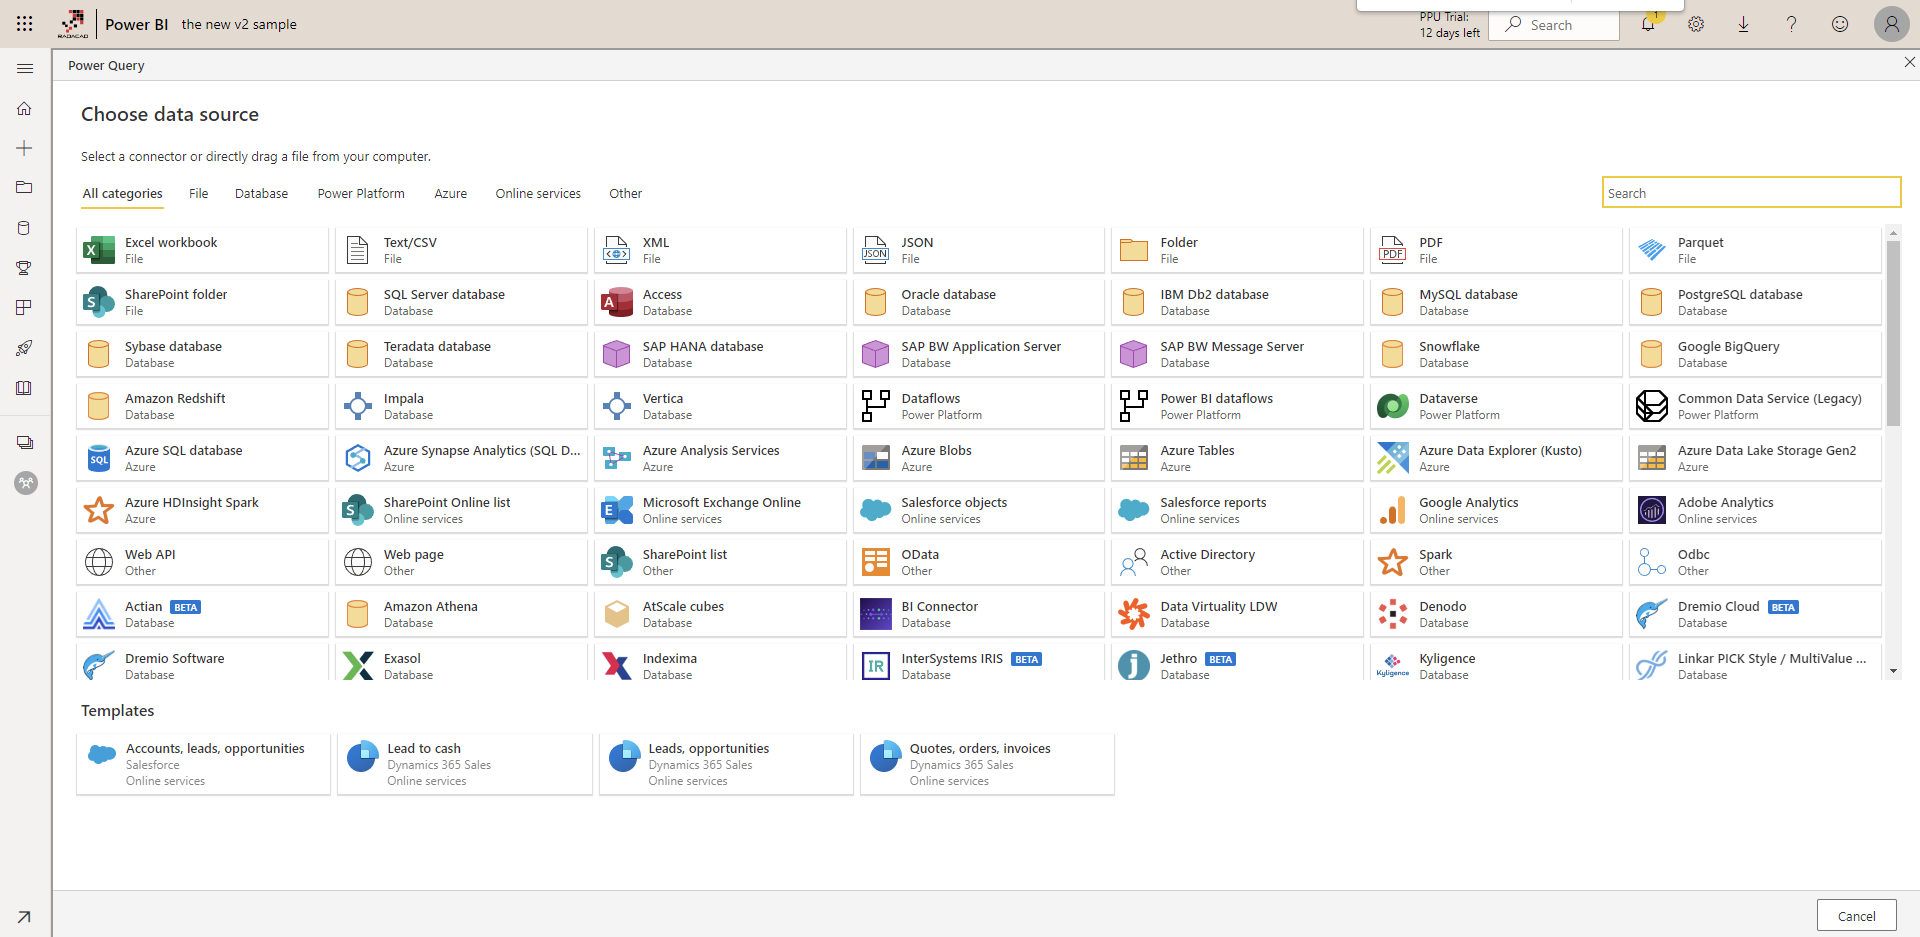
Click on Add new tables, You can see the list of all supported data sources (Recently in an update, many more data sources are added to the list). As you can see in the list below, the interface is very similar to the Get Data interface of the Power BI Desktop.
Sample Dataset
For this example, we will be using an OData source, because it won’t need gateway setup, and it doesn’t need additional setup requirements. Select OData as the type of data source, and in the URL part, enter this address: https://services.odata.org/V3/Northwind/Northwind.svc/
(OData is a dataset that is available through API, the output of that may include one or more tables. Many data transformation tools can read data from Odata. Power Query (or in this case; dataflow) also has an OData data source connection.

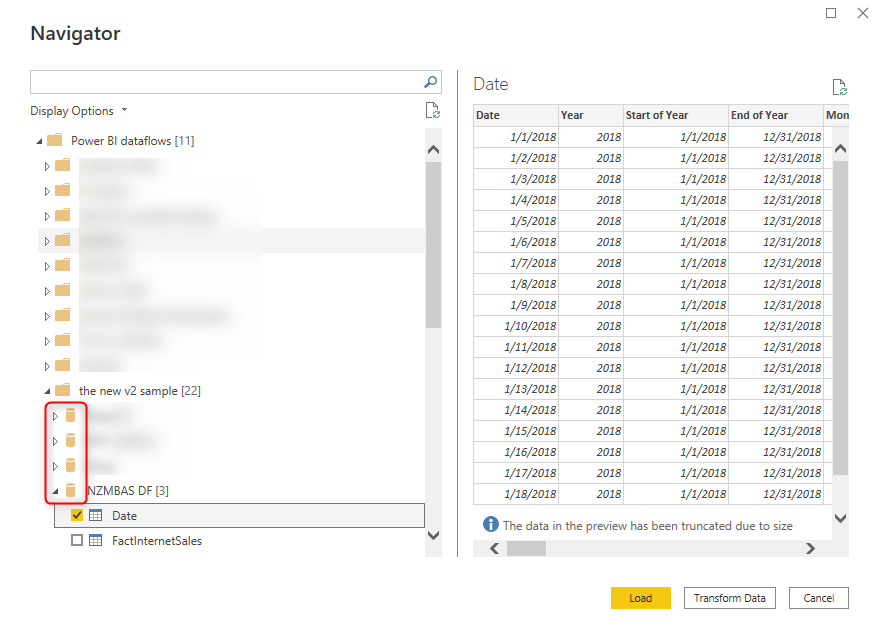
After this step, you should see a screen that is very similar to the Navigator window in the Power Query. On this screen, you will see a list of all tables and can start exploring them.
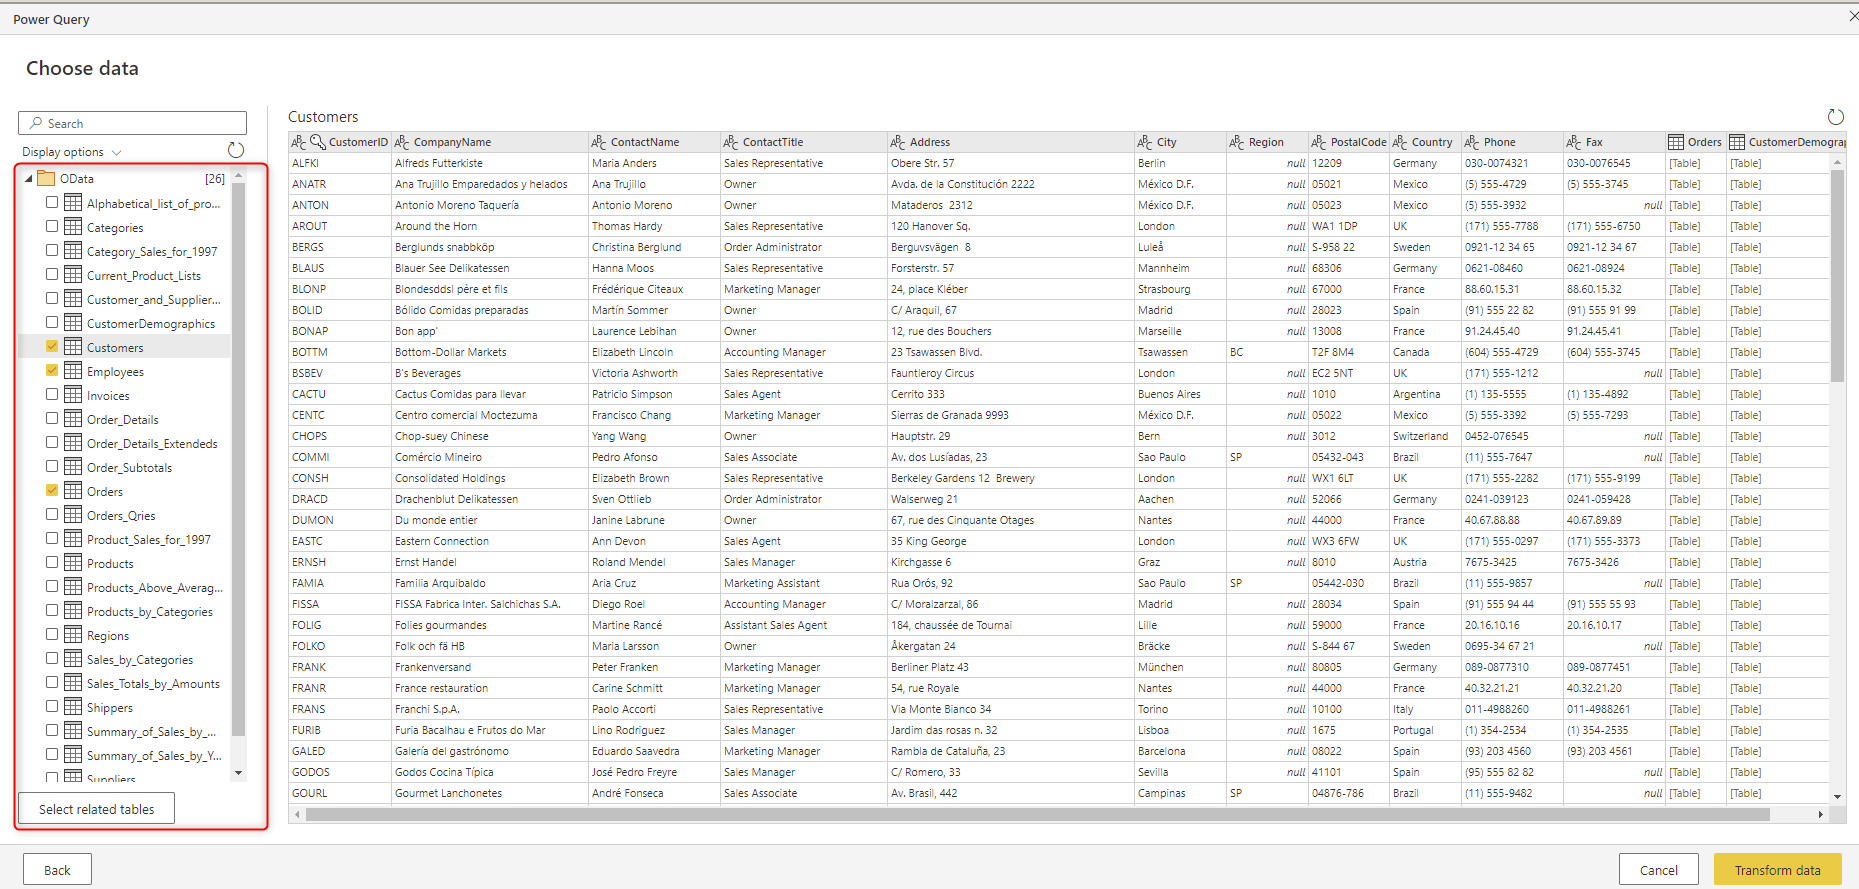
For this example, let’s select these tables: Customers, Employees, and Orders, and then click on Transform data.
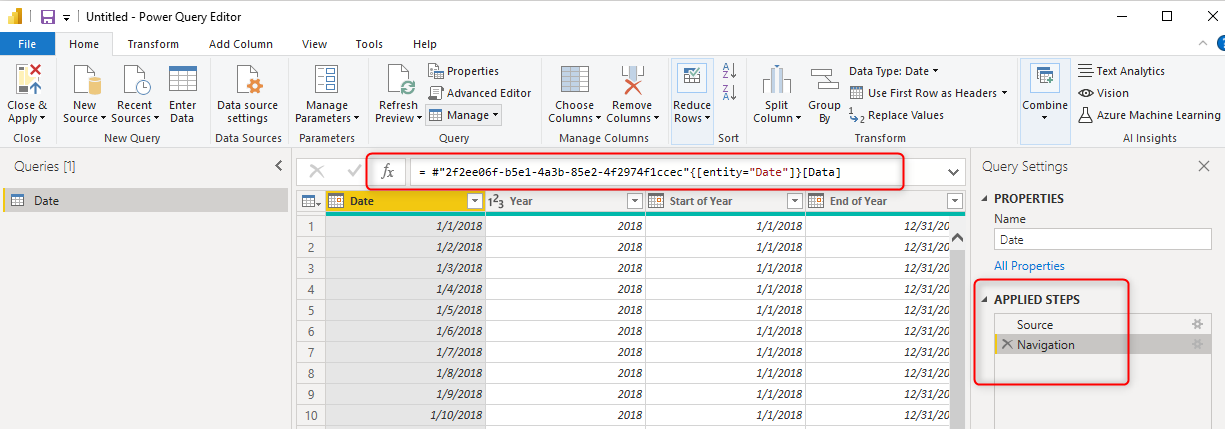
Power Query Editor Online
As you can see in the screenshot below, after selecting tables, you will see a screen that is very similar to the Power Query Editor, but the online version of it. You can see the Queries pane, Steps (Query Settings) pane, Data preview pane, and Data transformation pane all available. Recently there have been much more updates in the graphical interface of the Power Query Editor online than in the Desktop version.
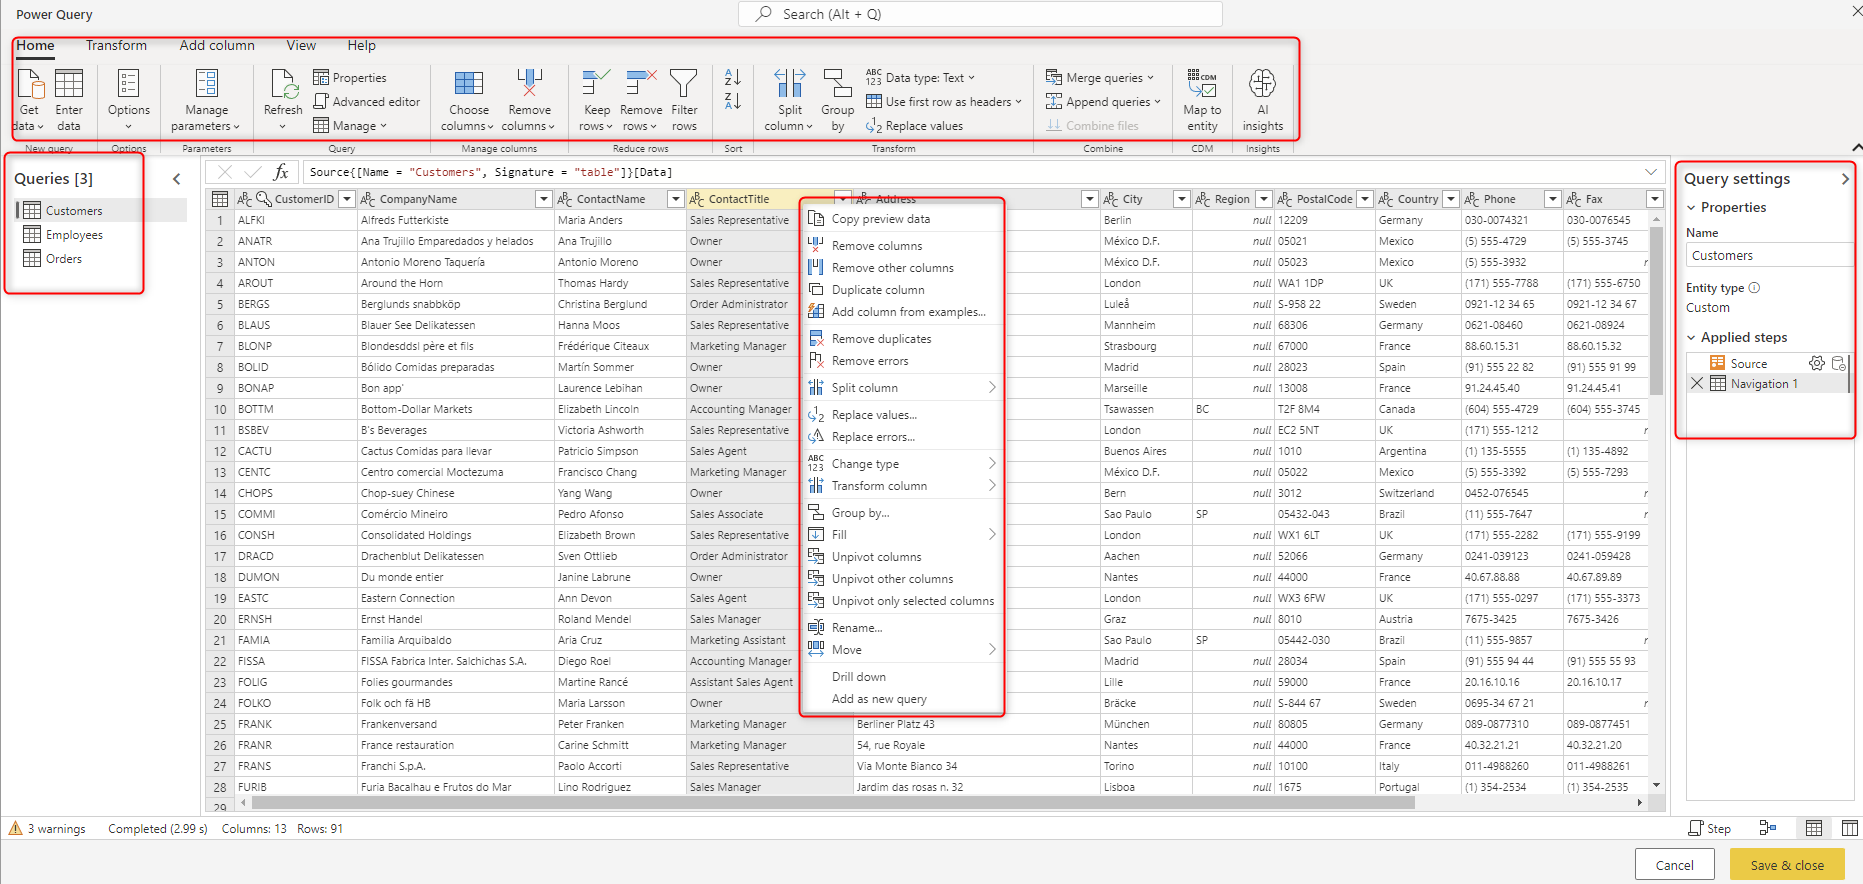
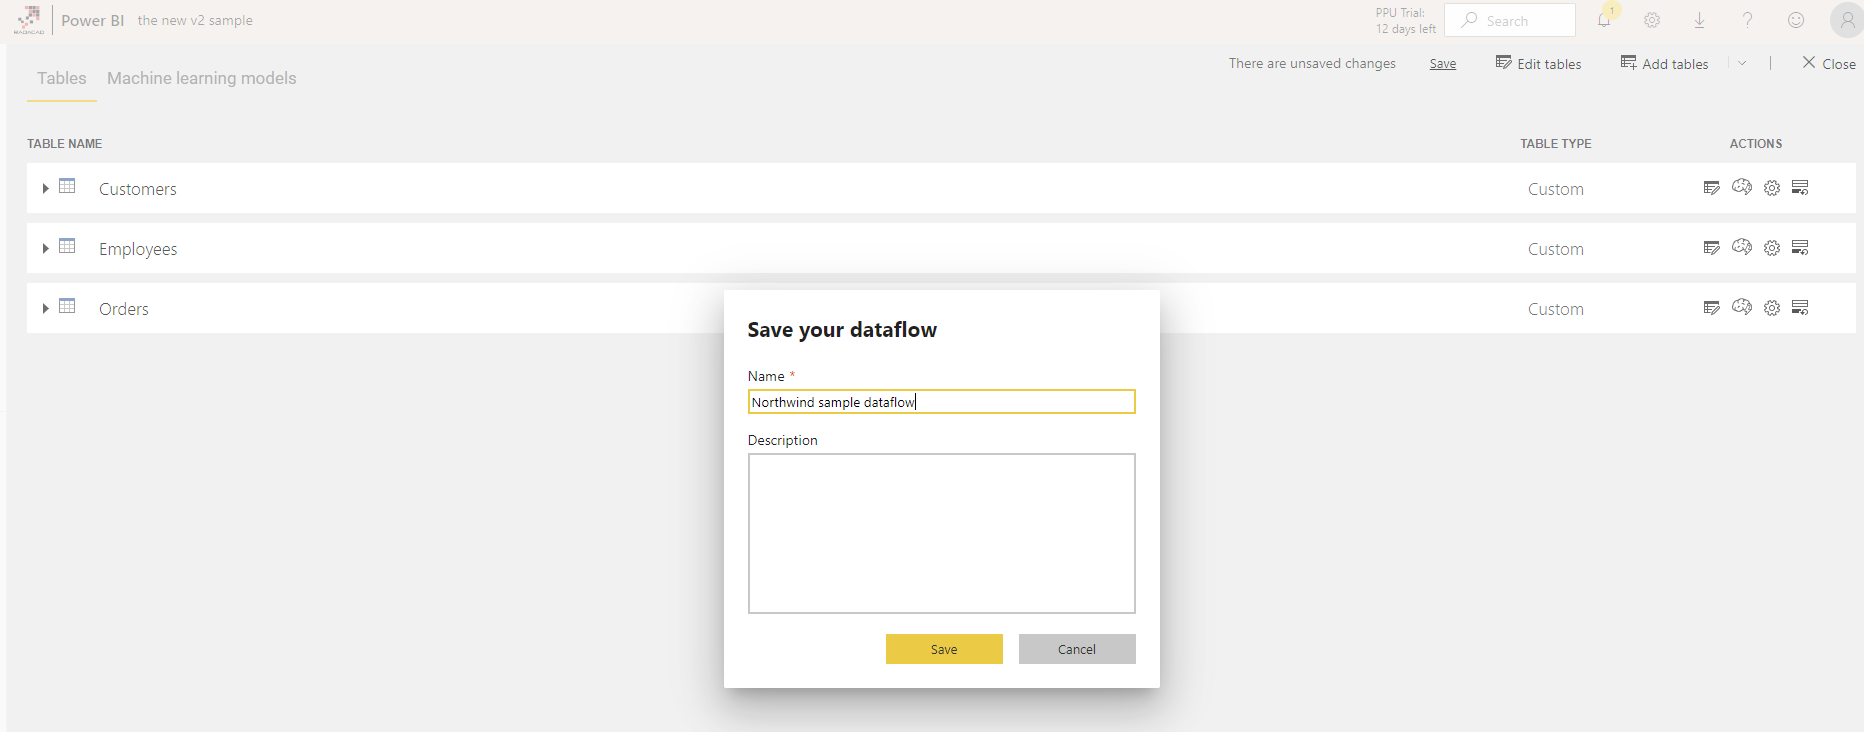
In this example, I just selected the three tables with no transformation and clicked on Done. You can see then all tables in this Dataflow. In dataflow, we call these Entities. For every entity, you can specify Incremental Refresh if you want. You can then Save the Dataflow.
Gateway
If your data is sourced from an on-premises (local domain) source, then you would need to have a gateway setup. I have previously written all about Gateway, and you can read that information in my article here. The difference here with the Power Query in the Power BI Desktop is that; In the Power BI Desktop, because you are developing the file locally, You can connect to an on-premises data source, and start developing your solution, and then after publishing it to the service, you can set up the gateway. However, in Dataflow because everything is happening in the service, you need to have a gateway setup if you are connecting to an on-premises data source, otherwise, you cannot pass the very first step. If you are connecting to an online data source (such as Azure SQL Database), you won’t need a gateway.

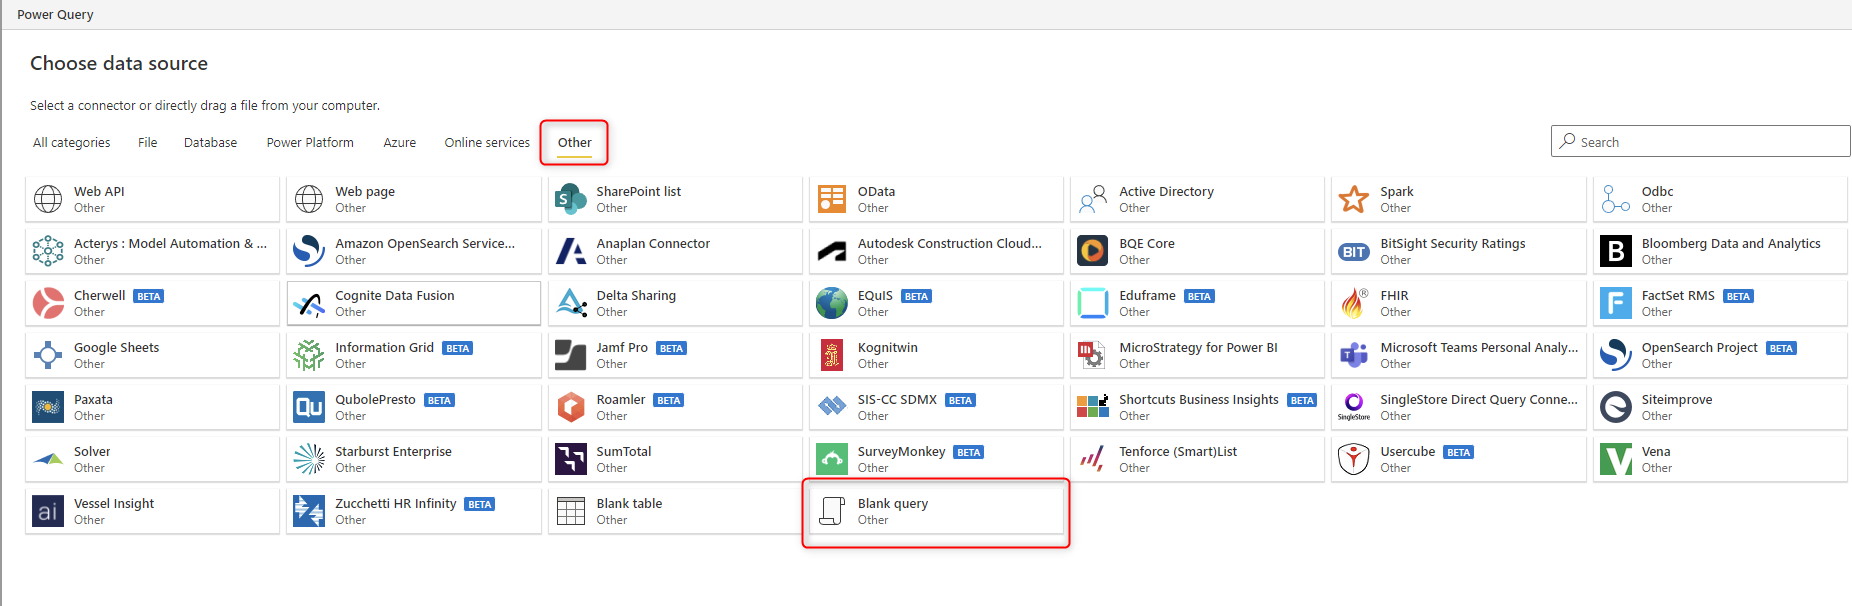
Blank Query as the Data Source
One way to transfer your Power Query scripts to Dataflow is to select Blank query as the data source and copy and paste the M script from your Power Query tables to the dataflow. However, be mindful that not all Power Query transformations are supported yet. You may need to make some changes.
This script is creating a basic date dimension. (You can learn more about it here). You can copy and paste it into the blank query in the dataflow;
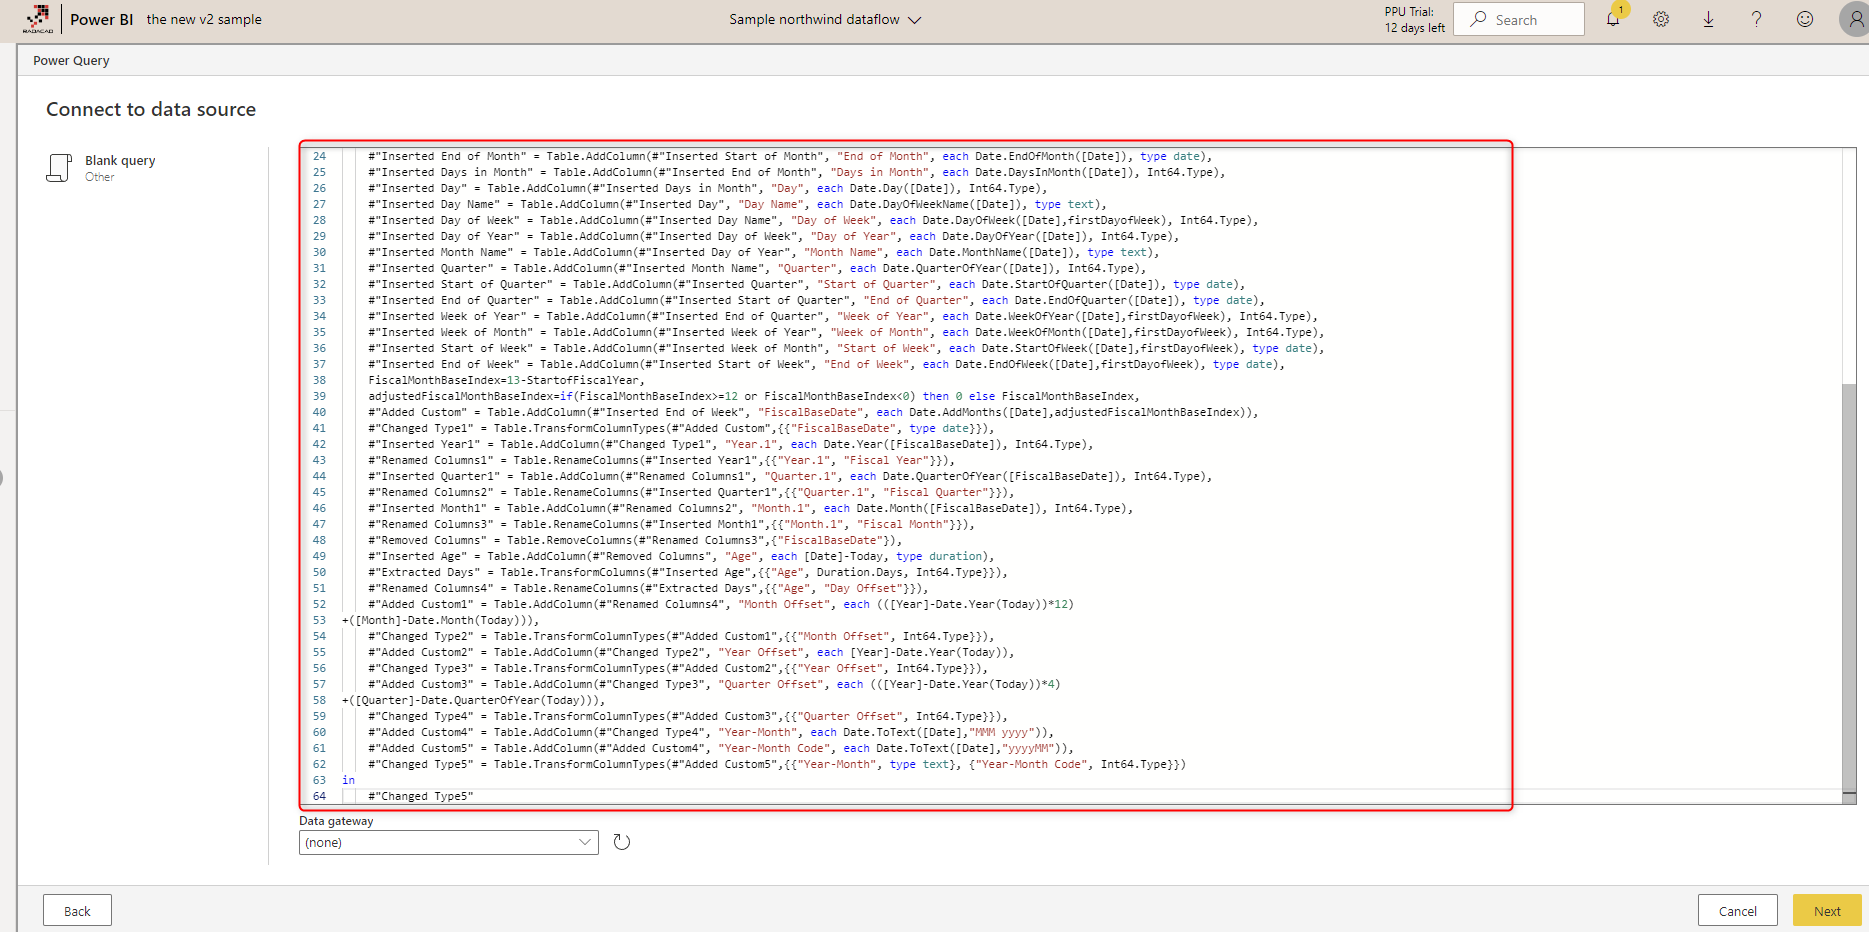
Dataflow then should be able to (depending on the functions used in the script and if they are already supported in dataflow or not) show you a list of steps based on the script.

You can also see that there is a very useful diagram view in the Power Query Editor online, which demonstrates all the steps and the data at each step;

Schedule Refresh
Scheduling the refresh of dataflows can be configured at each Dataflow level (Not at the entity level).
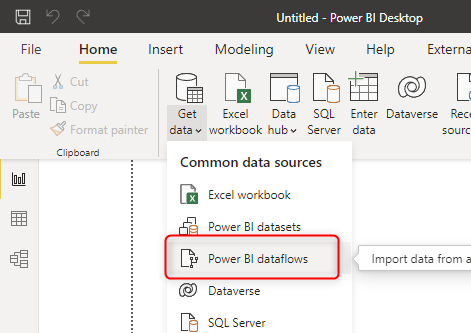
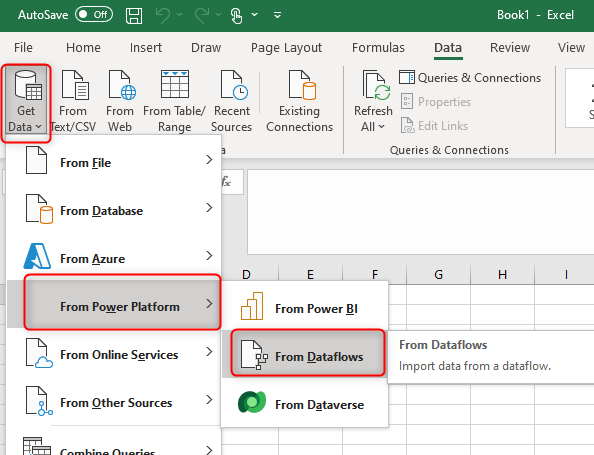
Get Data from Dataflow in Power BI Desktop
In the Power BI Desktop, you can get Data from the Dataflows under the common data sources;
Or under the Power Platform, you can choose Power BI dataflows. Note that there is also an option for Dataflows in general which also includes Power Platform dataflows.

After entering your Power BI credentials, you can then see all the workspaces with dataflows under it, and select the tables you want from each Dataflow.
Each Dataflow is like a database, and you can have multiple tables under it. Once, you get the data from the Dataflow, the Power Query in the Power BI Desktop, will just import the data (but not the transformations) from the Dataflow table.
It is possible to have a DirectQuery connection to the Dataflow tables as well (Which requires a Premium license). We’ll explore that in future blog articles.
Get data from Dataflow using Excel
You can also use Excel to get data from a Dataflow table. This option gives you access to both Power BI and Power Platform dataflows in one place.
After entering the credentials, you will be able to choose the Dataflow from Environments (for Power Platform Dataflows), or Workspaces (for Power BI Dataflows);

Summary
In this article, you have learned how to create a dataflow, and also the necessary steps for creating it. Dataflow, however, still has many areas to reveal; the schedule refresh, mapping outputs of the dataflow query to a standard model, common data model, external dataflow, and the structure of how the dataflow is saved in the Azure Data Lake. Stay tuned for the next parts of this blog series to learn more about dataflow. Below you can read other articles in the Dataflow series;
- Part 1: What are the Use Cases of Dataflow for You in Power BI?
- Part 2: Getting Starting with Dataflow in Power BI (this article)
- Computed and Linked Entity
- Dataflow Vs. Dataset
- Dataflow Vs. Data Warehouse
- Multi-Developer Architecture using Dataflow and Shared Dataset
- Power BI Datamarts


Reza is author of more than 14 books on Microsoft Business Intelligence, most of these books are published under Power BI category. Among these are books such as Power BI DAX Simplified, Pro Power BI Architecture, Power BI from Rookie to Rock Star, Power Query books series, Row-Level Security in Power BI and etc.
He is an International Speaker in Microsoft Ignite, Microsoft Business Applications Summit, Data Insight Summit, PASS Summit, SQL Saturday and SQL user groups. And He is a Microsoft Certified Trainer.
Reza’s passion is to help you find the best data solution, he is Data enthusiast.
His articles on different aspects of technologies, especially on MS BI, can be found on his blog: https://radacad.com/blog.
Very well explained.
But i have a simple question. How can I use Excel file from SharePoint site as Data Source in DataFlow?
Is your file located under a SharePoint list? If yes, you can access it through a Gateway using dataflow.
Hi Reza. Does Dataflow have the Advance Editor option?
yes, it does. just right-click on a query and choose advanced editor.
Cheers
Reza
Hi there, are you able to schedule refreshes if you have Power BI Pro? I keep getting an error that I need premium.
The scheduled refresh is not a premium feature. you can do that with Power BI pro license too.
However, my guess is that you are using premium features, such as a computed entity or linked entity. and that is why you are getting the error
Cheers
Reza